Tyvek House Wrap Maintenance and Pre-Cladding Inspection Playbook
Master the Tyvek house wrap maintenance playbook. Learn pre-cladding cleaning, UV exposure limits, tape remediation, and tear repair protocols.
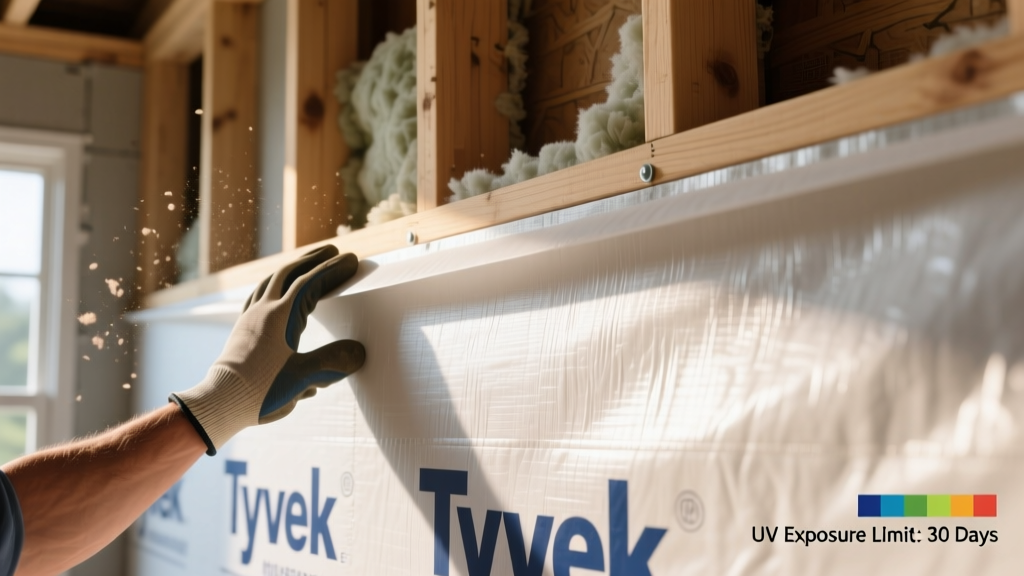
The Reality of Exposed WRB: Why Tyvek Needs Pre-Cladding Maintenance
Water-resistive barriers (WRBs) are frequently treated as 'install and forget' components, but the period between wrapping the sheathing and installing the exterior cladding is when the building envelope is most vulnerable. Job site debris, UV degradation, wind-driven flapping, and accumulated dust can silently compromise the hydrostatic resistance and air-sealing capabilities of the membrane. With the 2024 and upcoming 2026 International Energy Conservation Code (IECC) updates mandating stricter continuous air barrier verification, maintaining the integrity of your Tyvek house wrap before it is permanently covered by siding is no longer optional—it is a critical path to passing blower door tests and preventing long-term moisture intrusion.
This playbook details the exact cleaning protocols, inspection matrices, and repair methodologies required to remediate a Tyvek WRB system that has been exposed to the elements and job site abuse during the framing and roofing phases.
⚠️ CRITICAL WARNING: UV Exposure Limits by Product Line
Leaving Tyvek exposed to direct sunlight beyond its engineered UV threshold causes the flash-spun high-density polyethylene (HDPE) fibers to become brittle, leading to micro-tears and a total loss of water resistance. Do not rely on visual inspection alone; degraded wrap often looks intact until wind loads or siding installation stresses it.
- Tyvek HomeWrap & DrainWrap: Maximum 120 days of UV exposure.
- Tyvek CommercialWrap & CommercialWrap D: Maximum 270 days of UV exposure.
- Remediation: If exposure limits are exceeded, the affected panels must be completely removed and replaced. You cannot salvage UV-degraded HDPE membranes with coatings or tapes.
Phase 1: Surface Cleaning Protocols Before Taping and Cladding
The most common cause of WRB air-seal failure is tape adhesion loss due to microscopic job site dust. Drywall sanding, concrete cutting, and framing sawdust create a fine particulate layer on the Tyvek membrane. When Tyvek Weatherization Tape is applied over this dust, it bonds to the dirt, not the membrane, resulting in edge-curling and eventual air leakage.
Approved vs. Prohibited Cleaning Agents
The proprietary hydrophobic coating on Tyvek is highly resistant to liquid water but vulnerable to certain chemical solvents that can break down the surface tension or melt the HDPE fibers.
| Cleaning Agent | Verdict | Impact on Tyvek Membrane & Tape Adhesion |
|---|---|---|
| Water & Mild Detergent (e.g., Dawn) | APPROVED | Safely lifts dust and mud without altering the membrane's surface energy. |
| Isopropyl Alcohol (IPA) | CONDITIONAL | Use only on localized tape residue or metal flashings. Do not saturate the WRB. |
| Mineral Spirits / Paint Thinner | PROHIBITED | Dissolves the acrylic adhesive on tapes and degrades the HDPE fibers. |
| Chlorine Bleach | PROHIBITED | Causes oxidative embrittlement of the polyolefin structure. |
| High-Pressure Washers (>1500 PSI) | PROHIBITED | Will puncture the membrane and force water behind the WRB into the OSB sheathing. |
The 3-Step Pre-Taping Wash Down
- Dry Removal: Use a soft-bristle push broom or a leaf blower to remove heavy debris, wood chips, and loose framing dust. Never use wire brushes or stiff scrapers.
- Wet Wash: Mix 1 ounce of non-ionic surfactant (mild dish soap) per gallon of water. Apply using a low-pressure garden sprayer. Allow the solution to dwell for 3 to 5 minutes to loosen mud splatter and drywall dust.
- Gentle Agitation & Rinse: Wipe stubborn areas with a clean microfiber mop or cloth. Rinse thoroughly with a standard garden hose. Crucial: The membrane must be 100% dry before applying any tapes or flashing sealants. Trapped moisture under tape will cause immediate adhesion failure in high-heat summer conditions.
Phase 2: The 5-Point Pre-Siding Inspection Matrix
Before the siding crew arrives, the site superintendent must conduct a systematic audit of the WRB. According to Building Science Corporation's guidelines on water management, the WRB must function as both a drainage plane and an air barrier. Use this matrix to identify and log failure modes.
| Component | Common Failure Mode | Diagnostic Method | Required Remediation |
|---|---|---|---|
| Horizontal Seams | Reverse lapping (bottom sheet over top sheet) | Visual inspection of shingle overlap | Remove and re-install; top sheet MUST overlap bottom sheet by min. 6 inches. |
| Window Flanges | Tape applied only to the nailing fin, not the WRB | Peel-back test on tape edges | Apply Tyvek FlexWrap EZ to bridge the fin and the flat WRB membrane. |
| Fastener Holes | Staple pull-through and wind tearing | Tug test on membrane edges | Patch with 2-inch overlap; replace staples with 1-inch plastic cap nails. |
| Bottom Edges | Wrap terminates behind the foundation sill plate | Visual check at rim joist | Install Z-flashing and tape the WRB over the flashing to direct water out. |
| Pipe Penetrations | Slits cut too large; no sealant used | Measure gap around HVAC/ plumbing pipes | Seal with Tyvek FlexWrap or compatible butyl sealant; tape down edges. |
Phase 3: Damage Repair and Tape Remediation Playbook
Even with careful site management, tears and punctures are inevitable. How these defects are repaired dictates whether the wall assembly will drain properly or trap moisture against the structural sheathing.
Fixing Punctures and Tears (The Overlap Rules)
Never use standard duct tape, OSB house tape, or generic masking tape on a Tyvek membrane. The adhesives in these tapes lack the UV stability and long-term shear strength required for a 50-year building envelope lifecycle.
- Minor Punctures (Under 1 inch): Cover with a piece of Tyvek Weatherization Tape. Ensure the tape extends at least 2 inches beyond the tear in all directions. Press firmly from the center outward to eliminate air pockets.
- Major Tears and Rips (Over 1 inch): Cut a patch from a fresh roll of Tyvek. The patch must overlap the damaged area by a minimum of 6 inches on all sides. Tape the perimeter of the patch using Tyvek Weatherization Tape. This creates a redundant, shingle-lapped secondary drainage path.
- Bottom-Edge Damage: If the bottom edge of the wrap is torn or unsealed, water will bypass the WRB and soak the rim joist. Install a continuous bead of compatible fluid-applied flashing sealant or use a self-adhered flashing membrane to bridge the WRB to the foundation sill.
Remediating Failed Adhesive Seams
If you discover tape that is curling at the edges or peeling away from the membrane (usually due to application over dust or in sub-freezing temperatures), do not simply apply a second layer of tape over the failed joint. The underlying contamination will cause the new tape to fail as well.
- Use a utility knife to score and peel back the failed tape.
- Clean the exposed Tyvek membrane and the adjacent sheathing with a damp cloth and mild detergent. Allow to dry completely.
- Apply a fresh strip of Tyvek Weatherization Tape, ensuring at least a 2-inch overlap onto the clean, adjacent membrane.
- Pro-Tip for Cold Weather: If ambient temperatures are below 25°F (-4°C), standard acrylic tapes will not achieve initial tack. Switch to a butyl-based flashing tape or use a primer specifically approved by DuPont for cold-weather WRB adhesion.
💡 EXPERT INSIGHT: The Fastener Upgrade
The single most effective maintenance upgrade you can perform on an exposed WRB is replacing standard wire staples with 1-inch plastic cap nails or cap staples. Standard staples slice through the HDPE fibers under wind load, creating elongated, unsealable tears that compromise the air barrier. Cap fasteners distribute the wind load over a 1-inch surface area, reducing pull-through risk by over 90% and providing an integrated seal against water intrusion at the fastener head.
Long-Term Envelope Integrity: Post-Installation Diagnostics
Once the cladding is installed, physical maintenance of the Tyvek membrane ceases, but diagnostic monitoring begins. To verify that the pre-cladding maintenance and cleaning protocols were successful, envelope consultants utilize non-destructive testing during the final phases of construction.
Infrared Thermography: Conduct an interior thermal scan during a blower door test (depressurized to 50 Pascals). If the pre-cladding cleaning was inadequate and tape seams failed, the thermal camera will reveal distinct cold streaks along the horizontal and vertical WRB seams, indicating air infiltration bypassing the insulation.
Moisture Meter Mapping: For structures in high-humidity or driving-rain zones, use a pinless impedance moisture meter on the interior drywall directly adjacent to exterior penetrations (windows, doors, hose bibbs) 48 hours after a major rain event. Readings above 15% moisture content (MC) on the interior gypsum indicate a failure in the exterior WRB flashing integration, requiring immediate cladding removal and WRB remediation.
'A water-resistive barrier is only as good as its weakest tape seam. The difference between a high-performance building envelope and a mold-generating wall cavity is usually a $40 roll of tape and five minutes of surface cleaning.' — Building Envelope Commissioning Best Practices
By treating the Tyvek house wrap as an active, maintainable system during the vulnerable pre-cladding window, contractors eliminate the vast majority of envelope-related callbacks, ensuring the structure meets modern energy codes and resists moisture-driven degradation for decades.