How to Apply Waterproof Material for Outside Walls and Decks
Learn professional application techniques for exterior waterproofing. Compare liquid membranes and penetrating sealers for outside walls, decks, and foundations.

Surface Preparation: Moisture Testing and Profiling
The leading cause of exterior waterproofing failure is not product defect, but improper substrate preparation. Before applying any waterproof material for outside surfaces, you must quantify the moisture content and profile the substrate to ensure mechanical adhesion. According to the Portland Cement Association, concrete continues to emit moisture vapor long after initial curing, which can trap water beneath impermeable membranes and cause osmotic blistering.
Moisture Vapor Emission Rate (MVER) Testing
For concrete foundations and exterior slabs, conduct a calcium chloride test (ASTM F1869) or use an in-situ relative humidity probe (ASTM F2170). Do not apply liquid elastomeric membranes if the MVER exceeds 3 lbs per 1,000 square feet per 24 hours, or if internal RH exceeds 75%. For wood decks and exterior framing, use a pin-type moisture meter; the moisture content must be below 15% before encapsulation.
Substrate Profiling and Cleaning
- Concrete/Masonry: Pressure wash at 3,000 PSI using a 15-degree nozzle to remove laitance, dirt, and efflorescence. For smooth-troweled concrete, acid etch or mechanically grind to achieve a Concrete Surface Profile (CSP) of 2 or 3. A CSP of 2 provides the necessary microscopic valleys for liquid membranes to anchor into.
- Wood Decks: Clean with a sodium percarbonate-based deck stripper to remove gray oxidized wood fibers and mill glaze. Allow 48 hours of dry, sunny weather to flash off residual moisture before sealing.
Material Selection Matrix for Exterior Substrates
Selecting the correct waterproof material for outside applications depends entirely on the substrate's porosity, exposure to UV radiation, and hydrostatic pressure. Below is a technical comparison of the three primary exterior waterproofing chemistries used in modern construction.
| Material Chemistry | Best Substrate | Dry Mil Thickness | UV Resistance | Hydrostatic Resistance |
|---|---|---|---|---|
| Elastomeric Acrylic (e.g., Henry 208, Liquid Rubber) | Above-grade masonry, stucco, metal flashing | 20 - 30 mils | Excellent | Low to Moderate |
| Polyurethane Liquid (e.g., MasterSeal HLM 5000) | Below-grade foundations, plaza decks, balconies | 60 - 80 mils | Poor (Requires topcoat) | High (Negative & Positive side) |
| Silane/Siloxane Penetrating (e.g., PROSOCO Siloxane PD) | Porous concrete, brick, natural stone, pavers | N/A (Penetrates 1/4 inch) | Excellent (Below surface) | None (Hydrophobic only) |
Application Protocol: Liquid Elastomeric Membranes
Liquid-applied elastomerics are the most common choice for above-grade exterior walls and parapets because they bridge hairline cracks and cure to a seamless, UV-stable rubber shell. The ASTM D6083 standard dictates strict thickness and elongation requirements for these acrylic coatings to perform in exterior thermal cycling.
Step 1: Detailing and Bridging
Never apply a broad coat over un-reinforced joints. All inside corners, parapet coping joints, and pipe penetrations must be detailed first. Apply a heavy bead of polyurethane sealant (like Sikaflex-1a) to the joint, then embed a 4-inch alkali-resistant fiberglass mesh tape into a base layer of the elastomeric coating. This creates a reinforced bridge that accommodates structural movement without tearing the membrane.
Step 2: Base Coat Application
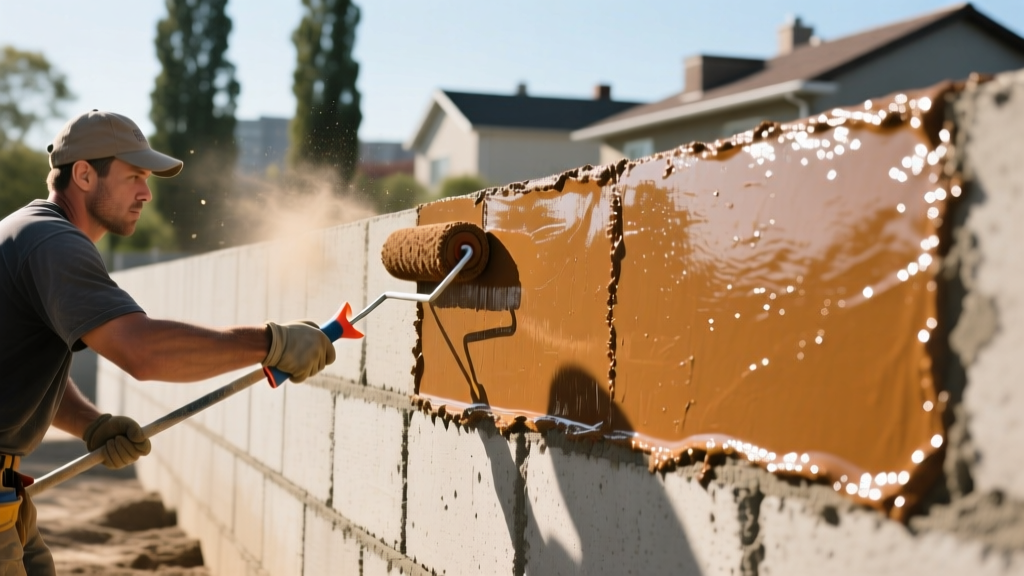
Apply the first coat using a 3/4-inch nap roller or an airless sprayer equipped with a 0.021-inch to 0.031-inch tip. The goal is a uniform wet film thickness of 15 to 20 mils. Use a wet mil gauge to verify thickness randomly across the surface. Applying too thick in a single pass will trap solvents and water, leading to a tacky, uncured core.
Step 3: Cross-Hatched Top Coat
Allow the base coat to cure for 12 to 24 hours (depending on ambient humidity and temperature; ideal range is 60°F to 85°F). Apply the second coat perpendicular to the direction of the first coat. This cross-hatching technique eliminates roller marks and ensures no microscopic pinholes are left exposed. The final cured system should measure at least 20 dry mils for vertical walls and 30 dry mils for horizontal deck surfaces.
Application Protocol: Penetrating Silane/Siloxane Sealers
For exterior hardscapes, brick facades, and exposed aggregate concrete where a surface film would alter the natural aesthetic or create a slip hazard, penetrating sealers are mandatory. These materials react chemically with the free lime in concrete to form a hydrophobic resin within the pores.
Spray and Back-Roll Technique
- Equipment: Use a low-pressure, high-volume (HVLP) pump sprayer with a 0.080-inch fan tip. High pressure atomizes the sealer, causing it to blow away in the wind rather than hitting the substrate.
- Flood Coat: Apply a generous flood coat from the bottom up to prevent streaking. The surface should look wet and glossy.
- Back-Rolling: Immediately back-roll the flooded area with a dry, clean microfiber roller. This pushes the material deep into the pores and evenly distributes puddles, preventing uneven dark spots upon curing.
- Second Coat: Apply a second wet-on-wet coat within 5 to 10 minutes while the first coat is still tacky. Do not wait for the first coat to dry, as it will seal the pores and block the second coat from penetrating.
Troubleshooting Common Application Failures
Even premium waterproof materials for outside use will fail if environmental variables are ignored. Recognizing these failure modes during application saves thousands of dollars in tear-off and rework costs.
If you apply an impermeable polyurethane or thick acrylic membrane over damp concrete, solar heat will vaporize the trapped moisture. The vapor expands, creating blisters that can grow to the size of a golf ball. Always verify MVER before encapsulating concrete.
- Pinholing and Outgassing: Common on porous concrete applied during the heat of the day. As the sun heats the substrate, air expands and escapes through the wet coating, leaving tiny craters. Fix: Apply coatings early in the morning or late in the evening when the substrate is cooling and air is contracting into the pores.
- Delamination at Edges: Coatings often peel at the termination points (where the wall meets the ground or a deck edge). Fix: Always terminate liquid membranes with a physical metal termination bar or route a 1/4-inch saw-cut groove into the masonry to tuck the membrane edge into, sealing it with polyurethane caulk.
- Chalking and UV Degradation: If a non-UV-stable polyurethane was used above grade without an aliphatic topcoat, it will chalk and degrade within 6 months. Fix: Polyurethanes used in direct sunlight must be top-coated with an aliphatic acrylic urethane (e.g., MasterSeal TC 275) within 24 hours of the base coat curing.
Cost Breakdown and Coverage Expectations
Budgeting for exterior waterproofing requires accounting for both material consumption and the labor intensity of surface preparation. The U.S. Department of Energy notes that proper exterior moisture management significantly reduces long-term structural repair costs, justifying the upfront investment in high-build systems.
| System Type | Material Cost (per Sq Ft) | Labor & Prep Cost (per Sq Ft) | Total Installed Cost | Expected Lifespan |
|---|---|---|---|---|
| Elastomeric Acrylic (2 coats) | $0.80 - $1.20 | $1.50 - $2.50 | $2.30 - $3.70 | 7 - 10 Years |
| Polyurethane Liquid (60 mils) | $2.50 - $3.50 | $3.00 - $4.50 | $5.50 - $8.00 | 15 - 20 Years |
| Silane/Siloxane Penetrating | $0.30 - $0.60 | $0.75 - $1.25 | $1.05 - $1.85 | 5 - 7 Years |
When calculating material quantities, always add a 15% waste factor for rough-sawn masonry and exposed aggregate concrete, as the deep texture significantly increases the surface area and absorption rate compared to smooth-troweled concrete. For professional applications, investing in a high-quality airless sprayer reduces labor time by up to 40% on large exterior foundation walls, easily offsetting the equipment rental cost on projects exceeding 1,000 square feet.
Written by
Marcus ChenMarcus Chen is a licensed structural engineer (PE) and building materials analyst with over 12 years of experience across residential, commercial, and industrial construction. He holds a Master of Science in Civil Engineering from UC Berkeley and spent six years at Thornton Tomasetti before transitioning to independent consulting and technical writing. Marcus specializes in material selection for seismic-prone regions, concrete reinforcement strategies, and lifecycle cost analysis. His work has been cited by the American Concrete Institute (ACI) and the Structural Engineers Association of California (SEAOC). When he is not on a job site or at his desk, you will find him hiking the Sierra Nevada or restoring a 1920s craftsman bungalow in Oakland, CA.
More from Marcus Chen
View all
Construction Cost
How Much Did the Eiffel Tower Cost to Build?
How much did the Eiffel Tower cost to build in 1889? We adjust for inflation and compare its budget to modern skyscraper construction.
Aug 4, 2026

Fire Resistance
What Is a Fire Resistant Material? Testing & Certification Guide
Discover what is a fire resistant material through ASTM and UL testing. Learn how fire ratings, certifications, and assemblies work in construction.
Aug 4, 2026

Construction Cost
How Much Did the Burj Khalifa Cost to Build?
How much did the Burj Khalifa cost to build? We break down the $1.5B project and extract 5 money-saving strategies for your next build.
Jul 30, 2026