AAC Building Materials Application Guide: Blocks, Panels, and Lintels
Learn how to properly install and detail AAC building materials. This application guide covers block laying, panel mounting, and moisture management.

Material Properties and 2026 Cost Matrix
Autoclaved Aerated Concrete (AAC) is a lightweight, precast building material that provides structural capacity, thermal insulation, and fire resistance in a single component. Manufactured by combining quartz sand, calcined gypsum, lime, Portland cement, water, and aluminum powder, the aluminum reacts to create microscopic hydrogen bubbles that expand the mixture. The resulting cellular structure gives AAC building materials a density roughly 25% that of traditional concrete, while maintaining compressive strengths between 290 psi and 800 psi (ASTM C1693).
When planning a 2026 construction budget, contractors must account for both the raw material costs and the specialized labor required for thin-bed masonry. While the per-unit cost of AAC is higher than standard CMU (Concrete Masonry Units), the elimination of traditional thick-bed mortar, reduced structural steel requirements, and faster installation times often yield a net savings in overall envelope costs.
| Component Type | Standard Dimensions | Approx. 2026 Material Cost | R-Value (Unfinished) |
|---|---|---|---|
| AAC Masonry Blocks | 8" x 8" x 24" (Nominal) | $3.85 - $5.20 per block | R-10.4 (8" thickness) |
| Precast AAC Wall Panels | 8" Thick x 24" Wide x Custom Length | $12.50 - $16.00 per sq. ft. | R-10.4 (8" thickness) |
| U-Block Bond Beams | 8" x 8" x 24" (Knockouts available) | $8.50 - $11.00 per unit | N/A (Filled with concrete/rebar) |
| Precast AAC Lintels | 8" x 8" x 48" to 120" spans | $45.00 - $110.00 per lintel | Matches wall assembly |
Substrate Preparation and the Critical First Course
The most common cause of structural cracking in AAC block walls is an improperly leveled base course. Because AAC masonry relies on thin-bed mortar (typically 1/16-inch to 1/8-inch thick) for subsequent courses, the foundation must be perfectly true. Any deviation in the slab or footing will compound with every course laid.
Step-by-Step Base Course Alignment
- Clean and Prime: Sweep the concrete footing or slab. Apply a bonding agent or dampen the concrete to prevent rapid moisture loss from the leveling bed.
- Apply Leveling Bed: Use a standard Type S or Type N Portland cement/lime mortar for the first course only. This bed should be 1/2-inch to 3/4-inch thick to absorb slab tolerances.
- Set the Corners: Lay the corner blocks first, checking for level and plumb. Run a mason's line between the corners.
- Install Base Blocks: Butter the vertical webs of the AAC blocks with thin-bed mortar before pushing them into the leveling bed. Do not use thin-bed mortar for the horizontal joint of the first course.
- Curing Time: Allow the base course leveling mortar to cure for a minimum of 24 hours before proceeding with the rest of the wall. This prevents the weight of the upper courses from squeezing the wet leveling bed out of alignment.
Thin-Bed Mortar Application for AAC Blocks
Standard thick-bed masonry practices will fail when applied to AAC building materials. The cellular structure of AAC requires specialized polymer-modified thin-bed mortar (compliant with ASTM C1660) to ensure adequate bond strength and prevent thermal bridging at the joints.
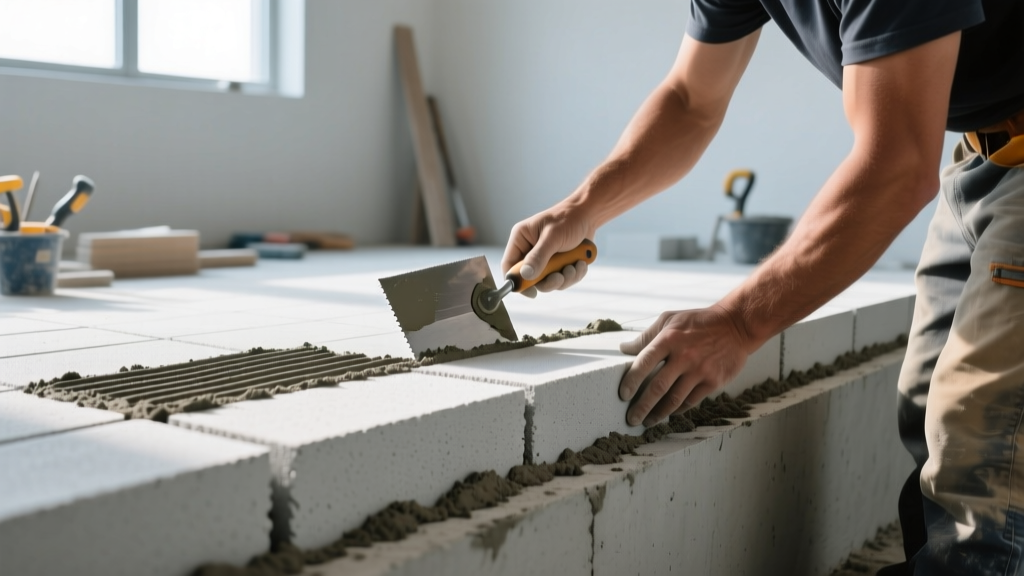
Use a 3/16-inch V-notched trowel for 8-inch and 10-inch AAC blocks, and a 1/4-inch square-notched trowel for 12-inch blocks. Applying mortar with a standard flat trowel results in inconsistent joint thicknesses and excessive squeeze-out that is difficult to clean from the porous AAC surface.
Mix the thin-bed mortar to a peanut-butter consistency using a low-speed drill (under 600 RPM) to avoid whipping excess air into the polymer blend. Apply the mortar to the horizontal bed and the vertical head joints simultaneously. Because AAC is highly absorbent, do not wet the blocks before laying; the blocks should be laid dry. The thin-bed mortar is formulated with water-retention agents that prevent the AAC from sucking the moisture out of the joint prematurely.
AAC Panel Installation and Structural Anchoring
For commercial or large-scale residential projects, precast AAC wall panels offer rapid enclosure. Panels are typically lifted via a specialized friction-lifting clutch that engages a recessed anchor cast into the top of the panel.
Panels are joined using a tongue-and-groove profile. Instead of cementitious mortar, the vertical joints are sealed using a specialized polyurethane (PU) foam adhesive or a proprietary acrylic sealant recommended by the manufacturer. This creates an airtight seal while allowing for minor thermal expansion and contraction.
Anchoring Requirements
Panels must be anchored to the foundation and to the top plate or bond beam. According to structural guidelines detailed by the PNNL Building America Solution Center, floor and roof connections require galvanized or stainless steel L-straps or flexible anchors. Minimum strap thickness should be 14-gauge, fastened to the AAC using specialized toggle bolts or screw anchors designed specifically for cellular concrete, and fastened to the wood or steel framing with structural screws.
Moisture Management and Common Failure Modes
While AAC provides excellent thermal mass and insulation, its porous nature makes it highly susceptible to capillary water wicking and freeze-thaw degradation if left unprotected.
Never install AAC blocks directly onto a below-grade stem wall or slab without a capillary break. Moisture from the concrete will wick upward into the AAC, leading to interior efflorescence, mold growth, and eventual spalling. Always install a fluid-applied membrane, a peel-and-stick flashing, or a minimum 6-mil polyethylene slip plane between the foundation and the first course of AAC.
Exterior AAC must be protected by a vapor-permeable finish. Trapped moisture is the primary cause of AAC failure. If an impermeable coating (like standard elastomeric paint or cementitious stucco without a drainage plane) is applied, moisture migrating from the interior or entering through micro-cracks will become trapped, causing the finish to delaminate during freeze-thaw cycles.
Cutting, Chasing, and MEP Rough-Ins
AAC building materials can be easily cut and routed on-site, which drastically reduces the time required for mechanical, electrical, and plumbing (MEP) rough-ins. However, the silica content in the quartz sand used to manufacture AAC poses a respiratory hazard when dry-cut.
- Straight Cuts: Use a carbide-tipped handsaw or a reciprocating saw with a specialized AAC blade. Standard wood blades will dull within a few cuts.
- Chasing for Electrical: Use a specialized AAC router equipped with a HEPA dust-extraction vacuum. Routes can be cut to exact depths for single or double-gang electrical boxes.
- Core Drilling: For plumbing penetrations, use a diamond-tipped hole saw attached to a variable-speed drill. Operate at low RPMs to prevent the bit from binding in the soft material.
After MEP rough-ins are complete, fill all chases and voids with a polyurethane foam sealant or a proprietary AAC patching compound. Do not use standard cement patch, as it will shrink and crack away from the AAC edges.
Exterior and Interior Finishing Systems
The finishing system must match the vapor permeability of the AAC substrate. As noted in comprehensive material analyses by ArchDaily, the breathability of the wall assembly is paramount for long-term durability and indoor air quality.
Direct-Applied vs. Furred Finishes
Direct-Applied Stucco (EIFS-style): For exterior applications, a polymer-modified base coat with embedded fiberglass mesh is troweled directly onto the AAC. This is followed by a breathable acrylic finish coat. This system provides impact resistance and waterproofing while allowing water vapor to escape.
Furred Cladding (Brick, Stone, Siding): If applying heavy masonry veneer or wood siding, install pressure-treated wood furring strips or galvanized steel hat channels. Fasten the furring directly into the AAC using structural screws with deep thread engagement (minimum 3 inches into the AAC). Ensure a 1-inch ventilated rainscreen gap is maintained between the AAC weather-resistive barrier and the back of the cladding.
Interior Finishes: Interior walls can be finished with a 1/16-inch skim coat of gypsum-based plaster specifically formulated for high-suction substrates. Alternatively, standard 1/2-inch drywall can be fastened directly to the AAC using coarse-thread drywall screws, provided the wall is plumb and true.
Written by
David NakamuraDavid Nakamura is a licensed architect (AIA) and construction technology writer focused on sustainable building methods, mass timber engineering, and high-performance building envelopes. He holds a Master of Architecture from the University of Washington and is a certified Passive House Consultant (CPHC). David spent eight years at the Seattle firm Mithun, where he led the design of three LEED Platinum projects, before founding his own practice specializing in net-zero residential design. He serves on the editorial advisory board of GreenBuilder Magazine and has authored peer-reviewed papers on cross-laminated timber (CLT) connections for the Journal of Structural Engineering. In his spare time, David teaches woodworking at Pratt Fine Arts Center and kayaks the Puget Sound.
More from David Nakamura
View all
Construction Cost
Labor Cost to Build a Deck Per Sq Ft: 2026 Installation Guide
Discover the exact labor cost to build a deck per sq ft in 2026. This installation guide breaks down contractor rates, complexity factors, and hidden fees.
Aug 4, 2026

Construction Cost
How Much Does It Cost to Build a 3 Bedroom House? Financing Guide
Learn exactly how much it costs to build a 3 bedroom house and explore 2026 financing options, construction loan types, and budget frameworks for your build.
Aug 4, 2026

Construction Cost
Cost to Build a Tennis Court: 2026 Guide
How much does it cost to build a tennis court in 2026? Breakdowns for asphalt, concrete, and synthetic surfaces plus fencing and lighting.
Jul 30, 2026