CMU Building Material: Application Guide for Structural Masonry Walls
Master CMU building material applications with our structural masonry guide. Learn specification, reinforcement, and installation best practices.

Core Properties and ASTM Standards for CMU
Concrete Masonry Units (CMUs) form the structural backbone of countless commercial, industrial, and multi-family residential envelopes. When specified and installed correctly, CMU building material delivers exceptional compressive strength, fire resistance, and acoustic attenuation. However, treating CMU as a monolithic commodity leads to structural failures and moisture intrusion. Proper application requires strict adherence to material standards and precise field execution.
All load-bearing CMUs must comply with the ASTM C90 standard, which dictates minimum compressive strength, dimensional tolerances, and absorption limits. Under ASTM C90, the net compressive strength of an individual unit must be at least 2,800 psi, while the average of three units must meet or exceed 3,800 psi. This baseline ensures the final grouted assembly achieves the 1,500 psi to 4,000 psi design strengths required by modern building codes.
CMU Density Classifications (ASTM C90)
- Normal Weight (125+ lbs/ft³): Made with sand and gravel aggregates. Highest thermal mass and structural capacity, but requires more labor to lift. Ideal for retaining walls and below-grade foundations.
- Medium Weight (105–125 lbs/ft³): Blends lightweight aggregates (like expanded shale) with normal sand. The industry standard for above-grade exterior load-bearing walls, balancing structural strength with mason fatigue reduction.
- Lightweight (<105 lbs/ft³): Manufactured entirely with expanded shale, clay, or slate. Offers superior fire ratings and R-values but has lower shear strength. Best for interior partition walls and non-load-bearing facades.
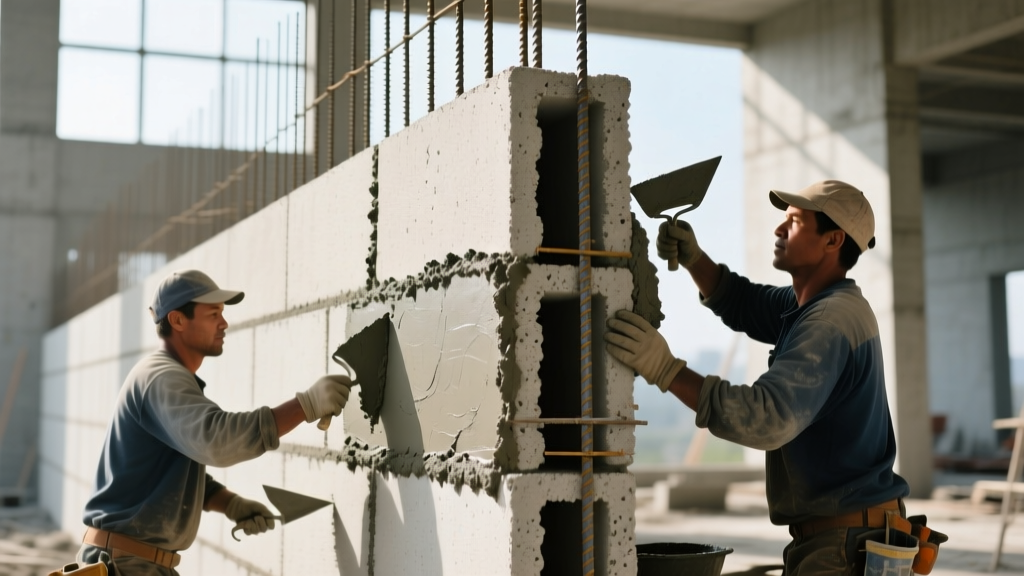
Step-by-Step Application: Laying the First Course
The first course of a CMU wall dictates the dimensional accuracy and structural integrity of the entire assembly. A deviation of just 1/8 inch at the base can compound to over an inch at the roofline.
- Substrate Preparation: The concrete slab or footing must be clean, free of laitance, and roughened to ensure a mechanical bond. Verify the slab is level within 1/4 inch over 10 feet.
- Layout and Snapping: Snap chalk lines on both the interior and exterior edges of the wall footprint. Dry-lay the first course of blocks without mortar to verify dimensions and adjust for corner closures.
- Bed Joint Application: Apply a full 1-inch thick mortar bed for the first course only. This thick bed allows masons to tap the blocks into perfect alignment and plumb. Subsequent courses require a standard 3/8-inch bed joint.
- Corner Leads: Build the corners (leads) 3 to 4 courses high first. Use a mason's line stretched between the leads to guide the intermediate blocks, ensuring perfect horizontal coursing.
Mortar Selection and Mixing Ratios
Mortar must be selected based on structural load and exposure conditions, governed by The Masonry Society (TMS) specifications. Do not use high-strength mortar where flexibility is required; overly rigid mortar will crack before the CMU does during thermal expansion.
| Mortar Type | Mix Ratio (Cement : Lime : Sand) | Compressive Strength | Primary Application |
|---|---|---|---|
| Type M | 1 : 1/4 : 3 | 2,500 psi | Below-grade foundations, retaining walls, high point-loads |
| Type S | 1 : 1/2 : 4.5 | 1,800 psi | At/below-grade exterior walls, structural load-bearing walls |
| Type N | 1 : 1.25 : 6.75 | 750 psi | Above-grade exterior interior partitions, veneer walls |
Pro Tip: Always use pre-blended, factory-proportioned mortar mixes (ASTM C1714) rather than field-mixing raw ingredients. Field-mixing introduces volumetric inconsistencies that compromise bond strength.
Reinforcement and Grouting Protocols
Unreinforced CMU performs poorly under lateral loads and seismic activity. Structural CMU building material applications require a composite system of masonry, steel reinforcement, and coarse grout. According to the National Concrete Masonry Association (NCMA), grout must achieve a minimum 28-day compressive strength of 2,000 psi and a slump between 8 and 11 inches to flow completely around the rebar without segregating.
Vertical and Horizontal Steel Placement
Vertical reinforcement (typically #4 or #5 Grade 60 rebar) is placed in the block cells and encased in grout. Horizontal joint reinforcement (3/16-inch wire) is embedded in the mortar bed joints to control shrinkage cracking and resist lateral shear.
| Seismic Design Category (SDC) | Minimum Vertical Rebar Spacing | Horizontal Joint Reinforcement | Grouting Requirement |
|---|---|---|---|
| SDC A & B (Low Risk) | 48 inches o.c. | Every 16 inches (every course for 8" block) | Cells with rebar only |
| SDC C (Moderate Risk) | 32 inches o.c. | Every 16 inches o.c. | Cells with rebar + bond beam cells |
| SDC D, E, & F (High Risk) | 16 inches o.c. (or every cell) | Every 16 inches o.c. | Solid grouting (all cells filled) |
Moisture Management and Flashing Details
CMU is inherently porous. Relying solely on surface sealants or integral water repellents is a guaranteed path to moisture failure. A structural CMU wall must be designed as a drainage cavity system when used in exterior applications.
- Air Space: Maintain a minimum 2-inch clear air space between the back of the CMU wythe and the interior framing or insulation.
- Through-Wall Flashing: Install a composite flashing membrane (e.g., 40-mil rubberized asphalt with a peel-and-stick backing) at all shelf angles, window heads, and sills.
- Weep Holes: Place open-head joint weep holes or manufactured weep vents at a maximum of 24 inches on center immediately above all flashing terminations. Never use cotton rope wicks; they degrade and clog with mortar droppings.
- Mortar Droppings Control: Use a mortar-catching mesh or peel-back the first course of block to clean out mortar bridging before parging the cavity. Bridged cavities defeat the entire drainage plane.
2026 Cost Breakdown for CMU Wall Assembly
Budgeting for structural masonry requires accounting for the hidden costs of grout, steel, and accessory items, which often exceed the cost of the blocks themselves. Below is a material-only cost estimate for 100 square feet of 8-inch normal-weight, reinforced, fully grouted CMU wall (SDC D requirements) based on early 2026 national averages.
| Material Component | Quantity per 100 SF | Unit Cost (2026) | Total Cost |
|---|---|---|---|
| 8x8x16 Normal Weight CMU | 112 blocks (incl. 5% waste) | $2.45 / block | $274.40 |
| Type S Pre-blended Mortar (80lb) | 9 bags | $9.50 / bag | $85.50 |
| Coarse Grout (Pre-mixed) | 38 cubic feet | $18.00 / cu ft | $684.00 |
| #5 Grade 60 Vertical Rebar | 8 sticks (20ft) | $16.50 / stick | $132.00 |
| 3/16" Ladder Joint Reinforcement | 120 linear feet | $1.10 / ft | $132.00 |
| Total Material Cost | $1,307.90 | ||
Note: Labor costs for fully grouted, reinforced masonry typically range from $14.00 to $22.00 per square foot depending on regional union rates and site accessibility.
Common Installation Failures and Troubleshooting
Even with perfect material specifications, poor field execution compromises the CMU building material system. Recognizing these failure modes prevents costly tear-outs.
Warning: Shrinkage Cracking
The Symptom: Vertical, stepped, or hairline cracks appearing near wall centers or window openings within 60 days of installation.
The Cause: CMUs shrink as they cure and dry out. If control joints are omitted or spaced too far apart, tensile stresses exceed the masonry's capacity.
The Fix: Install vertical control joints filled with flexible polyurethane sealant. The maximum spacing for control joints should not exceed 1.5 times the wall height in feet, and never exceed 25 feet horizontally. Place joints at all wall height changes and adjacent to large openings.
Troubleshooting: Efflorescence Blooming
The Symptom: White, powdery salt deposits migrating to the face of the masonry.
The Cause: Water entering the wall dissolves soluble salts in the Portland cement and carries them to the surface, where the water evaporates and leaves the salts behind.
The Fix: Do not use water or wire brushes, which drive salts back into the pores. Apply a specialized efflorescence cleaner (diluted phosphoric or sulfamic acid) followed by a thorough rinse. Crucially, identify and seal the water intrusion point—usually a failed coping cap, missing weep holes, or unsealed top-of-wall joints.
CMU is an unforgiving material. It does not hide poor layout, and it will not bridge structural deficiencies in the foundation. Success relies entirely on rigorous adherence to ASTM material standards, precise mortar proportioning, and uncompromising moisture management details.
Written by
Sarah WhitfieldSarah Whitfield is a chartered quantity surveyor (MRICS) and construction cost analyst with 15 years of experience in material pricing, procurement strategy, and project budgeting. She earned her degree in Construction Management from the University of Reading (UK) and has worked on projects ranging from $2M custom homes to $180M mixed-use developments across North America and Europe. Sarah currently leads cost estimating for BuildMat Insight, maintaining a proprietary database of 4,000+ material price points updated quarterly. She is a frequent contributor to RSMeans cost data panels and has presented at the International Cost Engineering Council (ICEC) congress. Based in Denver, CO, Sarah is an avid trail runner and volunteer mentor for Women in Construction.
More from Sarah Whitfield
View all
Wood & Lumber
What Are the Different Types of Wood? A Builder's Guide
Compare structural softwoods, finish hardwoods, and engineered lumber. Analyze Janka ratings, MOE values, and 2026 pricing for construction.
Aug 4, 2026

Walls & Panels
Steel Framing vs Wood Framing: Corrosion and Moisture Defense
Compare steel framing vs wood framing for moisture resistance. Learn about galvanized coatings, condensation risks, and corrosion protection strategies.
Jul 21, 2026

Stone & Masonry
How to Cut Stone Veneer: Wet Saw vs Grinder Comparison
Compare the best tools for cutting stone veneer. We review wet saws, angle grinders, and chop saws to help you achieve clean, chip-free cuts.
Jul 21, 2026