Pipe Wrap Insulation Maintenance and Cleaning Playbook
Learn how to inspect, clean, and maintain pipe wrap insulation in HVAC and plumbing systems to prevent mold, CUI, and thermal degradation.
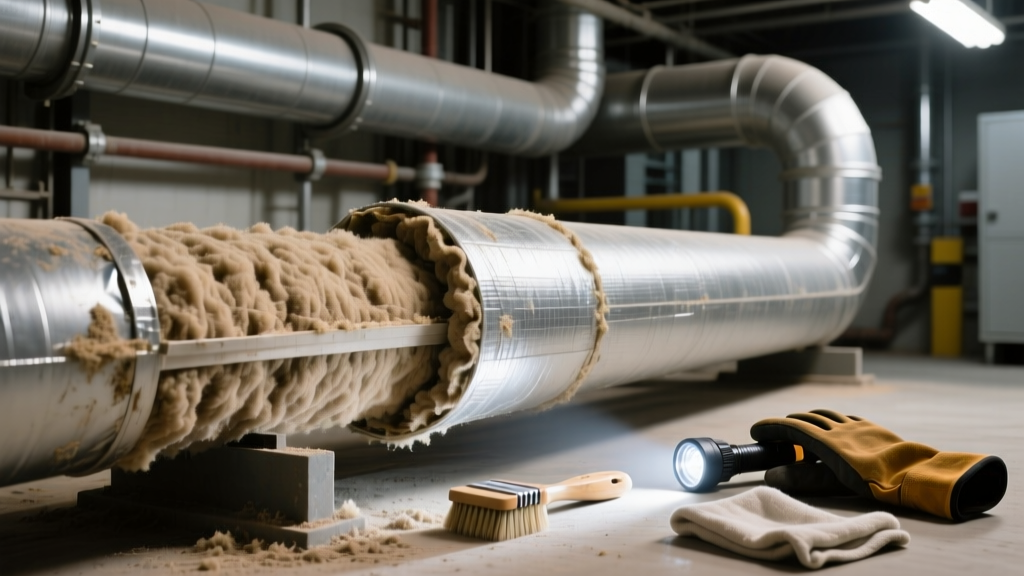
The Hidden Costs of Neglected Pipe Wrap Insulation
Pipe wrap insulation is the primary defense against thermal loss, condensation, and freezing in mechanical systems. However, facility managers often treat it as a "set-and-forget" installation. Degraded pipe wrap insulation on a chilled water line can absorb ambient moisture, leading to a 30% drop in thermal efficiency and accelerating Corrosion Under Insulation (CUI). According to the Association for Materials Protection and Performance (AMPP), CUI accounts for up to 60% of piping maintenance costs in industrial and large commercial facilities. This playbook provides exact, material-specific protocols for inspecting, cleaning, and repairing pipe wrap systems to extend their lifecycle and maintain ASTM C177 thermal resistance standards.
Never use chloride-based cleaning agents or tap water with high chloride content on stainless steel pipes wrapped in mineral wool or fiberglass. Chloride ions become trapped in the insulation matrix and, when combined with condensation, cause rapid pitting and stress corrosion cracking in the underlying stainless steel.
Step-by-Step Inspection Protocol for Pipe Wraps
Routine inspections should occur bi-annually, with an immediate follow-up after any major plumbing leak or roof failure above the mechanical space. Use this three-tier diagnostic approach:
- Visual Scan (The UV & Seam Check): Look for "chalking" or micro-cracking on elastomeric wraps (like ArmaFlex) exposed to indirect UV light. Inspect longitudinal seams on fiberglass wraps for tape peeling or mastic failure. A gap as small as 1/8-inch at a butt joint will cause localized condensation dripping.
- Tactile Squeeze Test: For closed-cell elastomeric pipe wraps, firmly squeeze the insulation. It should rebound instantly. If it remains compressed or feels mushy, the internal cellular structure has collapsed or become waterlogged, destroying its R-value.
- Infrared Thermography: Scan chilled water lines (typically operating at 42°F to 45°F) with a FLIR thermal camera. Warm spots on the insulation surface indicate air gaps, while abnormally cold, widespread patches indicate moisture saturation within the insulation matrix.
Cleaning Playbook: Material-Specific Techniques
Insulation materials react violently to incorrect solvents. Using a petroleum-based degreaser on elastomeric foam will dissolve the closed-cell structure, turning it into a sticky, useless sludge. The Armacell technical resources explicitly prohibit solvent-based cleaners on their products. Below is the definitive cleaning matrix for the three most common commercial pipe wraps.
| Material Type | Approved Cleaners | Prohibited Chemicals | Application Method |
|---|---|---|---|
| Elastomeric Foam (e.g., ArmaFlex, Rubatex) | Mild, pH-neutral dish soap (pH 7.0-8.0), ArmaClean 500 | Acetone, MEK, toluene, bleach, ammonia | Soft microfiber cloth; wipe gently; rinse with damp cloth; air dry. |
| Fiberglass (with PVC/ASJ Jacket) | Isopropyl alcohol (for scuffs), mild all-purpose degreaser | Abrasive scouring pads, high-pressure washers | Spray on soft sponge; wipe in direction of the lap seam to prevent forcing liquid under the jacket. |
| Mineral Wool (with Aluminum Jacket) | Non-chlorinated aluminum cleaner, soapy water | Caustic soda, highly acidic cleaners (pH < 5) | Soft bristle brush for the metal jacket; avoid flooding the circumferential seams with water. |
Dealing with Mold and Biological Growth
When condensation drips from poorly sealed pipe wraps in humid environments, mold colonies establish rapidly on the outer jacket or the insulation itself. Do not use sodium hypochlorite (bleach). Bleach degrades the polymers in elastomeric wraps and corrodes ASJ (All-Service Jacket) paper on fiberglass. Instead, apply a hydrogen peroxide-based botanical cleaner or a quaternary ammonium compound (quat). Spray the affected area, allow a 10-minute dwell time to penetrate the biofilm, and wipe clean. If mold has penetrated beneath the jacket into the fiberglass matrix, the insulation is compromised and must be removed.
Repair vs. Replace: Decision Matrix
Facility teams must balance the cost of patching against the risk of systemic failure. Use this framework to determine the correct intervention for damaged pipe wrap insulation.
The 15% Saturation Rule
If more than 15% of a continuous pipe run's insulation is saturated with water, spot-repairing is a waste of labor. Wet insulation acts as a thermal bridge and a sponge, continuously wicking moisture to adjacent dry sections. Action: Strip the entire run, dry the pipe, apply a corrosion inhibitor, and install new pre-slit tubular insulation.
Targeted Repair Guidelines
- Longitudinal Tears (< 2 inches): Clean the area with isopropyl alcohol. Apply a continuous bead of cyanoacrylate-based elastomeric adhesive (e.g., ArmaFlex 520) inside the tear. Press firmly for 30 seconds. Do not use standard duct tape; the adhesive will dry out and fail within 6 months in mechanical rooms.
- Circumferential Gaps at Butt Joints: If a gap has opened between two sections of pipe wrap, fill the void with expanding closed-cell polyurethane foam specifically rated for plumbing (e.g., Great Stuff Pro Window & Door, which remains flexible). Once cured, trim flush and wrap with 2-inch wide, self-adhering lap tape.
- Crushed Insulation (Impact Damage): If a heavy object has crushed the pipe wrap, the R-value in that zone is permanently reduced. Cut out the crushed section with a serrated insulation knife. Fabricate a replacement sleeve from a scrap piece of identical thickness and glue it into place, sealing all edges with mastic.
Re-wrapping and Sealing: Best Practices for 2026
When replacing sections of pipe wrap insulation, the vapor barrier is just as critical as the thermal barrier. The North American Insulation Manufacturers Association (NAIMA) emphasizes that a breached vapor barrier on a cold pipe guarantees condensation. For outdoor or high-humidity indoor applications, finish the insulation with a high-quality mastic. Foster 85-75 Flexible Mastic is the industry standard for sealing PVC and ASJ jacketing. Apply it at a wet thickness of 1/16-inch using a stiff brush, embedding a layer of fiberglass scrim cloth for tensile strength on high-vibration lines. For elastomeric systems exposed to direct sunlight, apply two coats of an elastomeric acrylic coating (like ArmaFlex 570) to prevent UV degradation, which can turn black foam gray and brittle in as little as 18 months.
Frequently Asked Questions (FAQ)
Can I paint elastomeric pipe wrap insulation to match the room decor?
Yes, but you cannot use standard oil-based or alkyd paints. The solvents in these paints will eat through the elastomeric foam. You must use a water-based, acrylic elastomeric coating specifically designed for flexible insulation. Ensure the coating maintains the ASTM E84 Surface Burning Characteristics rating of the underlying pipe wrap.
How do I insulate irregularly shaped pipe valves and flanges?
Do not attempt to wrap valves with standard tubular pipe wrap. Use removable, reusable insulated valve covers (often called "insulation blankets") made from silicone-coated fiberglass cloth filled with mineral wool. For a permanent, custom-fit solution, cut and bevel multiple pieces of rigid elastomeric sheet insulation, gluing them together to form a 3D box around the valve, and seal all seams with lap tape.
What is the minimum clearance required around pipe wrap insulation?
Maintain a minimum of 1.5 inches of clearance between the outer jacket of the pipe wrap and adjacent walls, ceilings, or other pipes. This clearance is vital for two reasons: it allows for proper application of seam sealants during installation, and it provides an air gap that prevents moisture from being trapped against the insulation jacket, which accelerates mold growth and jacket degradation.