How to Build a Veneer Stone Retaining Wall: Core and Facing Guide
Learn how to build a veneer stone retaining wall with a structural CMU core. Includes drainage, footing specs, and stone facing installation steps.

The Structural Reality: Veneer is Cosmetic, CMU is Structural
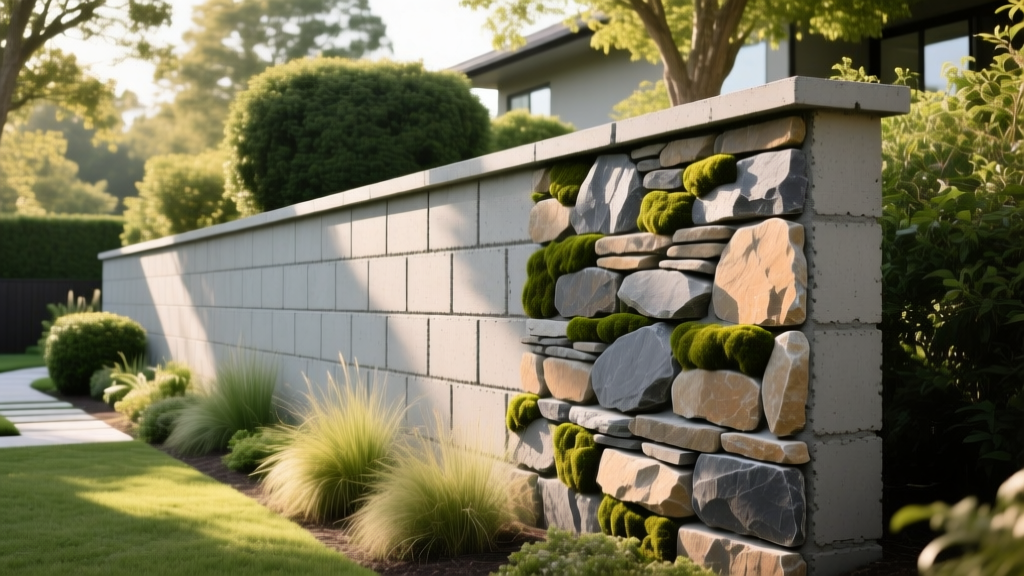
The most critical misconception in landscape masonry is the idea that stone veneer can retain soil. It cannot. Soil exerts immense lateral earth pressure, and a 1-to-2-inch layer of stone veneer possesses zero structural shear capacity to resist it. According to engineering guidelines published by the National Concrete Masonry Association (NCMA), any retaining wall over 2 feet in height requires a dedicated structural core. Therefore, a 'veneer stone retaining wall' is actually a structural Concrete Masonry Unit (CMU) or poured concrete wall that is subsequently faced with a cosmetic stone veneer.
Attempting to build a retaining wall using only mortared veneer stone will inevitably result in catastrophic structural failure, bulging, and collapse. This guide details the exact engineering and masonry steps required to build a CMU core and properly apply a stone veneer facing that will withstand frost heave, hydrostatic pressure, and lateral soil loads.
2026 Material Breakdown and Cost Estimates
Budgeting accurately requires separating the structural core costs from the cosmetic facing costs. The following table outlines average 2026 material costs for a standard 4-foot-high retaining wall.
| Material Component | Specification / Type | Estimated Unit Cost (2026) |
|---|---|---|
| Structural CMU Blocks | 8x8x16 Standard Weight | $3.50 - $4.50 per block |
| Masonry Mortar | Type S (80lb bag) | $13.00 - $16.00 per bag |
| Natural Stone Veneer | Fieldstone or Ledge (Flat) | $15.00 - $24.00 per sq ft |
| Manufactured Stone Veneer | Architectural MSV Panels | $9.00 - $14.50 per sq ft |
| Steel Reinforcement | #4 Rebar (20ft stick) | $19.00 - $26.00 per stick |
| Subsurface Drainage | 4-inch Perforated PVC | $1.25 - $1.80 per linear ft |
| Backfill Aggregate | #57 Crushed Washed Stone | $45.00 - $65.00 per ton |
Phase 1: Excavation and the Frost-Protected Footing
The structural integrity of your CMU core relies entirely on its footing. If the footing shifts, the rigid CMU wall will crack, and the veneer will delaminate.
- Determine Frost Depth: Excavate a trench that extends at least 6 inches below your local frost line. In northern climates, this often means digging 36 to 48 inches deep. In southern zones, a minimum 12-inch depth is standard.
- Trench Width: The footing must be twice the width of the CMU core. For a standard 8-inch CMU wall, pour a 16-inch wide footing.
- Base Preparation: Compact the subgrade soil using a vibratory plate compactor. Lay a 4-inch base of crushed gravel and compact again to create a stable, draining sub-base.
- Rebar Grid: Tie a grid of #4 (1/2-inch) rebar at 16 inches on center (OC) both longitudinally and transversely. Elevate the rebar grid 3 inches off the gravel base using plastic dobies (chairs) to ensure it sits in the middle of the concrete pour.
- Concrete Pour: Pour a minimum 3,000 PSI concrete mix. Screed the top perfectly level. A sloped or uneven footing will compound into massive alignment errors by the time you reach the top course of the CMU wall.
Phase 2: Laying the CMU Core and Subsurface Drainage
Once the footing has cured for a minimum of 48 hours, begin laying the structural CMU core.
Block Laying and Reinforcement
Use Type S mortar for all CMU joints. Type S provides the high tensile and compressive strength required for below-grade and retaining applications. Butter the ends of each block before setting them to ensure full head joints. As you stack, drop vertical #4 rebar into the block cells every 32 inches (every other cell). Once the wall reaches its final height, fill all rebar-containing cells with high-slump masonry grout to lock the steel and concrete together.
Managing Hydrostatic Pressure
Water trapped behind a retaining wall is the primary cause of failure. You must install a comprehensive drainage system behind the CMU core:
- Parging: Apply a 1/2-inch parge coat of mortar to the back (soil-facing side) of the CMU wall. This seals the block joints and prevents soil and water from migrating through the porous concrete.
- Weeep Holes: Leave the vertical head joints on the very first course of CMU blocks open (mortar-free) every 4 feet to serve as weep holes.
- Drain Pipe: Lay a 4-inch perforated PVC pipe directly behind the first course of blocks. Ensure the pipe has a minimum 1% slope toward a daylight exit point or dry well.
- Backfill: Cover the pipe and fill the space between the CMU wall and the native soil with #57 crushed stone. Do not use gravel with fines (like crusher run), as the dust will clog the drain pipe.
- Geotextile Fabric: Drape non-woven geotextile landscape fabric over the top of the crushed stone before backfilling with native topsoil. This prevents soil fines from washing down into the drainage aggregate.
Never apply a waterproofing membrane to the front (exterior) face of the CMU core before applying the veneer. Moisture that enters the wall from the top cap or driving rain must be able to evaporate outward. Trapping moisture inside the CMU will cause severe efflorescence (white salt deposits) and freeze-thaw spalling on your veneer face.
Phase 3: Applying the Stone Veneer Facing
With the structural core and drainage complete, you can transition to the cosmetic stone veneer. The Portland Cement Association outlines strict protocols for adhering masonry veneer to concrete substrates to prevent delamination.
Step 1: Metal Lath and Scratch Coat
While some modern polymer-modified mortars allow direct application to clean CMU, best practice dictates using a mechanical key. Attach 2.5 lb galvanized expanded metal lath (compliant with ASTM C847) to the CMU face using concrete nails or masonry screws spaced every 6 inches. Overlap lath seams by 1 inch. Apply a 1/2-inch scratch coat of Type S mortar over the lath. Use a notched trowel to score horizontal grooves into the wet mortar. Allow this scratch coat to cure for 24 to 48 hours.
Step 2: Stone Layout and Mortaring
Lay out your stone veneer on the ground to blend colors, sizes, and textures. Avoid placing two identical stones adjacent to one another. When installing, use a high-quality Type N or Type S masonry mortar. Butter the back of each stone with a 1/2-inch layer of mortar and press it firmly into the scratch coat. Maintain consistent 1/2-inch to 1-inch joints for a traditional dry-stack look, or tight-fit the stones for a mosaic pattern. Tool the joints with a concave jointer once the mortar becomes thumbprint-hard to compress the mortar and seal it against water intrusion.
Coping and Capstone Installation
The top of the retaining wall is its most vulnerable point for water ingress. You must install a solid capstone or coping layer that overhangs the veneer face by at least 1 to 2 inches. This overhang acts as a drip edge, shedding rainwater away from the veneer face and preventing streaking. Mortar the capstones securely to the top CMU course and seal the top joints with a high-grade, UV-stable polyurethane masonry sealant to prevent surface water from penetrating the wall core.
Common Failure Modes and Troubleshooting Matrix
Even with proper installation, environmental factors can cause issues. Use this matrix to diagnose and repair common veneer retaining wall failures.
| Symptom | Root Cause Analysis | Corrective Action |
|---|---|---|
| White powdery residue on stone face (Efflorescence) | Water migrating through the CMU core, dissolving soluble salts, and evaporating on the veneer surface. | Clean with a diluted muriatic acid solution or commercial efflorescence remover. Ensure weep holes are clear and apply a breathable silane/siloxane penetrating sealer to the stone. |
| Veneer stones delaminating or falling off | Failure of the bond coat, lack of metal lath, or application over a dusty/unparged CMU surface. | Remove all loose stones. Wire-brush the CMU substrate, install galvanized metal lath, apply a new scratch coat, and reset stones with fresh Type S mortar. |
| Wall bulging, leaning, or stair-step cracking in CMU | Hydrostatic pressure buildup behind the wall due to clogged drainage pipe or lack of aggregate backfill. | Excavate the soil behind the wall. Clear or replace the perforated PVC pipe. Re-backfill with clean #57 washed stone and install fresh geotextile fabric. |
| Mortar joints crumbling or powdering | Improper mortar mix ratio, lack of curing time, or freeze-thaw damage due to high water content in the mix. | Rake out the failed joints to a depth of 3/4 inch using a grinder. Repoint with a properly mixed, low-water-content Type N mortar and keep damp-cured for 3 days. |
Building a veneer stone retaining wall is a dual-discipline project requiring both structural engineering and artistic masonry. By respecting the CMU core as the true load-bearing element and treating the stone veneer as a meticulously applied weather-resistant skin, you ensure a landscape feature that remains structurally sound and visually striking for decades.
Written by
Priya KapoorPriya Kapoor is a real estate market analyst and construction economics researcher with expertise in housing affordability, development feasibility, and infrastructure investment. She holds a Master of Regional Planning from Cornell University and previously worked as a senior analyst at CBRE's Investment Properties group, where she modeled returns for $4B in mixed-use development pipelines. Priya now runs an independent research practice advising developers, municipalities, and REITs on construction cost forecasting and market timing. She publishes the quarterly "BuildMat Market Pulse" report tracking material price indices across 12 commodity categories. Based in Austin, TX, Priya serves on the board of Habitat for Humanity Austin and is a marathon runner.
More from Priya Kapoor
View all
Construction Cost
Cost to Build a 1600 Sq Ft Home in 2026: Full Breakdown
Accurate 2026 cost to build a 1600 sq ft home—material, labor, and regional pricing breakdowns included. Plan your budget with real-time estimates.
Aug 11, 2026

Wood & Lumber
Name the Types of Wood for Pressure Treatment and Preservation
Learn how to name the types of wood best suited for pressure treatment. Compare species treatability, chemical retention levels, and 2026 preservation costs.
Aug 4, 2026

Stone & Masonry
Stone Veneer Suppliers Lindenhurst: 2026 Cost Analysis
Analyze 2026 stone veneer costs in Lindenhurst, NY. Compare local supplier pricing, delivery fees, and Suffolk County installation labor rates.
Aug 4, 2026