Choosing the Right Type of Mortar for Stone Veneer Installation
Discover which type of mortar for stone veneer guarantees lasting adhesion. Compare Type S, Type N, and polymer blends with exact mixing ratios.

The Chemistry of Adhesion: Why Mortar Selection Dictates Veneer Lifespan
Stone veneer failures rarely originate from the stone itself; they occur at the bond line. When selecting the correct type of mortar for stone veneer, installers must account for shear stress, freeze-thaw cycling, and moisture migration. Natural and manufactured stone veneers possess vastly different absorption rates and weights. A mortar mix that performs flawlessly with lightweight manufactured veneer may suffer catastrophic shear failure when supporting dense natural slate or granite.
The primary mechanism of failure in veneer applications is efflorescence-induced spalling and freeze-thaw delamination. If the mortar lacks adequate water retention or contains excessive free lime, soluble salts migrate to the surface, crystallize, and break the micro-mechanical bond. According to the Brick Industry Association's Technical Notes on Mortar Materials, matching the mortar's compressive strength and elasticity to the specific veneer unit is critical to preventing these micro-fractures.
Decoding Mortar Types: N, S, and Polymer-Modified Blends
Industry standards categorize cementitious mortars by their compressive strength and ingredient ratios. For stone veneer, the debate typically narrows to Type S, Type N, and modern polymer-modified formulations.
| Mortar Type | Compressive Strength | Bond Strength | Water Retention | Best Application |
|---|---|---|---|---|
| Type S | 1,800+ psi | High | Excellent | Exterior natural stone, heavy ledgerstone, below-grade foundations |
| Type N | 750+ psi | Medium | Good | Interior manufactured veneer, lightweight stacked stone, above-grade exteriors |
| Polymer-Modified | 2,500+ psi | Exceptional | Superior | Premium natural stone, high-moisture areas, non-standard substrates |
Type S Mortar: The Heavy-Duty Standard
Type S mortar is the default specification for most exterior stone veneer installations. Formulated with 1 part Portland cement, 1/2 part hydrated lime, and 4.5 parts damp sand, its high Portland content yields superior tensile and shear bond strength. This makes it mandatory for heavy natural stones (like thick-cut limestone or granite) where gravitational shear forces are significant.
Type N Mortar: The Flexible Alternative
Type N contains a higher proportion of lime (1 part Portland, 1 part lime, 6 parts sand). This increased lime content provides greater workability and flexibility, allowing the mortar to absorb minor substrate movements without cracking. It is the preferred type of mortar for stone veneer when working with lightweight manufactured products indoors, where extreme weather resistance is unnecessary.
Polymer-Modified Veneer Mortars: The Premium Choice
As of 2026, polymer-modified mortars, such as the LATICRETE MVIS Premium Veneer Mortar, have become the standard for high-end residential and commercial projects. These pre-blended, factory-bagged mortars contain acrylic or latex polymers that drastically reduce water permeability, eliminate the need for a separate scratch coat in some systems, and increase bond strength by up to 40% compared to traditional Type S.
Never apply stone directly to a bare substrate. A scratch coat (typically 3/8" thick, scored horizontally) must cure for 24-48 hours. The setting bed mortar is then applied to both the back of the stone (back-buttering) and the scratch coat to ensure 100% coverage and eliminate air pockets where moisture can freeze and expand.
Step-by-Step Mortar Application Protocol
Proper execution of the mortar bed is just as critical as the mix design. Follow this protocol to ensure maximum adhesion:
- Substrate Preparation: Install 18-gauge galvanized wire lath over a weather-resistant barrier (WRB) using corrosion-resistant fasteners spaced no more than 6 inches apart vertically and 16 inches horizontally.
- Scratch Coat Application: Trowel a 3/8-inch layer of Type S or polymer-modified mortar over the lath. Use a notched trowel or rake to score horizontal grooves into the wet mortar. Allow to cure for a minimum of 24 hours.
- Mixing the Setting Bed: Mix the mortar to a thick, peanut-butter consistency. The slump should not exceed 2 to 3 inches.
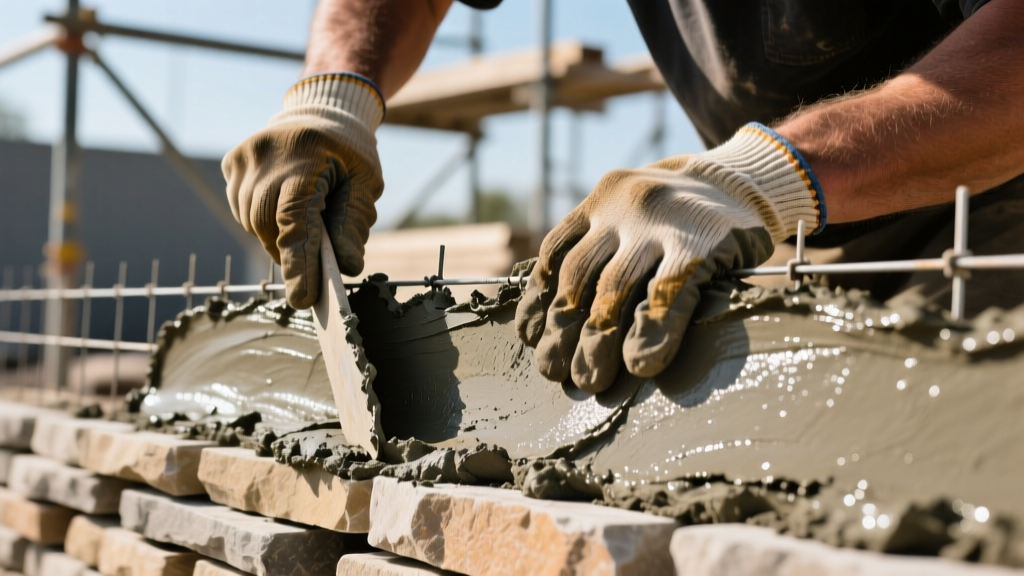
- Back-Buttering: Using the flat side of a trowel, apply a 1/8-inch layer of mortar to the entire back of the stone veneer unit. This forces mortar into the stone's microscopic pores.
- Setting the Stone: Apply a 1/2-inch layer of mortar to the scratch coat. Press the back-buttered stone firmly into the bed, wiggling slightly to squeeze out excess mortar and ensure complete contact.
Mixing Ratios and Slump Consistency
Field-mixed mortars are highly susceptible to proportioning errors. When mixing Type S from raw materials, use a volumetric ratio of 1:0.5:4.5 (Portland:lime:sand). Always measure sand in a damp, loose state.
Never retemper (add water to) mortar that has begun to stiffen or lose its plasticity. Adding water after the initial hydration phase destroys the chemical matrix, reducing bond strength by up to 50%. Discard any mortar that has sat in the mixing tub for longer than 90 minutes.
For optimal workability, mix the dry ingredients with water for 3 to 5 minutes in a mechanical mixer. Allow the batch to slake (rest) for 10 minutes, which gives the lime time to fully hydrate and improves water retention. Remix for 2 minutes without adding water before use.
Troubleshooting Common Mortar Failures
Identifying the root cause of veneer failure requires understanding the chemical and physical properties of the mortar used.
- Efflorescence (White Powdery Residue): Caused by soluble salts in the mortar or substrate mixing with water. Fix: Use a low-alkali Portland cement, ensure proper weep hole drainage behind the veneer, and avoid using calcium chloride accelerators in cold weather.
- Map Cracking (Spiderweb Fractures): Indicates excessive shrinkage during the curing process. Fix: The sand-to-cement ratio is too high, or the mortar was applied too thickly in a single pass. Limit scratch coats to 3/8" and setting beds to 1/2".
- Shear Delamination (Stone Falling Off): Occurs when the bond strength is overcome by the weight of the stone. Fix: Upgrade from Type N to Type S, or switch to a polymer-modified blend. Verify that the back of the stone was properly back-buttered and not merely "spot-dotted" with mortar.
Sourcing and Cost Breakdown (2026 Estimates)
Budgeting for stone veneer installation requires accurate material forecasting. A standard 50 lb. bag of pre-blended Type S veneer mortar covers approximately 12 to 15 square feet of scratch coat and setting bed combined.
- Pre-blended Type S (e.g., Sakrete, Quikrete): $8.00 - $12.00 per 50 lb. bag.
- Pre-blended Type N: $7.50 - $11.00 per 50 lb. bag.
- Polymer-Modified Veneer Mortar (e.g., LATICRETE, Custom Building Products): $28.00 - $36.00 per 50 lb. bag.
While polymer-modified mortars carry a 250% price premium over standard Type S, the reduction in labor time (often eliminating the need for a separate scratch coat in approved systems) and the drastic reduction in warranty callbacks make them the most cost-effective choice for professional contractors installing high-value natural stone.
For comprehensive structural guidelines and load-bearing specifications, installers should always consult the latest provisions published by the Masonry Society and adhere strictly to local building codes regarding weather-resistant barriers and mortar joint tooling.
Written by
Sarah WhitfieldSarah Whitfield is a chartered quantity surveyor (MRICS) and construction cost analyst with 15 years of experience in material pricing, procurement strategy, and project budgeting. She earned her degree in Construction Management from the University of Reading (UK) and has worked on projects ranging from $2M custom homes to $180M mixed-use developments across North America and Europe. Sarah currently leads cost estimating for BuildMat Insight, maintaining a proprietary database of 4,000+ material price points updated quarterly. She is a frequent contributor to RSMeans cost data panels and has presented at the International Cost Engineering Council (ICEC) congress. Based in Denver, CO, Sarah is an avid trail runner and volunteer mentor for Women in Construction.
More from Sarah Whitfield
View all
Wood & Lumber
What Are the Different Types of Wood? A Builder's Guide
Compare structural softwoods, finish hardwoods, and engineered lumber. Analyze Janka ratings, MOE values, and 2026 pricing for construction.
Aug 4, 2026

Walls & Panels
Steel Framing vs Wood Framing: Corrosion and Moisture Defense
Compare steel framing vs wood framing for moisture resistance. Learn about galvanized coatings, condensation risks, and corrosion protection strategies.
Jul 21, 2026

Stone & Masonry
How to Cut Stone Veneer: Wet Saw vs Grinder Comparison
Compare the best tools for cutting stone veneer. We review wet saws, angle grinders, and chop saws to help you achieve clean, chip-free cuts.
Jul 21, 2026