DIY Stone Veneer: Complete Material and Installation Guide
Master your DIY stone veneer project with our complete material guide. Compare manufactured vs. natural stone, mortar types, and 2026 cost breakdowns.

Core Material Selection: Manufactured vs. Natural Stone Veneer
Executing a successful diy stone veneer installation begins with selecting the right material for your structural capacity and aesthetic goals. The market is dominated by two primary categories: Architectural Stone Veneer (ASV) and Natural Stone Veneer. Understanding the physical properties of each is critical for substrate preparation and long-term adhesion.
Manufactured ASV is cast in molds from natural stone using a lightweight concrete mix, typically incorporating pumice or expanded shale aggregates and iron oxide pigments. This results in a product that weighs between 10 and 12 pounds per square foot. Natural stone veneer, quarried and sliced to a 1-inch to 1.5-inch thickness, retains the dense mineral composition of the original rock, weighing anywhere from 15 to over 25 pounds per square foot depending on the geology (e.g., slate vs. limestone).
Material Comparison Matrix
| Feature | Manufactured ASV | Natural Stone Veneer |
|---|---|---|
| Weight (lbs/sq ft) | 10 - 12 lbs | 15 - 28 lbs |
| Thickness | 1.5 - 2.5 inches | 0.75 - 1.5 inches |
| Water Absorption | Moderate (requires sealing in freeze-thaw zones) | Low to High (varies by stone type; slate is low, sandstone is high) |
| Cutting Method | Standard masonry saw or angle grinder | Diamond-blade wet saw required for dense stones like granite |
| Best Application | >Exterior accents, full-house wraps, interior fireplacesHigh-end interior feature walls, wainscoting, exterior pillars |
Substrate Preparation: The Hidden Failure Point
The most common cause of delamination in DIY installations is inadequate substrate preparation. Stone veneer cannot be applied directly to drywall, painted surfaces, or bare exterior sheathing. The wall must be engineered to handle the sheer weight and manage moisture migration.
Critical Warning: Never install stone veneer over standard paper-faced gypsum drywall in wet areas or exterior applications. The moisture from the mortar scratch coat will degrade the paper facing, causing catastrophic structural failure of the wall assembly.
The Mandatory Layering Sequence
- Weather-Resistive Barrier (WRB): Apply two layers of Grade D building paper or a high-performance house wrap (like Tyvek) over exterior OSB or plywood sheathing. Overlap horizontal seams by 2 inches and vertical seams by 6 inches.
- Corrosion-Resistant Lath: Staple or nail 2.5 lb per square yard self-furring galvanized steel lath (meeting ASTM C847 standards) over the WRB. Use 1-inch galvanized roofing nails spaced 6 inches apart on vertical studs. The self-furring dimples must face outward to create a 1/4-inch gap for the mortar to key into.
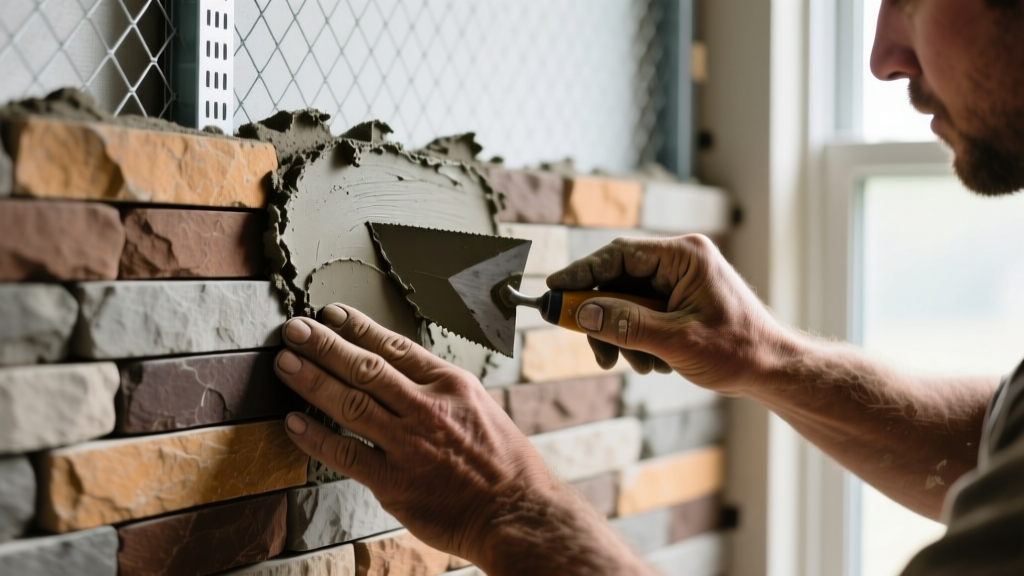
- Scratch Coat Application: Trowel a 1/2-inch thick layer of Type S mortar over the lath. Before it fully sets, use a notched trowel or a stiff bristle brush to score horizontal grooves into the surface. This scratch coat must cure for a minimum of 48 hours before any stone is applied.
Mortar Chemistry and Adhesive Selection
Selecting the correct bonding agent is non-negotiable. Standard brick mortar lacks the tensile strength and polymer additives required to hold heavy veneer stones on vertical surfaces without sagging.
For exterior applications and interior masonry substrates, you must use a Type S Mortar. According to ASTM C270 standards, Type S mortar provides a minimum compressive strength of 1,800 psi and high bond strength, which is essential for resisting wind loads and thermal expansion. A highly reliable, pre-blended option for DIYers is QUIKRETE Veneer Stone Mortar, which includes proprietary polymers to improve workability and reduce efflorescence.
For interior applications over cement backer board (such as Durock or HardieBacker), a high-performance, polymer-modified thin-set mortar can be used, particularly for lighter manufactured panel systems. Products like Custom Building Products MegaLite offer exceptional non-sag properties, allowing you to install heavier stones without temporary bracing while the adhesive cures.
2026 Material Cost Breakdown per Square Foot
Budgeting accurately requires looking beyond the price of the stone itself. The auxiliary materials required for a code-compliant installation add significant cost. Below is a realistic 2026 material cost breakdown for a standard 200-square-foot exterior wall project.
| Material Component | Manufactured ASV Project | Natural Stone Project |
|---|---|---|
| Stone Veneer (Flat & Corners) | $7.50 - $12.00 / sq ft | $14.00 - $26.00 / sq ft |
| Galvanized Lath & Fasteners | $1.65 / sq ft | $1.65 / sq ft |
| Weather-Resistive Barrier | $0.45 / sq ft | $0.45 / sq ft |
| Type S Mortar (Scratch & Bond) | $1.80 / sq ft | $2.10 / sq ft (requires thicker bed) |
| Sealer & Cleanup Supplies | $0.60 / sq ft | $0.90 / sq ft |
| Total Material Cost | $12.00 - $16.50 / sq ft | $19.10 - $31.10 / sq ft |
Note: These figures exclude tool rental, scaffolding, and structural reinforcement if the existing foundation cannot support the added dead load.
Specialized Tooling for Precision Cuts
While a hammer and chisel might suffice for rustic fieldstone, achieving tight, professional joints with manufactured or flat-bed natural stone requires specialized cutting equipment.
- Wet Tile Saw with Bridge: A 10-inch wet saw equipped with a continuous-rim diamond blade is essential for cutting manufactured stone and softer natural stones like slate. The water feed prevents the blade from overheating and reduces hazardous silica dust.
- Angle Grinder with Dust Shroud: For quick notches and cuts on exterior corners, a 4.5-inch angle grinder paired with a turbo-rim diamond blade and a vacuum-attached dust shroud is mandatory to comply with OSHA silica regulations.
- Carbide-Tipped Nippers: Used for chipping away small fractions of an inch to fit stones tightly around electrical boxes or window casings without fracturing the entire piece.
- Margin Trowels and Hawks: A 5-inch margin trowel is the ideal size for buttering the back of individual stones, while a 14-inch aluminum hawk holds the mortar efficiently.
Troubleshooting Common DIY Failure Modes
Even with premium materials, improper technique leads to specific, predictable failures. Use this diagnostic guide to identify and correct issues before they compromise the installation.
Symptom: White, Powdery Residue (Efflorescence)
Cause: Soluble salts within the mortar or stone are being dissolved by moisture migrating through the wall assembly and deposited on the surface as the water evaporates.
Fix: Ensure the scratch coat was allowed to cure fully before applying stone. Do not use acid-based cleaners on fresh mortar, as this drives salts deeper. Brush the dry residue with a stiff nylon brush and apply a breathable, silane-based penetrating sealer once the wall has fully cured (minimum 28 days).
Symptom: Stones Detaching or Sounding Hollow
Cause: 'Skinning over' of the mortar or applying stone to a dry, dusty scratch coat. If the substrate absorbs the moisture from the bonding mortar too quickly, the cement cannot hydrate properly, resulting in zero bond strength.
Fix: Always mist the scratch coat with a fine spray of water immediately before applying the bonding mortar. Additionally, you must 'butter' the back of every single stone with a 1/2-inch layer of mortar, pressing it firmly until mortar squeezes out of the joints, ensuring 100% surface contact.
Expert FAQ
Can I install stone veneer directly over an existing brick fireplace?
Yes, but only if the brick is unpainted and thoroughly cleaned of soot and sealers using a wire brush and TSP (trisodium phosphate). If the brick is painted or sealed, you must attach metal lath using masonry tapcons and apply a scratch coat before installing the veneer.
Do I need to seal exterior stone veneer?
In climates with freeze-thaw cycles, sealing is highly recommended. Use a breathable, non-film-forming siloxane sealer. Film-forming sealers trap moisture inside the stone, which expands when frozen and causes the face of the stone to spall and pop off.
Written by
James ThorntonJames Thornton is a construction industry veteran with 25 years of hands-on experience in wood framing, lumber grading, and residential building codes. He started as a framing carpenter in rural Oregon, earned his ICC Residential Building Inspector certification, and eventually became a senior plan reviewer for the City of Portland Bureau of Development Services. James holds a B.S. in Wood Science & Technology from Oregon State University and is a certified lumber grader through the West Coast Lumber Inspection Bureau (WCLIB). He has inspected over 3,000 residential construction sites and authored the city's internal guide on advanced framing techniques (2x6 at 24" O.C.). James lives in Bend, OR, where he builds custom timber-frame cabins and competes in lumberjack sports.
More from James Thornton
View all
Insulation
Best Home Insulation Materials: Complete 2026 Guide
Compare top home insulation materials for 2026. Find R-values, installed costs per square foot, and best uses for fiberglass, spray foam, and mineral wool.
Aug 4, 2026

Sustainable Building
Certify Your Green Building Material for LEED and WELL
Step-by-step guide to certifying a green building material for LEED v5 and WELL v2. Master EPDs, HPDs, and VOC limits for 2026 project specifications.
Aug 4, 2026

Stone & Masonry
Veneer Stacked Stone Panels: Interior Design & Style Showcase
Discover how veneer stacked stone panels transform interiors. Explore modern design profiles, material pairings, and technical installation specs.
Aug 4, 2026