How to Put Up Stone Veneer on Exterior Wall: Design & Install Guide
Master how to put up stone veneer on exterior wall projects. Explore 2026 design profiles, moisture management, and step-by-step installation costs.

The Intersection of Curb Appeal and Structural Integrity
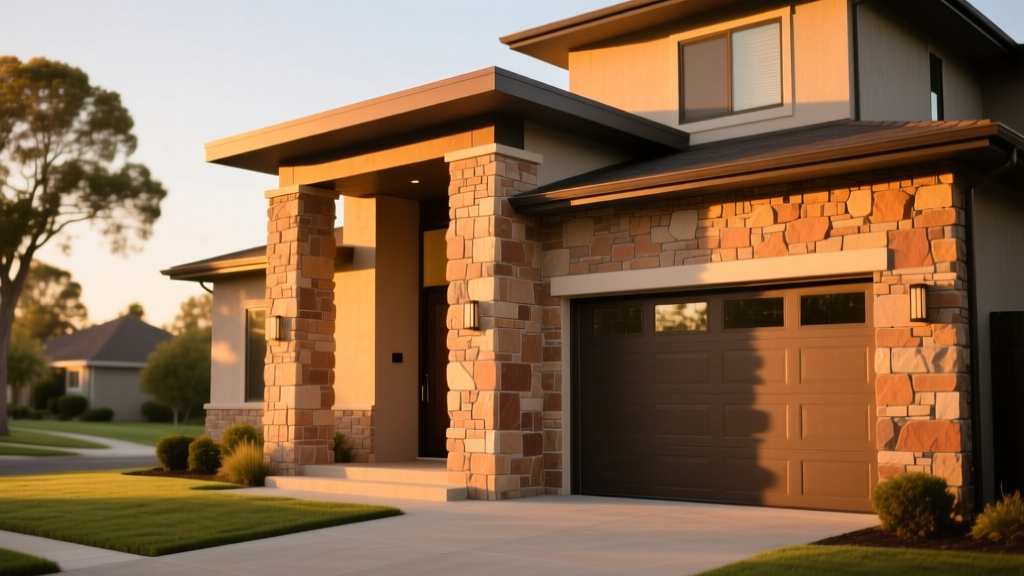
Learning how to put up stone veneer on exterior wall surfaces requires balancing high-end architectural aesthetics with rigorous building science. Unlike interior applications, exterior veneer cladding must withstand freeze-thaw cycles, UV degradation, and hydrostatic pressure while delivering the visual weight of solid masonry. In 2026, the design trend has shifted heavily toward large-format ashlar panels and dark charcoal ledgestone profiles, moving away from the heavily grouted, rustic looks of the previous decade. However, the most striking design will fail prematurely if the underlying moisture management system is compromised. This guide bridges the gap between high-impact facade design and the exact technical specifications required for a lasting exterior installation.
Choosing Your Aesthetic: Veneer Profiles for Exterior Facades
The visual rhythm of your exterior wall is dictated by the stone profile you select. Each profile demands a specific mortar joint technique and architectural context to look authentic rather than applied.
Ledgestone (Linear Modern)
Ledgestone features long, narrow rectangular cuts that emphasize horizontal lines. It is the premier choice for contemporary and mid-century modern exteriors. Design-wise, ledgestone is almost exclusively installed using a dry-stack method, meaning no visible mortar joint is left between the stones. This requires incredibly precise substrate leveling, as any deviation in the wall plane will cast harsh shadows and break the linear illusion.
Fieldstone (Organic Rustic)
Characterized by irregular, rounded shapes and varying thicknesses, fieldstone mimics naturally gathered river rock. It is best suited for Craftsman, Tudor, or rural farmhouse designs. Because the stones are irregular, installers use a standard or overgrout joint technique, allowing the mortar to act as a visual binder that hides minor depth discrepancies between individual stones.
Ashlar Cut (Tailored Traditional)
Ashlar consists of large, precisely cut rectangular blocks with clean edges, reminiscent of historic limestone or granite masonry. It anchors traditional, colonial, and neoclassical architecture. Ashlar requires a raked or flush mortar joint, emphasizing the geometric precision of the stone layout.
| Profile | Architectural Style | Joint Technique | Install Difficulty |
|---|---|---|---|
| Ledgestone | Modern / Contemporary | Dry-Stack (No visible mortar) | High (Requires precise leveling) |
| Fieldstone | Rustic / Craftsman | Standard / Overgrout | Medium (Forgiving organic shapes) |
| Ashlar Cut | Traditional / Colonial | Raked / Flush | High (Strict horizontal lines) |
Prepping the Canvas: Substrate and Moisture Management
Before any stone is laid, the wall assembly must be prepared to manage water intrusion. According to guidelines published by DuPont Building Envelopes, a proper weather-resistive barrier (WRB) is non-negotiable for exterior cladding. Water that penetrates the porous stone and mortar must have a clear drainage plane to exit the wall cavity.
The Weep Screed: Per ASTM C1063 standards, a corrosion-resistant metal weep screed must be installed at the base of the wall. It must maintain a minimum clearance of 4 inches above finished soil grade and 2 inches above paved surfaces like concrete driveways. This gap prevents ground moisture from wicking up into the veneer and allows trapped water to weep out of the wall cavity.
Metal Lath: Over the WRB, staple or nail 2.5 lb self-furring galvanized steel lath. The self-furring dimples hold the lath away from the WRB, allowing the scratch coat mortar to completely encapsulate the metal. Overlap horizontal seams by 1 inch and vertical seams by 2 inches. Wrap the lath around all corners by at least 16 inches to prevent corner cracking.
Mortar Selection and Mixing Ratios
For exterior veneer, Type S mortar is the industry standard due to its high tensile bond strength and flexibility, which accommodates minor structural shifting and thermal expansion. While traditional Type S requires mixing Portland cement, hydrated lime, and masonry sand, modern polymer-modified veneer mortars (such as those specified by The Masonry Society) offer superior adhesion and water resistance. When mixing, aim for a consistency resembling thick peanut butter; it should hold its shape on a trowel held at a 90-degree angle without sliding off.
How to Put Up Stone Veneer on Exterior Wall: The Installation Sequence
With the substrate prepped and mortar mixed, the physical installation follows a strict sequence to ensure structural bonding and aesthetic alignment.
- Apply the Scratch Coat: Using a flat trowel, apply a 1/2-inch layer of Type S mortar over the metal lath. Before it sets, use a notched trowel or a stiff brush to score horizontal grooves into the surface. This 'scratch coat' provides a mechanical key for the final stone-setting mortar. Allow it to cure for 24 to 48 hours, keeping it lightly misted with water if temperatures exceed 80°F to prevent rapid drying and shrinkage cracks.
- Dry-Fit and Layout: Lay out your stones on the ground to visualize the pattern. Mix stones from at least three different pallets to ensure color and texture variation. Never pull stones sequentially from a single box, or you will end up with noticeable color banding on the wall.
- Install Corner Pieces First: Always begin your installation at the exterior corners using pre-manufactured corner returns. This establishes the depth and alignment for the rest of the wall. Alternate long and short corner pieces to mimic natural masonry.
- Apply the Mortar Bed and Back-Butter: Apply a 1/2-inch layer of mortar to the wall where you will place the next stone. Simultaneously, 'back-butter' the stone by applying a thin layer of mortar to its back. Press the stone firmly into the wall bed with a slight twisting motion until mortar squeezes out the edges, ensuring 100% coverage and eliminating air pockets where water could collect and freeze.
- Maintain the Pattern: Work from the bottom up. Use a level frequently to ensure your horizontal lines remain true, especially when installing Ashlar or Ledgestone profiles.
Grouting, Pointing, and Sealing for Longevity
If your design calls for a visible mortar joint (Fieldstone or Ashlar), wait until the setting mortar has firmed up but is still thumbprint-soft (usually 30 to 60 minutes). Use a pointing trowel and jointing tool to compress and smooth the joints. Compressing the mortar increases its density and weather resistance. For dry-stack ledgestone, use a stiff bristle brush to immediately clean away any mortar that squeezes out between the tight seams.
Once the veneer has fully cured (minimum 28 days), apply a penetrating silane/siloxane sealer, such as Prosoco Siloxa-Tek 8500. Unlike film-forming acrylics that trap moisture inside the stone and cause spalling during freeze-thaw cycles, siloxane sealers penetrate the pores and create a hydrophobic barrier that repels liquid water while allowing water vapor to escape.
Cost Breakdown: Materials, Labor, and Design Premiums
Budgeting for exterior stone veneer requires accounting for both the cladding material and the extensive prep work. The following data reflects average national pricing for 2026, though regional labor rates and site accessibility will cause variance. Industry tracking by the National Association of Home Builders consistently highlights labor as the primary cost driver in masonry veneer projects.
| Material Type | Material Cost (per sq. ft.) | Labor Cost (per sq. ft.) | Total Installed Cost |
|---|---|---|---|
| Manufactured Stone Veneer (MSV) | $8.50 - $14.00 | $12.00 - $16.00 | $20.50 - $30.00 |
| Natural Thin Veneer | $15.00 - $22.00 | $14.00 - $19.00 | $29.00 - $41.00 |
| Large-Format Architectural Panels | $18.00 - $28.00 | $9.00 - $13.00 | $27.00 - $41.00 |
Note: These costs do not include the expense of scaffolding, structural wall repairs, or upgrading the underlying weather-resistive barrier, which can add $2.00 to $4.00 per square foot to the total project.
Common Design Mistakes That Ruin Exterior Veneer
Even with flawless installation techniques, poor design choices can make exterior veneer look cheap or structurally unsound. Avoid these critical aesthetic and functional errors:
- Picture Framing Windows: Stopping the stone veneer abruptly at the edge of a window casing without a transitional element looks like an afterthought. Always use a stone lintel, keystone, or a deliberate masonry return into the window jamb to integrate the fenestration into the stone facade.
- Ignoring the Wainscot Transition: When using stone veneer as a wainscot (covering only the bottom 3 to 4 feet of a wall), the top edge must be capped with a sloped masonry sill, metal flashing, or a transition trim. Leaving the top edge of the stone exposed and flat guarantees water pooling and eventual deterioration of the substrate.
- Mortar Smearing on Dry-Stack: Attempting to clean dried mortar off a dry-stack ledgestone installation using acid washes or wire brushes will permanently scar the stone face and leave a hazy, unremovable residue. Meticulous care during the setting phase is the only way to preserve a clean dry-stack profile.
- Using Interior Stone Outdoors: Interior manufactured stone is often cast with lightweight aggregates and lacks the freeze-thaw durability required for exterior cladding. Always verify that the product carries an ASTM C1670 certification for exterior use.
Written by
James ThorntonJames Thornton is a construction industry veteran with 25 years of hands-on experience in wood framing, lumber grading, and residential building codes. He started as a framing carpenter in rural Oregon, earned his ICC Residential Building Inspector certification, and eventually became a senior plan reviewer for the City of Portland Bureau of Development Services. James holds a B.S. in Wood Science & Technology from Oregon State University and is a certified lumber grader through the West Coast Lumber Inspection Bureau (WCLIB). He has inspected over 3,000 residential construction sites and authored the city's internal guide on advanced framing techniques (2x6 at 24" O.C.). James lives in Bend, OR, where he builds custom timber-frame cabins and competes in lumberjack sports.
More from James Thornton
View all
Insulation
Best Home Insulation Materials: Complete 2026 Guide
Compare top home insulation materials for 2026. Find R-values, installed costs per square foot, and best uses for fiberglass, spray foam, and mineral wool.
Aug 4, 2026

Sustainable Building
Certify Your Green Building Material for LEED and WELL
Step-by-step guide to certifying a green building material for LEED v5 and WELL v2. Master EPDs, HPDs, and VOC limits for 2026 project specifications.
Aug 4, 2026

Stone & Masonry
Veneer Stacked Stone Panels: Interior Design & Style Showcase
Discover how veneer stacked stone panels transform interiors. Explore modern design profiles, material pairings, and technical installation specs.
Aug 4, 2026