Top Stone Veneer Fireplace Ideas: Complete Material Guide
Explore top stone veneer fireplace ideas with our complete material guide. Compare costs, styles, and installation tips for manufactured and natural stone.

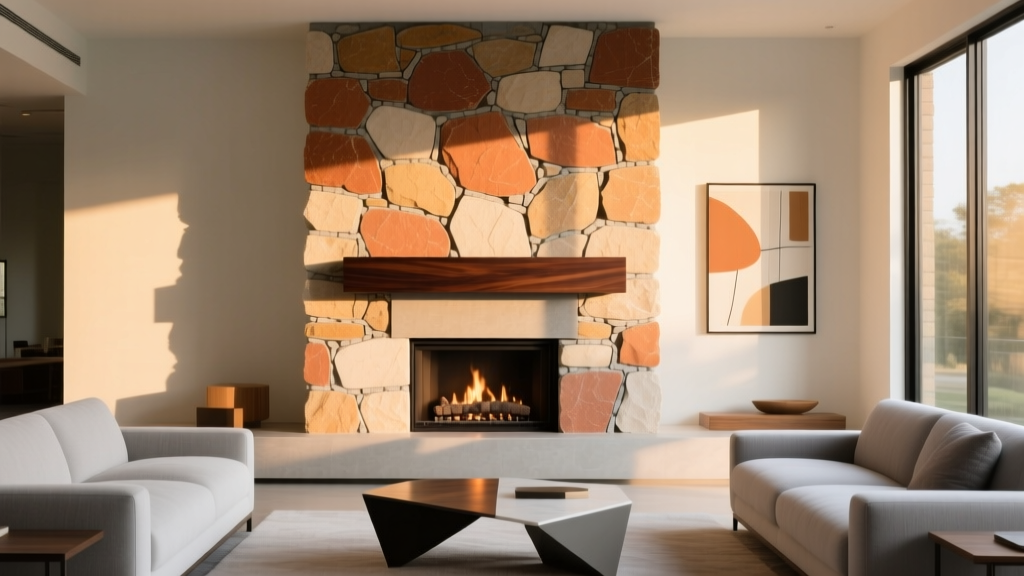
Transforming a standard firebox into a striking architectural focal point requires selecting the right masonry profile, understanding substrate limitations, and executing precise mortar applications. Stone veneer offers the aesthetic weight of full-bed masonry at a fraction of the structural load. This guide breaks down the material science, design profiles, and 2026 installation economics to help you execute a flawless fireplace upgrade.
The Core Material Showdown: Manufactured vs. Natural Stone Veneer
Before selecting a design profile, you must choose between architectural manufactured stone veneer (AMSV) and natural thin stone veneer (NTSV). Both adhere to strict weight and durability standards, but their installation tolerances and cost structures differ significantly.
| Feature | Manufactured Stone (AMSV) | Natural Thin Stone (NTSV) |
|---|---|---|
| Weight | 8 to 12 lbs per sq. ft. | 13 to 20 lbs per sq. ft. |
| Thickness | 1.5 to 2.5 inches | 0.75 to 1.5 inches |
| Governing Standard | ASTM C1670 | ASTM C616 / C568 (varies by stone) |
| Color Consistency | High (batch-controlled pigments) | Low (natural geological variation) |
| Corner Pieces | Molded 90-degree returns available | Requires on-site wet saw mitering |
| Material Cost (2026) | $6.50 - $11.00 per sq. ft. | $12.00 - $24.00 per sq. ft. |
Manufactured stone is cast in molds taken from real stone, utilizing lightweight aggregates and iron-oxide pigments. It is the preferred choice for DIYers and complex geometries because factory-made corner pieces hide the substrate edge seamlessly. Natural thin stone is quarried and diamond-sawn to a thin profile. It demands a higher skill level for corner detailing but offers unmatched authenticity and thermal mass.
5 High-Impact Stone Veneer Fireplace Ideas
1. The Dry-Stacked Linear Modernist
Dry-stack profiles feature tightly fitted stones with no visible mortar joint. This creates a clean, horizontal shadow line ideal for contemporary living rooms and linear gas fireplaces. Because there is no mortar to hide gaps, the substrate must be perfectly plumb. Pro Tip: Use a high-quality polymer-modified mortar behind the stones to ensure adhesion, even though the face remains dry. Brands like Eldorado Stone offer precise ledgerock profiles that interlock to maintain consistent 1/16-inch reveals.
2. The Traditional Fieldstone Hearth
Fieldstone profiles mimic river-tumbled or quarried field rocks, requiring wide, raked mortar joints (typically 1/2 to 3/4 inch). This style suits craftsman, colonial, and rustic homes. The mortar color is just as critical as the stone; a buff or light gray Type N mortar provides a classic contrast against darker browns and grays. Installers must use a masonry pointing tool to compress the joints, preventing water intrusion and ensuring long-term durability.
3. The Dark Slate Herringbone Accent
For a high-end, bespoke look, natural slate cut into rectangular tiles and laid in a herringbone pattern draws the eye upward. This requires natural thin veneer (NTSV) cut to precise dimensions. You will need a continuous-rim diamond blade on a wet saw to prevent spalling the slate edges. This design pairs exceptionally well with matte black steel firebox surrounds and minimalist floating mantels.
4. The Whitewashed Limestone Cottage
The 'German Schmear' technique involves applying a wet, highly hydrated white mortar over natural or manufactured limestone and partially wiping it away before it cures. This leaves heavy mortar deposits in the crevices and a translucent white film on the stone faces. It is an excellent way to brighten a dark room while retaining the tactile texture of stone. Ensure the base stone has high compressive strength to withstand the moisture load of the heavy mortar application.
5. The Rugged Stacked Ledger with Mitered Corners
If you opt for natural stone but want the clean look of manufactured corners, hire a mason skilled in precision mitering. Using a 45-degree wet saw cut, two pieces of natural ledger stone are joined at the outside corner and epoxied together with a color-matched structural adhesive. This eliminates the need for bulky corner stones and provides a razor-sharp architectural edge.
2026 Cost Breakdown: Material and Labor Economics
Budgeting for a fireplace surround requires accounting for hidden masonry accessories. The veneer itself is only a fraction of the total material cost. Below is the average pricing for a standard 50-square-foot fireplace facade (floor to ceiling).
| Cost Component | Manufactured Stone (50 sq ft) | Natural Stone (50 sq ft) |
|---|---|---|
| Veneer Material | $450 - $550 | $750 - $1,200 |
| Metal Lath & Fasteners | $85 | $85 |
| Type S Mortar & Scratch Coat | $120 | $140 |
| Professional Masonry Labor | $750 - $1,250 | $1,000 - $1,800 |
| Total Estimated Project Cost | $1,405 - $2,005 | $1,975 - $3,225 |
Step-by-Step Installation Framework
Proper adhesion relies entirely on substrate preparation. The Portland Cement Association mandates strict protocols for veneer application to prevent delamination.
- Substrate Preparation: Strip the fireplace down to the studs. Install a water-resistive barrier (WRB) like Grade D building paper, followed by 1/2-inch cement backer board secured with corrosion-resistant screws every 6 inches.
- Lath Application: Staple 2.5 lb self-furring galvanized metal lath over the cement board. Overlap horizontal seams by 1 inch and vertical seams by 2 inches. Ensure the lath is pulled tight; loose lath causes mortar cracking.
- The Scratch Coat: Mix Type S masonry cement to a peanut-butter consistency. Trowel a 3/8-inch thick layer over the lath, pressing it firmly through the mesh. Use a notched trowel to rake horizontal grooves into the wet mortar. Let this cure for 24 to 48 hours.
- Stone Placement: Butter the back of each stone with a 1/2-inch layer of fresh Type S mortar. Press the stone into the scratch coat with a slight twisting motion until mortar squeezes out the edges. Do not slide the stone, as this breaks the suction bond.
- Jointing and Tooling: For jointed profiles, use a grout bag to fill the gaps. Once the mortar becomes thumbprint-hard, strike the joints with a convex jointer to compress the surface and shed water.
Expert Troubleshooting: Avoiding Common Failures
Efflorescence (White Powdery Stains)
The Problem: Soluble salts migrate to the surface of the stone or mortar, leaving a chalky white residue.
The Cause: Excess moisture in the scratch coat or using unwashed masonry sand containing high salt content.
The Fix: Prevent it by using washed, kiln-dried sand and allowing the scratch coat to fully cure before applying stone. If it occurs, remove it with a dry stiff-bristle brush and a specialized efflorescence cleaner. Never use muriatic acid on manufactured stone, as it will strip the iron-oxide pigments.
Delamination and Stone Popping
The Problem: Stones detach from the wall months after installation.
The Cause: Installing in temperatures below 40°F (4°C) or above 90°F (32°C) without climate control, causing the mortar to freeze before curing or dry out too rapidly.
The Fix: Maintain ambient temperatures between 40°F and 90°F during installation and for 48 hours post-application. In high heat, mist the scratch coat with water immediately before applying the setting mortar to prevent the dry substrate from sucking moisture out of the fresh bond layer.
Mortar Smearing on Dry-Stack Profiles
The Problem: Mortar squeezes out onto the face of dry-stack stones, ruining the shadow-line aesthetic.
The Cause: Over-buttering the back of the stone or using mortar that is too wet.
The Fix: Keep the mortar mix on the stiff side. Apply mortar only to the center 60% of the stone's back, leaving the perimeter clear. If smearing occurs, let the mortar dry completely, then carefully chip it off with a wooden stick or stiff nylon brush—never use metal wire brushes on manufactured stone.
Written by
David NakamuraDavid Nakamura is a licensed architect (AIA) and construction technology writer focused on sustainable building methods, mass timber engineering, and high-performance building envelopes. He holds a Master of Architecture from the University of Washington and is a certified Passive House Consultant (CPHC). David spent eight years at the Seattle firm Mithun, where he led the design of three LEED Platinum projects, before founding his own practice specializing in net-zero residential design. He serves on the editorial advisory board of GreenBuilder Magazine and has authored peer-reviewed papers on cross-laminated timber (CLT) connections for the Journal of Structural Engineering. In his spare time, David teaches woodworking at Pratt Fine Arts Center and kayaks the Puget Sound.
More from David Nakamura
View all
Construction Cost
Labor Cost to Build a Deck Per Sq Ft: 2026 Installation Guide
Discover the exact labor cost to build a deck per sq ft in 2026. This installation guide breaks down contractor rates, complexity factors, and hidden fees.
Aug 4, 2026

Construction Cost
How Much Does It Cost to Build a 3 Bedroom House? Financing Guide
Learn exactly how much it costs to build a 3 bedroom house and explore 2026 financing options, construction loan types, and budget frameworks for your build.
Aug 4, 2026

Construction Cost
Cost to Build a Tennis Court: 2026 Guide
How much does it cost to build a tennis court in 2026? Breakdowns for asphalt, concrete, and synthetic surfaces plus fencing and lighting.
Jul 30, 2026