Metal Lath Stone Veneer Guide: Complete Installation & Specs
Master metal lath stone veneer installation. Learn substrate specs, diamond mesh vs. ribbed lath, fastening patterns, and ASTM standards for flawless results.

The Structural Backbone of Veneer Masonry
When installing manufactured or natural stone veneer over non-masonry substrates like wood framing, steel studs, or existing drywall, the mortar cannot bond directly to the surface. Metal lath serves as the critical structural bridge, providing a three-dimensional matrix that encapsulates the mortar scratch coat and transfers the substantial dead load of the stone to the building's framing. According to the Expanded Metal Lath Association (EMLA), proper lath selection and fastening are the primary determinants of long-term veneer adhesion, preventing catastrophic delamination and shear failure.
This guide details the exact material specifications, fastening protocols, and moisture management strategies required for compliant, durable metal lath stone veneer installations in both exterior and interior applications.
Diamond Mesh vs. Ribbed Lath: Selecting the Right Profile
Not all metal lath is engineered for the same load-bearing demands. Stone veneer installations primarily utilize two profiles, each with distinct mechanical properties.
Self-Furring Diamond Mesh Lath
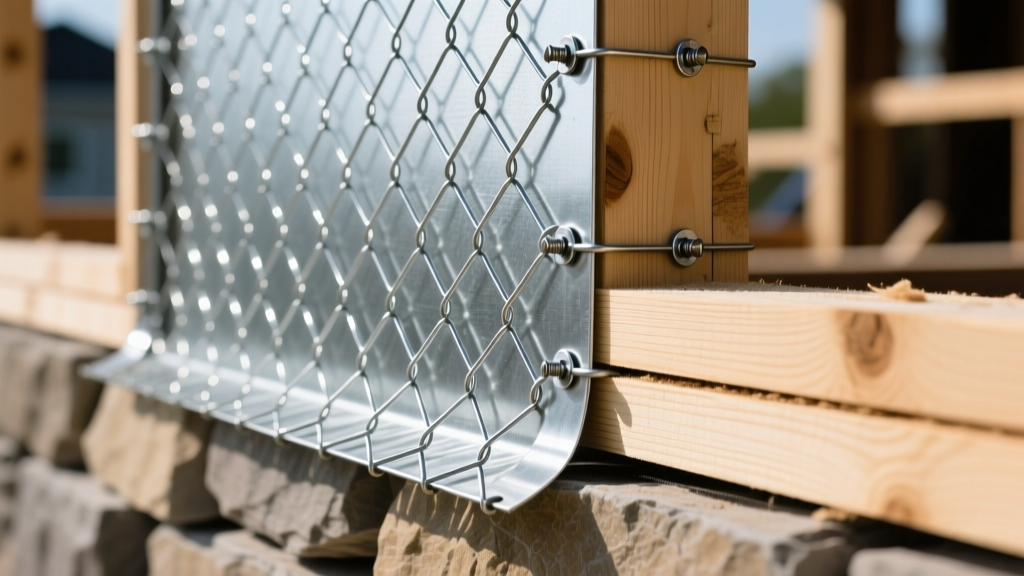
Diamond mesh is the industry standard for residential and light-commercial stone veneer. The critical feature is the 'self-furring' dimple—small embossed nodes that hold the wire mesh approximately 1/4 inch away from the weather-resistive barrier (WRB). This gap is non-negotiable; it allows the Type S mortar scratch coat to squeeze behind the wire, fully encapsulating the metal and creating a true mechanical lock. If flat, non-furring lath is used, the mortar only grips the front half of the wire, reducing shear strength by up to 50%.
Ribbed (High-Rib) Lath
Ribbed lath features longitudinal stiffening ribs spaced 3 to 4 inches apart. It is specified for heavy natural stone veneers (such as thick-cut granite or limestone exceeding 15 lbs per square foot) or in high-seismic zones where additional rigidity is required to resist racking forces. The ribs act as miniature structural beams, reducing deflection between framing members.
Material Specifications and Galvanization Standards
Specifying the correct weight and corrosion resistance is vital for passing municipal inspections and ensuring longevity. The ClarkDietrich Building Systems technical data sheets outline the baseline requirements for ASTM C847 (Standard Specification for Metal Lath).
| Specification | Diamond Mesh (Standard) | Diamond Mesh (Heavy) | Ribbed Lath |
|---|---|---|---|
| Weight | 2.5 lbs / sq yd | 3.4 lbs / sq yd | 3.4 lbs / sq yd |
| Thickness (Nominal) | 0.019 inches | 0.025 inches | 0.025+ inches |
| Exterior Coating | G90 Galvanized | G90 Galvanized | G90 Galvanized |
| Interior Coating | G60 Galvanized | G60 Galvanized | G60 Galvanized |
| Best Application | Manufactured stone, lightweight natural stone | Heavy natural stone, high-wind/seismic zones | Thick-cut masonry, commercial facades |
Never use G60 galvanized or ungalvanized (paint-bonded) lath for exterior stone veneer. The high alkalinity of Portland cement mortar will rapidly corrode inferior coatings, causing rust stains to bleed through the porous stone and mortar joints within 12 to 18 months. Always mandate G90 hot-dipped galvanization for exterior applications.
Substrate Preparation and Weep Screed Integration
Before a single sheet of lath is unrolled, the moisture management layer must be perfected. Exterior stone veneer is a 'drainage cladding' system; water will inevitably penetrate the stone and mortar matrix.
- Weep Screed Installation: Install a corrosion-resistant weep screed (minimum 0.019-inch galvanized steel or PVC) at the base of all exterior walls. The weep screed must extend at least 4 inches above grade or 2 inches above paved surfaces.
- WRB Lapping: Apply two layers of Grade D building paper or a code-approved house wrap. The WRB must lap over the upper flange of the weep screed by at least 2 inches. This ensures water draining down the WRB exits through the weep holes rather than behind the screed.
- Flashing Integration: Above all windows, doors, and penetrations, install Z-flashing that directs water outward over the lath and stone, never behind it.
Fastening Protocols: Securing the Matrix
Lath failure almost always originates at the fastener. According to ASTM C1063 (Standard Specification for Installation of Lathing and Furring), fasteners must penetrate directly into the structural framing, not just the wood sheathing or drywall.
Fastener Selection and Penetration
Use galvanized roofing nails (minimum 1-1/2 inch long, 7/16 inch heads) or galvanized staples (minimum 1-1/2 inch crown, 16-gauge wire). If you are fastening through 1/2-inch OSB sheathing, a 1-1/2 inch fastener only penetrates the underlying wood stud by 1 inch. For heavy stone veneer, specify 2-inch or 2-1/2 inch fasteners to achieve a minimum 1-inch penetration directly into the solid framing member.
Spacing and Overlap Requirements
- Field Fastening: Space fasteners maximum 6 inches on center (o.c.) along all framing members (studs, plates, blocking).
- Edge Fastening: Secure all edges and overlaps with fasteners spaced no more than 6 inches o.c.
- Side Laps: Overlap adjacent sheets by a minimum of 1/2 inch (one diamond mesh row).
- End Laps: Overlap end joints by a minimum of 1 inch, and ensure the end lap occurs directly over a framing member or is securely wired together.
The Scratch Coat: Achieving the Mechanical Lock
The metal lath is only half of the substrate equation. The scratch coat mortar is what binds the stone to the lath. The Northwest Wall and Ceiling Bureau (NWCB) mandates specific mixing and application protocols for veneer scratch coats.
Always use Type S mortar (a blend of Portland cement, hydrated lime, and masonry sand). Type S offers higher tensile and bond strength than Type N, which is critical for supporting the sheer weight of stone veneer. Apply the mortar to a thickness of 1/2 inch, forcing it completely through the mesh to encapsulate the wires. While the mortar is still plastic, score it horizontally with a stiff-bristled brush or a scarifier to create deep grooves. These horizontal grooves provide the mechanical key for the final setting bed that will adhere the stone.
Pro-Tip: Cure the scratch coat for a minimum of 24 to 48 hours before applying stone. Mist the scratch coat lightly with water 2 to 3 times a day during the curing period to prevent rapid moisture loss and shrinkage cracking, which compromises the bond strength.
2026 Cost and Yield Breakdown
Accurate budgeting requires understanding both material yields and the hidden costs of ancillary components. As of early 2026, material pricing for metal lath systems has stabilized following supply chain fluctuations, but labor remains the dominant cost driver.
| Component | Estimated Unit Cost (2026) | Coverage / Yield | Cost Per Sq. Ft. of Wall |
|---|---|---|---|
| 2.5 lb G90 Diamond Mesh Lath | $14.00 - $18.00 per sheet | 18 sq ft (27" x 96") | $0.78 - $1.00 |
| Galvanized Roofing Nails (5 lb box) | $22.00 - $28.00 | ~400 sq ft of lath | $0.06 |
| PVC Weep Screed (10 ft stick) | $8.50 - $11.00 | 10 linear ft | $0.85 - $1.10 (linear) |
| Type S Mortar Mix (80 lb bag) | $9.00 - $12.00 | ~12 sq ft at 1/2" thick | $0.75 - $1.00 |
When calculating total substrate costs, contractors should budget approximately $2.50 to $3.50 per square foot for the complete lath, WRB, weep screed, and scratch coat materials. Factoring in specialized masonry labor, the fully installed substrate preparation typically adds $6.00 to $9.00 per square foot before the stone veneer itself is even unboxed.
Interior vs. Exterior Adjustments
For interior applications (such as a living room fireplace surround), the cost drops significantly. The WRB, weep screed, and G90 galvanization requirements are eliminated. Standard G60 lath and a single layer of building paper (or direct application over painted drywall using a bonding agent and lath) can reduce interior substrate material costs by up to 40%. However, the 6-inch on-center fastening schedule into the wall studs remains identical to ensure the heavy stone does not pull the drywall away from the framing.
Written by
Marcus ChenMarcus Chen is a licensed structural engineer (PE) and building materials analyst with over 12 years of experience across residential, commercial, and industrial construction. He holds a Master of Science in Civil Engineering from UC Berkeley and spent six years at Thornton Tomasetti before transitioning to independent consulting and technical writing. Marcus specializes in material selection for seismic-prone regions, concrete reinforcement strategies, and lifecycle cost analysis. His work has been cited by the American Concrete Institute (ACI) and the Structural Engineers Association of California (SEAOC). When he is not on a job site or at his desk, you will find him hiking the Sierra Nevada or restoring a 1920s craftsman bungalow in Oakland, CA.
More from Marcus Chen
View all
Construction Cost
How Much Did the Eiffel Tower Cost to Build?
How much did the Eiffel Tower cost to build in 1889? We adjust for inflation and compare its budget to modern skyscraper construction.
Aug 4, 2026

Fire Resistance
What Is a Fire Resistant Material? Testing & Certification Guide
Discover what is a fire resistant material through ASTM and UL testing. Learn how fire ratings, certifications, and assemblies work in construction.
Aug 4, 2026

Construction Cost
How Much Did the Burj Khalifa Cost to Build?
How much did the Burj Khalifa cost to build? We break down the $1.5B project and extract 5 money-saving strategies for your next build.
Jul 30, 2026