Gray Veneer Stone: The Complete Material and Cost Guide
Discover everything about gray veneer stone, including natural vs. manufactured types, 2026 cost breakdowns, and expert installation tips.

Natural vs. Manufactured Gray Veneer Stone: A Technical Comparison
Gray veneer stone remains one of the most versatile and sought-after cladding materials in both residential and commercial construction. Its neutral tonal range—from cool slate grays to warm, weathered charcoal—allows it to anchor modern minimalist designs or complement traditional rustic aesthetics. However, specifying the right material requires understanding the fundamental differences between natural and manufactured options, particularly regarding weight, porosity, and structural requirements.
Natural gray veneer stone is quarried and sliced into thin profiles, typically ranging from 0.75 to 1.5 inches thick. Common natural varieties include bluestone, basalt, limestone, and slate. These materials must meet ASTM C503 (for marble) or ASTM C568 (for limestone) standards for exterior durability. Manufactured stone veneer (MSV), conversely, is a Portland cement-based composite cast in molds taken from real stone. MSV must comply with ASTM C1670, which dictates strict limits on water absorption, freeze-thaw durability, and compressive strength.
| Feature | Natural Gray Stone (e.g., Bluestone, Basalt) | Manufactured Gray Stone (MSV) |
|---|---|---|
| Weight | 10 - 15 lbs per sq. ft. | 6 - 9 lbs per sq. ft. |
| Thickness | 0.75" - 1.5" | 0.5" - 2.5" (varies by profile) |
| Color Consistency | High natural variation; requires blending | Controlled; integral pigments ensure batch consistency |
| Cutting & Shaping | Requires wet saw with diamond blade | Easily cut with standard masonry blade or hatchet |
| Water Absorption | Low (especially basalt and slate) | Moderate (requires sealing in freeze-thaw zones) |
2026 Cost Breakdown: Material, Labor, and Hidden Prep Expenses
Budgeting for gray veneer stone requires looking beyond the per-square-foot material cost. The total installed price is heavily influenced by substrate preparation, scaffolding, and the complexity of the profile (e.g., flat veneer vs. corner pieces). Corner pieces are typically sold by the linear foot and cost significantly more than flat fieldstone.
| Cost Category | Manufactured Gray Veneer | Natural Gray Veneer |
|---|---|---|
| Material (Flat pieces) | $5.50 - $9.00 / sq. ft. | $11.00 - $18.00 / sq. ft. |
| Material (Corners) | $9.00 - $14.00 / lin. ft. | $18.00 - $28.00 / lin. ft. |
| Substrate Prep (Lath, WRB, Mortar) | $2.50 - $4.00 / sq. ft. | $2.50 - $4.00 / sq. ft. |
| Professional Labor | $12.00 - $18.00 / sq. ft. | $16.00 - $24.00 / sq. ft. |
| Total Installed Cost | $20.00 - $31.00 / sq. ft. | $29.50 - $46.00 / sq. ft. |
Design Applications and Mortar Pairing Strategies
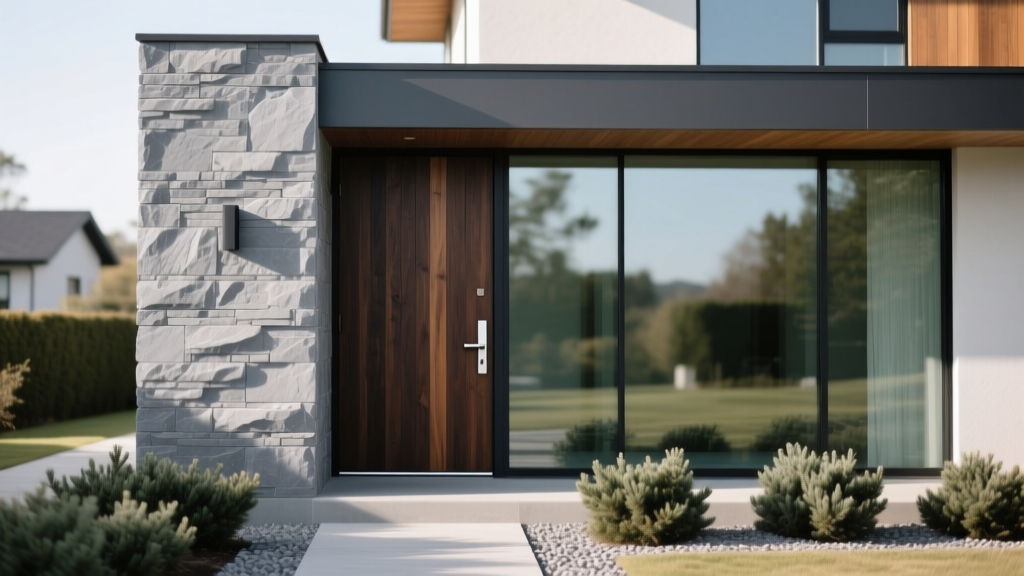
The visual impact of gray veneer stone is dictated as much by the mortar joint as by the stone itself. When designing with gray tones, the mortar color and joint profile act as a framing mechanism.
- Monolithic Dry-Stack Look: Use a dark gray or charcoal Type S mortar with a flush or slightly raked joint. This minimizes the mortar lines, making the wall appear as a single, massive stone structure. Ideal for modern fireplace surrounds and contemporary exterior accents.
- High-Contrast Traditional: Pair cool gray bluestone or manufactured limestone with a bright white or buff mortar using a concave or grapevine joint profile. This highlights the individual stones and is highly effective for craftsman-style exteriors and wainscoting.
- Warm Rustic Blend: Use a warm, taupe-gray mortar with natural gray fieldstone. This bridges the gap between the cool stone and surrounding warm wood elements, such as cedar siding or timber frame beams.
For exterior applications in regions with severe freeze-thaw cycles, always specify a polymer-modified Type S mortar. The polymer additives increase flexural strength and reduce water permeability, preventing the mortar joints from cracking and allowing moisture behind the veneer.
Critical Installation Specifications for Long-Term Durability
Improper installation is the leading cause of veneer stone failure. Whether you are managing a contractor or executing a DIY build, adherence to the Eldorado Stone Installation Guidelines and local building codes is non-negotiable. The following framework applies to wood-frame and metal-stud exterior walls.
- Weather-Resistive Barrier (WRB): Apply two layers of Grade D felt paper or a high-performance commercial house wrap (like Tyvek CommercialWrap) over the exterior sheathing. The dual-layer approach creates a drainage plane, allowing any incidental moisture that penetrates the veneer to weep out safely.
- Corrosion-Resistant Metal Lath: Install self-furring, galvanized metal lath (minimum 2.5 lbs per square yard, meeting ASTM C847). Attach the lath using corrosion-resistant nails or staples driven directly into the wall studs, not just the sheathing. Overlap horizontal seams by 1 inch and vertical seams by 2 inches.
- Weep Screed Installation: At the base of the wall, install a corrosion-resistant weep screed (ASTM C2273). The screed must be placed a minimum of 4 inches above grade or 2 inches above paved surfaces to prevent ground moisture wicking and soil splash-back.
- The Scratch Coat: Apply a 3/8-inch to 1/2-inch thick scratch coat of Type S mortar over the lath. While the mortar is still wet, use a coarse rake or scarifier to score horizontal lines into the surface. This provides the mechanical tooth required for the setting bed to adhere. Allow the scratch coat to cure for 24 to 48 hours, keeping it lightly misted if temperatures exceed 80°F.
- Setting the Stone: Apply a 1/2-inch setting bed of mortar to the wall and 'butter' the back of each stone with a 1/2-inch layer of mortar. Press the stone firmly into place until mortar squeezes out, ensuring no voids exist behind the unit.
Common Failure Modes: Delamination, Efflorescence, and Moisture
Understanding how gray veneer stone systems fail allows you to preemptively engineer them out of your project. According to the Brick Industry Association Technical Notes on masonry veneer, moisture management is the primary determinant of lifespan.
1. Efflorescence (White Powdery Staining)
Efflorescence occurs when water-soluble salts within the mortar, scratch coat, or concrete backing are dissolved by moisture and transported to the surface, where they crystallize upon evaporation. While more visible on dark gray or charcoal stones, it can plague any veneer. The Fix: Use low-alkali Portland cement in your mortar mix, ensure the concrete CMU backing is fully cured and sealed before applying the WRB, and avoid acid-based cleaners during the final wash, which can actually exacerbate salt migration.
2. Delamination and Spalling
Stones popping off the wall or the faces of natural stones flaking away (spalling) are usually the result of trapped moisture freezing and expanding. This happens when the drainage plane is compromised or when the weep screed is buried under soil or landscaping mulch. The Fix: Maintain strict grade-to-weep-screed clearances and ensure the WRB is lapped correctly (shingle-style) so water is directed outward, not inward toward the sheathing.
3. Mortar Joint Cracking
Horizontal or stair-step cracking in the mortar joints indicates structural deflection or thermal expansion that the veneer cannot accommodate. Veneer stone is a non-structural cladding; it cannot bear loads. The Fix: Incorporate soft joints (flexible sealant matching the mortar color) at floor lines, rooflines, and wherever the veneer meets dissimilar materials like window frames or wood trim, as recommended in the Architectural Record Masonry Section.
Sourcing and Brand Recommendations
When sourcing manufactured gray veneer stone, prioritize brands that utilize integral iron-oxide pigments rather than surface-applied stains. Surface stains will wear away during cutting or aggressive weather exposure, revealing the gray concrete core beneath. Industry leaders like Cultured Stone (specifically their Dressed Fieldstone in 'Fog' or 'Sage'), Eldorado Stone (their 'Rustic Ledge' in 'Chalk'), and Coronado Stone offer consistent color profiles backed by 50-year limited warranties. For natural stone, work with regional quarries to minimize freight costs, as the weight of natural bluestone and basalt can cause shipping expenses to eclipse the material cost itself if sourced cross-country.
Written by
Priya KapoorPriya Kapoor is a real estate market analyst and construction economics researcher with expertise in housing affordability, development feasibility, and infrastructure investment. She holds a Master of Regional Planning from Cornell University and previously worked as a senior analyst at CBRE's Investment Properties group, where she modeled returns for $4B in mixed-use development pipelines. Priya now runs an independent research practice advising developers, municipalities, and REITs on construction cost forecasting and market timing. She publishes the quarterly "BuildMat Market Pulse" report tracking material price indices across 12 commodity categories. Based in Austin, TX, Priya serves on the board of Habitat for Humanity Austin and is a marathon runner.
More from Priya Kapoor
View all
Construction Cost
Cost to Build a 1600 Sq Ft Home in 2026: Full Breakdown
Accurate 2026 cost to build a 1600 sq ft home—material, labor, and regional pricing breakdowns included. Plan your budget with real-time estimates.
Aug 11, 2026

Wood & Lumber
Name the Types of Wood for Pressure Treatment and Preservation
Learn how to name the types of wood best suited for pressure treatment. Compare species treatability, chemical retention levels, and 2026 preservation costs.
Aug 4, 2026

Stone & Masonry
Stone Veneer Suppliers Lindenhurst: 2026 Cost Analysis
Analyze 2026 stone veneer costs in Lindenhurst, NY. Compare local supplier pricing, delivery fees, and Suffolk County installation labor rates.
Aug 4, 2026