How to Install a Stone Veneer Kitchen Backsplash: Step-by-Step Guide
Learn how to install a stone veneer kitchen backsplash with our expert guide. Covers substrate prep, mortar selection, cutting, and sealing for lasting results.

The Technical Reality of Stone Veneer Backsplashes
Installing a stone veneer kitchen backsplash introduces significant weight, moisture, and thermal cycling to a high-traffic environment. Unlike lightweight ceramic subway tile, natural and manufactured stone veneers weigh between 8 and 15 pounds per square foot. The most common point of failure in residential stone backsplash installations is substrate deflection and adhesive re-emulsification, leading to delaminated panels and efflorescence staining. This guide details the precise substrate preparation, ANSI-compliant mortar selection, and installation sequencing required to ensure a permanent, fault-free stone veneer kitchen backsplash.
Material Specifications and Cost Breakdown
Before beginning, procure materials that meet specific industry standards. The Tile Council of North America (TCNA) and the Natural Stone Institute mandate specific adhesive and substrate criteria for vertical stone applications.
| Material Category | Specification / Product Example | Estimated Cost (2026) |
|---|---|---|
| Stone Veneer | Natural thin veneer (slate, quartzite) or manufactured architectural stone | $8.00 - $18.00 / sq. ft. |
| Substrate | 1/2" Cement backer board (e.g., HardieBacker 500 or USG Durock) | $1.20 - $1.80 / sq. ft. |
| Waterproofing | Liquid applied membrane (e.g., Custom Building Products RedGard) | $0.60 - $0.90 / sq. ft. |
| Adhesive (Mortar) | ANSI A118.15 Polymer-modified thinset (e.g., Laticrete 254 Platinum or Custom MegaLite) | $45.00 - $65.00 / 50lb bag |
| Sealer | Penetrating impregnator (e.g., Miracle Sealants 511 Impregnator) | $35.00 - $50.00 / quart |
Phase 1: Substrate Preparation and Moisture Management
The longevity of your stone veneer kitchen backsplash relies entirely on the rigidity and moisture resistance of the wall behind it.
Step 1: Remove Existing Surfaces
Strip the backsplash area down to the wall studs. Remove any existing tile, mastic, and standard gypsum drywall. Inspect the studs for plumb; any variance greater than 1/8 inch over 10 feet must be shimmed before attaching the backer board.
Step 2: Install Cement Backer Board
Fasten 1/2-inch cement backer board to the studs using corrosion-resistant backer board screws every 6 inches along the studs and 8 inches in the field. Leave a 1/8-inch gap between panels and fill these gaps with alkali-resistant fiberglass mesh tape embedded in thinset mortar. Do not use standard drywall joint compound.
Step 3: Apply Liquid Waterproofing Membrane
Kitchens generate significant steam and grease. Roll a liquid waterproofing membrane (like RedGard or Hydro Ban) over the cured cement board. Apply two coats at perpendicular angles to achieve a minimum dry film thickness of 30 mils. This barrier prevents moisture from migrating into the wall cavity and stops efflorescence (white salt deposits) from bleeding through the stone joints.
Phase 2: Mortar Selection and Mixing Protocol
Organic adhesives (mastic) are strictly prohibited for stone veneer. Mastic requires air to cure; when trapped behind dense, non-porous stone or thick veneer profiles, it remains soft and re-emulsifies when exposed to kitchen steam, causing the stone to slide off the wall.
Mix the thinset using a low-speed drill (300 RPM) and a mixing paddle. Add the powder to the water, mix for 3 minutes, let the mixture slake (rest) for 10 minutes to allow the polymers to fully hydrate, and remix for 2 minutes. The final consistency should resemble thick peanut butter and hold its shape on a trowel without slumping.
Phase 3: Cutting and Dry-Fitting the Veneer
Stone veneer requires precise cutting to fit around outlets, cabinets, and corners. Dry-fit the entire layout before mixing your final batches of mortar.
- Wet Saw Requirement: Use a continuous rim diamond blade on a wet saw for natural stone to prevent chipping the edges. For manufactured stone, a masonry blade on an angle grinder (used outdoors with a respirator) is sufficient.
- Electrical Outlets: Measure the exact coordinates of receptacle boxes. Cut the stone veneer using a diamond-tipped hole saw or a jigsaw with a carbide-grit blade. The stone must overlap the electrical box flange by at least 1/8 inch so the cover plate hides the cut edge.
- Corner Treatment: If your stone veneer does not include pre-cast corner pieces, you must miter the edges at a 45-degree angle using a wet saw with an adjustable tilt table, or create a woven corner by alternating the overlapping stone profile.
Phase 4: Installation and Pointing Techniques
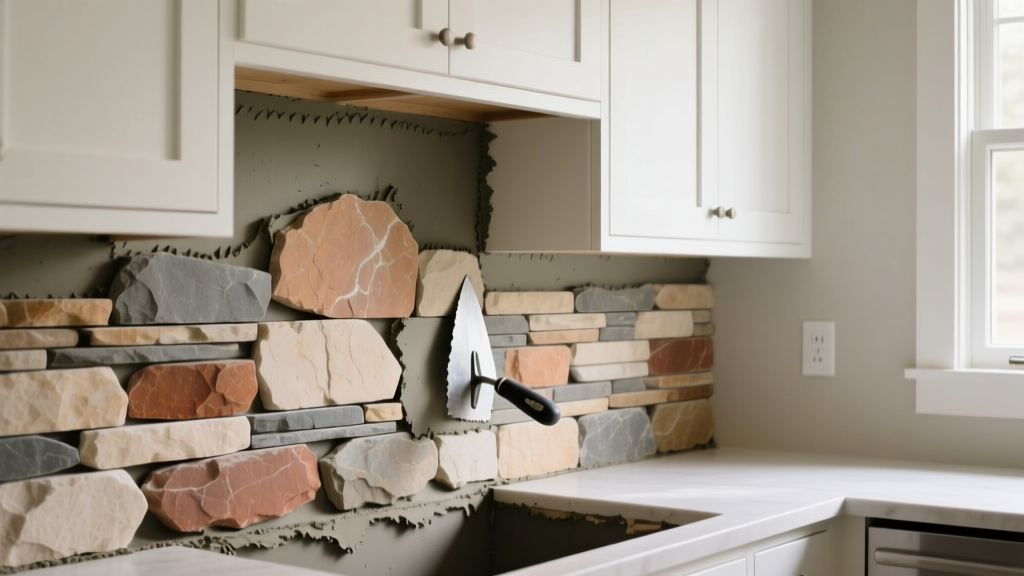
Begin installation at the bottom of the backsplash, resting the first course on a temporary ledger board screwed into the wall to support the weight while the mortar cures. Ensure the ledger is perfectly level.
The Back-Buttering Mandate
Because stone veneer has an uneven back profile, troweling the wall alone is insufficient. You must "back-butter" every piece. Use the flat side of your trowel to scrape a thin layer of thinset directly onto the back of the stone, forcing it into the crevices. Then, apply a 1/2-inch x 1/2-inch square-notched trowel bed of mortar to the wall. Press the stone firmly into the wall mortar, twisting slightly to collapse the ridges and achieve a minimum of 85% mortar contact, which is the industry standard for vertical stone applications.
Managing Joints and Pointing
Depending on the style of your stone veneer kitchen backsplash, you will either use a dry-stack (ledgestone) method or a grouted joint method.
- Dry-Stack (Mortarless): Press stones tightly together. Mortar will inevitably squeeze out into the joints. Use a stiff, dry brush to immediately sweep away excess mortar before it skins over. Do not use water to clean dry-stack joints, as it will smear the cement paste and stain the stone face.
- Grouted Joints: Maintain a consistent 1/2-inch to 1-inch gap using spacers. Once the thinset has cured for 24 hours, apply a Type S masonry mortar or a specialized stone pointing mix using a grout bag. Tool the joints with a convex jointer when the mortar becomes thumbprint-hard. Avoid standard sanded tile grout, as it lacks the structural flexibility required for thicker stone profiles.
Phase 5: Sealing and Long-Term Maintenance
Natural stone is inherently porous. In a kitchen environment, unsealed stone will rapidly absorb cooking oils, tomato acids, and grease, resulting in permanent dark spots.
Wait a minimum of 72 hours after installation to allow all moisture from the thinset and grout to evaporate. Apply a high-quality, solvent-based penetrating impregnating sealer (such as Miracle Sealants 511 or Aqua Mix Sealer's Choice Gold). Do not use topical acrylic sealers, which will trap moisture inside the stone and create a plastic-like, unnatural sheen.
- Apply the sealer using a low-pressure pump sprayer or a microfiber applicator pad.
- Allow it to penetrate for 5 to 15 minutes. Keep the surface wet during this time.
- Crucially, buff off all excess sealer from the surface with a clean, dry cotton towel before it dries. Dried surface sealer creates a hazy, unremovable film.
- Perform a water-drop test: if water beads on the surface, the seal is successful. Reapply a second coat if the stone darkens upon contact with water.
Troubleshooting Common Installation Failures
Efflorescence (White Powdery Staining)
Cause: Water-soluble salts within the stone, mortar, or substrate are pushed to the surface by migrating moisture.
Fix: Ensure a waterproofing membrane was applied behind the backer board. To remove existing efflorescence, dry-brush the area vigorously. If persistent, use a specialized efflorescence remover (phosphoric acid blend) formulated for natural stone, never muriatic acid, which will etch calcium-based stones like marble or limestone.
Hollow-Sounding or Loose Stone Panels
Cause: Inadequate mortar coverage (less than 85%) or failure to back-butter the stone, resulting in void spaces behind the veneer.
Fix: Unfortunately, there is no reliable surface-level fix for voided vertical stone. The affected stones must be carefully pried off, the old mortar chiseled away, and reinstalled using the proper back-buttering technique.
Grease Staining Near the Cooktop
Cause: Penetrating sealers wear down over time due to heat and aggressive kitchen cleaning chemicals.
Fix: Reseal the backsplash area behind the stove annually. For active grease stains, apply a poultice made of baking soda and acetone, cover with plastic wrap for 24 hours to draw the oil out of the stone pores, and then wipe clean.
Written by
James ThorntonJames Thornton is a construction industry veteran with 25 years of hands-on experience in wood framing, lumber grading, and residential building codes. He started as a framing carpenter in rural Oregon, earned his ICC Residential Building Inspector certification, and eventually became a senior plan reviewer for the City of Portland Bureau of Development Services. James holds a B.S. in Wood Science & Technology from Oregon State University and is a certified lumber grader through the West Coast Lumber Inspection Bureau (WCLIB). He has inspected over 3,000 residential construction sites and authored the city's internal guide on advanced framing techniques (2x6 at 24" O.C.). James lives in Bend, OR, where he builds custom timber-frame cabins and competes in lumberjack sports.
More from James Thornton
View all
Insulation
Best Home Insulation Materials: Complete 2026 Guide
Compare top home insulation materials for 2026. Find R-values, installed costs per square foot, and best uses for fiberglass, spray foam, and mineral wool.
Aug 4, 2026

Sustainable Building
Certify Your Green Building Material for LEED and WELL
Step-by-step guide to certifying a green building material for LEED v5 and WELL v2. Master EPDs, HPDs, and VOC limits for 2026 project specifications.
Aug 4, 2026

Stone & Masonry
Veneer Stacked Stone Panels: Interior Design & Style Showcase
Discover how veneer stacked stone panels transform interiors. Explore modern design profiles, material pairings, and technical installation specs.
Aug 4, 2026