How to Install Veneer Stone: Buyer's Material & Prep Guide
Master how to install veneer stone with our buyer's guide. Compare substrates, select Type S vs. polymer mortar, and prevent delamination.

The Buyer's Dilemma: Manufactured vs. Natural Stone Veneer
When sourcing materials for a masonry facade or interior accent wall, understanding how to install veneer stone begins long before the first trowel touches mortar. As a buyer or project manager, your selection between manufactured stone veneer (MSV) and natural stone dictates the structural preparation, mortar chemistry, and labor costs required for a successful build. Manufactured stone, governed by ASTM C1670 standards, is a Portland cement-based product cast in molds. Natural stone veneer, governed by ASTM C1780, is quarried and sliced.
| Feature | Manufactured Stone Veneer (MSV) | Natural Thin Stone Veneer |
|---|---|---|
| Weight | 8 – 12 lbs per sq. ft. | 10 – 15 lbs per sq. ft. |
| Thickness | 1.5 to 3 inches | 1 to 2.5 inches (sawn thin) |
| Substrate Flexibility | High (Wood frame, CMU, masonry) | Moderate (Requires rigid backing) |
| Mortar Requirement | Type S or Polymer-Modified | Type S or Type N (depending on climate) |
| Color Consistency | High (Batch-controlled) | Low (Natural geological variation) |
Substrate Selection: What Lies Beneath Dictates Longevity
The most critical decision in learning how to install veneer stone is specifying the correct substrate and moisture management system. Veneer stone is an adhered, non-load-bearing cladding; it relies entirely on the shear strength of the mortar bond to the substrate. According to building science principles detailed by the National Park Service Preservation guidelines, moisture management behind adhered masonry is non-negotiable.
Wood-Frame Construction (Exterior)
For exterior wood-frame walls, you must specify a drainage plane. The International Residential Code (IRC R703.7) requires a minimum of one layer of Grade D building paper or an approved water-resistive barrier (WRB). However, best practice for 2026 construction mandates a dual-layer system: a primary housewrap (like Tyvek) covered by a secondary layer of Grade D paper. This creates a capillary break. Over this, specify 18-gauge, 1-inch self-furring galvanized metal lath, fastened every 6 inches into the wall studs with corrosion-resistant nails.
Concrete Masonry Units (CMU) and Poured Concrete
While some manufacturers allow direct application of mortar to clean, unpainted CMU, specifying a lath base coat is the superior buyer choice. CMU can suffer from efflorescence and moisture migration. Applying a metal lath and a 1/2-inch scratch coat isolates the veneer from the structural concrete's moisture fluctuations, drastically reducing the risk of delamination.
Never omit the weep screed at the base of the wall. Specify a corrosion-resistant weep screed with a minimum 3.5-inch vertical flange. It must be installed at least 4 inches above finished soil grade and 2 inches above paved surfaces to prevent ground moisture from wicking into the lath and causing bottom-course rot.
Mortar & Adhesive Selection: Type S vs. Polymer-Modified
Do not allow contractors to use standard brick-laying mortar or thin-set tile adhesive for veneer stone unless explicitly approved by the stone manufacturer. The mortar must accommodate the specific weight and porosity of the veneer.
- Type S Mortar: The industry baseline for exterior veneer stone. With a compressive strength of 1,800+ psi, Type S (typically 1 part Portland cement, 1/2 part lime, 4.5 parts sand) provides the high shear and tensile strength required to hold heavy stone profiles against lateral wind loads and freeze-thaw cycles.
- Type N Mortar: Rated at 750+ psi, Type N is highly workable and flexible. It is suitable for interior applications or exterior applications in mild climates where the stone profile is relatively lightweight (under 10 lbs/sq ft).
- Polymer-Modified Veneer Mortars: Products like Quikrete Veneer Stone Mortar or Laticrete ProLite incorporate latex polymers. These are the premium buyer choice for high-shear applications, such as installing stone over existing painted masonry or in extreme freeze-thaw zones. They offer superior adhesion and reduced efflorescence due to lower water-retention requirements.
Step-by-Step Installation Framework for Project Managers
When overseeing the installation, verify that your masonry crew follows this exact sequence. Deviations here are the primary cause of warranty voids.
- The Scratch Coat Application: After lath is secured, the crew must apply a 1/2-inch thick layer of Type S mortar. Before it sets, this coat must be "scratched" with a coarse rake or stiff brush to create horizontal grooves. Crucial: The scratch coat must cure for a minimum of 48 hours (longer in high humidity) before any stone is applied. This prevents the scratch coat from drawing moisture out of the setting mortar later.
- Dry Layout and Corner First: Stones must be dry-laid on the ground to mix sizes and colors. Installation always begins at the corners. Corner pieces must wrap seamlessly, with the mortar joint tooled to match the bed joints.
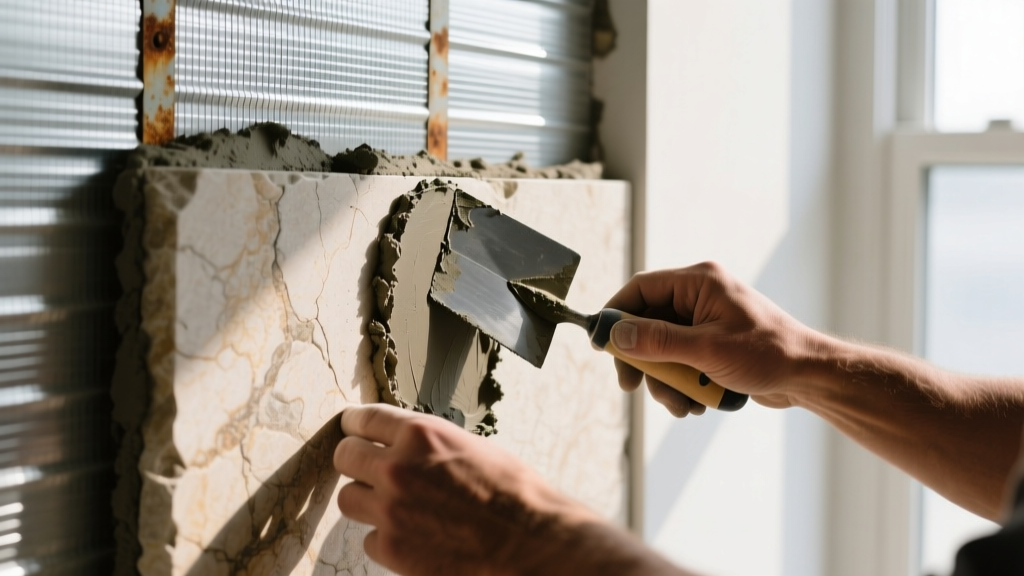
- Back-Buttering (The Non-Negotiable Step): Every single piece of veneer stone must be "back-buttered." The mason must apply a 1/2-inch layer of mortar to the entire back surface of the stone, creating a raised ridge in the center. When pressed against the scratch coat, this ridge collapses, pushing air out and ensuring 100% mortar contact. Spot-bonding (applying mortar only to the edges) is an immediate fail condition.
- Jointing and Tooling: For jointed profiles (like fieldstone or brick styles), joints should be kept between 1/2-inch and 3/4-inch. Mortar joints must be tooled with a concave jointer or V-jointer when the mortar is "thumbprint hard" to compress the joint and seal it against water intrusion.
Common Failure Modes & How Buyers Can Prevent Them
Understanding how installations fail allows you to write preventative measures into your contractor agreements.
1. Delamination and Stone Drop-Off
The Cause: Lack of back-buttering, installing over painted surfaces without mechanical abrasion, or applying mortar in freezing temperatures. Mortar stops curing and loses bond strength if temperatures drop below 40°F (4°C) within 24 hours of application.
The Fix: Mandate heated enclosures for cold-weather masonry. Require a mock-up panel where the buyer can physically pull a stone off after 48 hours to verify the mortar bond tore the stone face rather than separating cleanly from the back.
2. Efflorescence (White Powdery Staining)
The Cause: Soluble salts within the Portland cement or the stone itself are dissolved by moisture and migrate to the surface. This is common when stones are left uncovered in the rain before installation, or when the wall lacks a proper cap or weep screed.
The Fix: Specify low-alkali Portland cement in your mortar mix. Ensure all stone pallets are kept completely dry under tarps until the moment of installation. Never allow contractors to use muriatic acid to clean manufactured stone, as it will etch the cementitious surface and permanently alter the color.
Before finalizing your stone selection, request a sample and perform a water absorption test. Drop a few ounces of water on the back of the stone. If it absorbs instantly, the stone will suck moisture out of your mortar too quickly during installation, requiring the mason to pre-dampen the stones (a time-consuming labor cost). Dense, low-absorption stones are vastly superior for installation speed and bond integrity.
Cost Breakdown: Material vs. Labor in 2026
Budgeting for veneer stone requires looking beyond the per-box price of the stone itself. Accessories, mortar, and specialized masonry labor make up the bulk of the project cost. Below is the current national average pricing for residential and light commercial projects.
| Cost Category | Manufactured Stone | Natural Thin Stone |
|---|---|---|
| Stone Material (Flats & Corners) | $7.00 – $14.00 | $14.00 – $28.00 |
| Mortar, Lath & WRB Accessories | $1.50 – $3.00 | $1.50 – $3.50 |
| Masonry Labor (Prep & Install) | $18.00 – $30.00 | $22.00 – $38.00 |
| Scaffolding & Equipment | $2.00 – $4.00 | $2.00 – $5.00 |
| Total Estimated Installed Cost | $28.50 – $51.00 | $39.50 – $74.50 |
By focusing on substrate integrity, specifying the correct polymer or Type S mortar, and strictly enforcing back-buttering protocols, buyers can ensure their veneer stone investment remains structurally sound and aesthetically flawless for decades. The cheapest mortar and the fastest installation crew will always cost more in the long run than doing the prep work correctly the first time.
Written by
Elena RodriguezElena Rodriguez is a civil engineer and technical writer specializing in concrete technology, masonry systems, and ASTM/ACI compliance. She earned her B.S. in Civil Engineering from Texas A&M University and spent a decade at a materials testing laboratory, performing over 2,000 concrete compressive strength tests and masonry prism evaluations. Elena is an ACI-certified Field Testing Technician (Grade I) and a member of ASTM Committee C12 on Natural Building Stone. She currently consults on forensic engineering cases involving concrete failures and moisture intrusion. Based in San Antonio, TX, Elena is a proud member of the Society of Women Engineers (SWE) and coaches her daughter's FIRST Robotics team.
More from Elena Rodriguez
View all
Walls & Panels
Cost Analysis: Light Gauge Steel Framing Advantages and Disadvantages
Evaluate light gauge steel framing advantages and disadvantages through a strict cost analysis lens, comparing material, labor, and lifecycle expenses.
Aug 4, 2026

Walls & Panels
Gypsum Board Types: Exact Specifications, Thickness & Dimensions
Compare standard, Type X, and moisture-resistant gypsum board types. Get exact specifications, thicknesses, dimensions, and ASTM standards for your project.
Aug 4, 2026

Fire Resistance
Best Fire-Resistant Outdoor Decking Materials: 2026 Buyer Guide
Discover the best fire-resistant outdoor decking materials for 2026. Compare Class A PVC, aluminum, and hardwood options for WUI compliance and safety.
Aug 4, 2026