Mastering Natural Stone Veneer Installation: A Complete Guide
Master natural stone veneer installation with our complete guide. Learn substrate prep, mortar selection, layout techniques, and sealing for lasting results.

The Structural Reality of Adhered Masonry
Natural stone veneer is not a superficial cladding; it is an adhered masonry system. Unlike anchored stone that relies on mechanical ties to a structural backup, adhered veneer depends entirely on the chemical and mechanical bond between the mortar, the metal lath, and the substrate. When a International Masonry Institute (IMI) engineer evaluates a veneer failure, it is almost never the stone that fails. The failure occurs at the bond line. Mastering natural stone veneer installation requires strict adherence to substrate preparation, precise mortar chemistry, and meticulous setting techniques to ensure the system withstands decades of thermal cycling, wind shear, and moisture intrusion.
Substrate Preparation Matrix
The substrate dictates the preparation protocol. Applying veneer directly to an unprepared surface guarantees delamination. Use the following matrix to determine your prep requirements based on the backup wall.
| Substrate Type | Moisture Barrier Required? | Metal Lath Required? | Preparation Specifics |
|---|---|---|---|
| Wood / Steel Framing (OSB, Plywood, DensGlass) | Yes (Two layers of Grade D paper or WRB) | Yes (2.5 lb/yd² self-furring) | Fasten lath into studs, not just sheathing. Overlap horizontal seams 1", vertical 2". |
| CMU (Concrete Masonry Units) | No (if sealed and above grade) | No (if clean, open-pored) | Remove all form release agents, paint, and dust. Apply bonding agent if surface is smooth. |
| Poured Concrete | No (if above grade) | Only if form-tie holes or smooth finish | Mechanically abrade smooth surfaces to achieve a minimum 1/16" profile for mortar key. |
Phase 1: Weather Barriers and Lath Installation
For framed construction, the weather-resistive barrier (WRB) is your primary defense against bulk water. Install two layers of ASTM D226 Grade D building paper or a high-performance fluid-applied membrane. The first layer acts as a drainage plane; the second protects the first from mortar alkalinity during the scratch coat application.
Lath Specification and Fastening
Use only 2.5 lb/yd² self-furring galvanized wire lath conforming to ASTM C1063. The "self-furring" dimples are critical: they hold the wire 1/4" away from the WRB, allowing the scratch coat mortar to flow behind the wire and fully encapsulate it. If the lath lays flat against the building paper, the mortar cannot wrap the wire, reducing the mechanical bond strength by up to 60%.
- Fasteners: Use 1.5" galvanized roofing nails or 1" crown staples.
- Spacing: Fasten every 6" on center vertically into the studs, and every 16" on center horizontally.
- Penetration: Fasteners must penetrate the wood stud by a minimum of 3/4". Never fasten solely into OSB or plywood sheathing.
Phase 2: Mortar Selection and the Scratch Coat
Do not use pre-mixed thinset or mastic for natural stone veneer. The system requires Portland cement-based mortar conforming to ASTM C270.
CRITICAL: Type S vs. Type N Mortar
Always specify Type S mortar for exterior adhered veneer. Type S achieves a minimum compressive strength of 1,800 psi and possesses high tensile bond strength, which is necessary to resist wind loads and freeze-thaw expansion. Type N mortar (750 psi) is suitable for interior, non-loadbearing applications but lacks the sheer bond strength required for exterior vertical cladding. Use a pre-blended product like SPEC MIX® or Sakrete® Type S to ensure consistent aggregate ratios.
Applying the Scratch Coat
- Wetting: Dampen the lath with a fine mist of water. Do not soak it; standing water will weaken the mortar bond.
- Application: Force the mortar through the lath using a flat trowel, then pull it to a uniform thickness of 1/2" to 3/4".
- Scoring: While the mortar is still thumbprint-hard, score it horizontally with a coarse rake or notched trowel. Horizontal grooves provide a mechanical shelf for the setting bed mortar to grip.
- Curing: Allow the scratch coat to cure for a minimum of 24 to 48 hours. Keep it damp by misting lightly if temperatures exceed 80°F (27°C) to prevent plastic shrinkage cracking.
Phase 3: Layout Strategy and Dry-Fitting
Natural stone is inherently irregular. Opening a single pallet and installing sequentially will result in severe color banding and size clustering. Before mixing your setting mortar, execute a dry-fit layout.
"Blend stone from a minimum of three different pallets simultaneously. Lay out a 4x4 foot section on the ground, mixing large ashlar pieces, small fieldstones, and varying color tones to establish a randomized, natural aesthetic before a single trowel touches the wall."
Always install corner pieces first. Corners dictate the horizontal coursing and the return depth. Dry-fit the corners to ensure the alternating long-and-short leg patterns align naturally without looking manufactured.
Phase 4: Setting the Stone and Back-Buttering
The setting bed mortar should be mixed to a slightly stiffer consistency than the scratch coat—often described as "buttery" but capable of holding a 1/2" notch without slumping.
The Back-Buttering Mandate
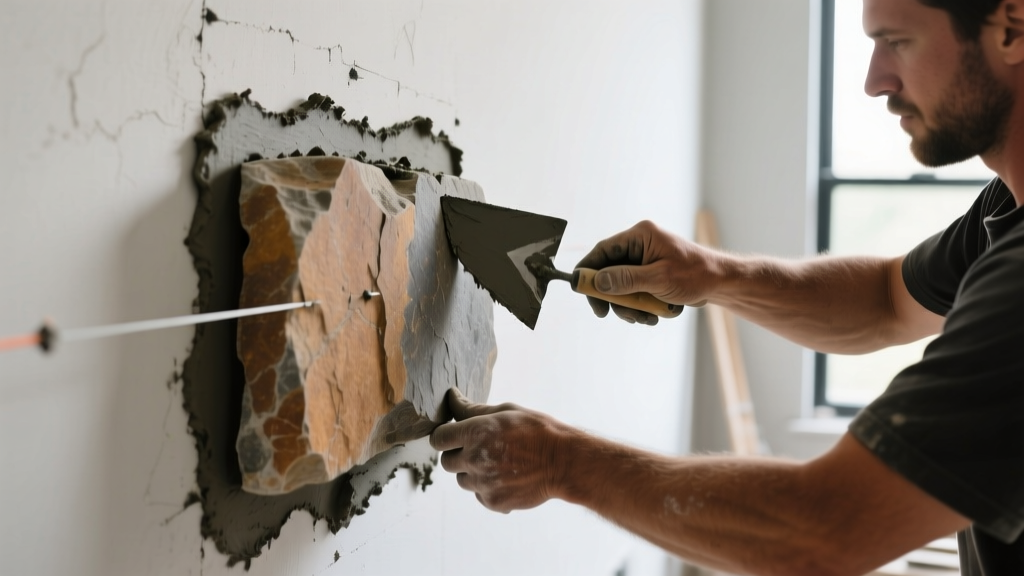
Unlike manufactured concrete veneer, which features a flat cast back, natural stone has deep voids, ridges, and irregularities. You must back-butter 100% of the stone's surface.
- Apply a 1/2" layer of mortar to the back of the stone, forcing it into every crevice.
- Apply a 1/2" layer of mortar to the scratch coat on the wall.
- Press the stone firmly into place with a slight twisting motion until mortar squeezes out the edges, ensuring a complete mechanical key with zero air pockets.
Failure to back-butter creates hollow voids behind the stone. When water enters these voids and freezes, the resulting expansion will pop the stone off the wall.
Phase 5: Jointing and Tooling
For dry-stacked veneer profiles, joints are kept tight and mortar is raked back or hidden. For grouted profiles (like fieldstone or mosaic), the mortar joints are an integral part of the design.
Wait until the setting mortar is thumbprint-hard (usually 30 to 60 minutes) before tooling the joints. Use a jointing tool or a stiff bristle brush to compress the mortar. Compressing the joint densifies the surface, pushing air voids to the interior and drastically reducing the joint's permeability to water. Never use a wet sponge to clean natural stone. Smearing wet mortar into the porous face of limestone or sandstone will cause permanent staining. Allow smudges to dry completely, then chip them off with a stiff, dry nylon brush.
Troubleshooting Common Failure Modes
Symptom: Efflorescence (White Powdery Staining)
Cause: Efflorescence occurs when water migrates through the masonry system, dissolving soluble salts (usually from the Portland cement) and depositing them on the surface as it evaporates. It is a moisture management issue, not a material defect.
Fix: Identify and eliminate the water intrusion source (missing flashing, clogged weep holes, or negative grading). Allow the wall to dry completely. Remove deposits with a stiff, dry brush. For stubborn cases, apply a specialized cleaner like Prosoco SureKlean® Weather Seal Siloxane PD, which penetrates deeply without altering the stone's natural color. Never use muriatic acid on natural stone, as it will etch calcium-based stones like limestone and marble.
Symptom: Delamination (Stone Falling Off)
Cause: Lack of mechanical key. This is almost always caused by failing to back-butter irregular natural stone, applying mortar to a dusty/unabraded concrete substrate, or using lath that was not self-furring, preventing mortar encapsulation.
Fix: Remove the failed stones. Chip away the old mortar down to the lath or substrate. Re-apply a bonding agent, re-scratch the area, and reset the stone using strict back-buttering protocols.
2026 Cost Breakdown and Project Budgeting
Budgeting for natural stone veneer requires accounting for the heavy material weight, which increases shipping and handling costs compared to lightweight manufactured alternatives. The following data reflects national averages for 2026.
| Cost Category | Low End (Basic Fieldstone) | High End (Premium Cut Ashlar) |
|---|---|---|
| Stone Material | $14.00 / sq. ft. | $28.00 / sq. ft. |
| Prep Materials (Lath, WRB, Mortar) | $3.50 / sq. ft. | $5.50 / sq. ft. |
| Professional Labor | $18.00 / sq. ft. | $35.00 / sq. ft. |
| Total Installed Cost | $35.50 / sq. ft. | $68.50 / sq. ft. |
Note: Scaffolding, structural reinforcement (if required by engineering for heavy stone loads on wood framing), and specialized waste disposal for heavy masonry debris can add 10-15% to the total project cost.
Sealing and Long-Term Maintenance
The decision to seal natural stone veneer is highly debated in the masonry community. While a high-quality silane/siloxane penetrating sealer will reduce water absorption and mitigate efflorescence, it can also trap vapor inside the wall if the interior side lacks a proper vapor retarder. If you choose to seal, use a 100% breathable, penetrating sealer that does not form a surface film. Film-forming acrylics will peel, yellow under UV exposure, and trap moisture, leading to spalling during freeze-thaw cycles. Always consult the manufacturer's installation guidelines regarding sealing, as some natural stones (like dense slates) benefit greatly from sealing, while highly porous sandstones may require specialized breathable treatments.
Written by
Marcus ChenMarcus Chen is a licensed structural engineer (PE) and building materials analyst with over 12 years of experience across residential, commercial, and industrial construction. He holds a Master of Science in Civil Engineering from UC Berkeley and spent six years at Thornton Tomasetti before transitioning to independent consulting and technical writing. Marcus specializes in material selection for seismic-prone regions, concrete reinforcement strategies, and lifecycle cost analysis. His work has been cited by the American Concrete Institute (ACI) and the Structural Engineers Association of California (SEAOC). When he is not on a job site or at his desk, you will find him hiking the Sierra Nevada or restoring a 1920s craftsman bungalow in Oakland, CA.
More from Marcus Chen
View all
Construction Cost
How Much Did the Eiffel Tower Cost to Build?
How much did the Eiffel Tower cost to build in 1889? We adjust for inflation and compare its budget to modern skyscraper construction.
Aug 4, 2026

Fire Resistance
What Is a Fire Resistant Material? Testing & Certification Guide
Discover what is a fire resistant material through ASTM and UL testing. Learn how fire ratings, certifications, and assemblies work in construction.
Aug 4, 2026

Construction Cost
How Much Did the Burj Khalifa Cost to Build?
How much did the Burj Khalifa cost to build? We break down the $1.5B project and extract 5 money-saving strategies for your next build.
Jul 30, 2026