Mastering Natural Stone Veneer Installation: A Pro Guide
Learn how to install natural stone veneer on exterior walls with our pro guide. Covers prep, mortar mixing, layout, and sealing for a flawless finish.

Substrate Assessment and Structural Preparation
Installing natural stone veneer on exterior walls requires rigorous substrate preparation. Unlike manufactured veneer, which is uniform in thickness and weight, natural stone varies wildly in density, porosity, and profile depth (typically 1 to 3.5 inches). According to guidelines published by the Natural Stone Institute, the structural framing must support a minimum dead load of 40 pounds per square foot (psf), though heavier stones like thick granite or basalt can exceed 55 psf. Always verify your wall framing and foundation load capacities before purchasing materials.
For wood-framed exterior walls, you must install a continuous Weather-Resistive Barrier (WRB) such as Tyvek HomeWrap or Grade D building paper. Overlap horizontal seams by 2 inches and vertical seams by 6 inches. For existing masonry or concrete substrates, the WRB is omitted, but the surface must be aggressively cleaned via power washing and etched with muriatic acid if efflorescence or form-release agents are present.
Essential Materials and Tool Checklist
Skip the generic hardware store mixes. Natural stone demands high-bond, high-compressive-strength materials to prevent delamination over seasonal freeze-thaw cycles.
- Metal Lath: 2.5 lb per square yard, self-furring galvanized diamond mesh (ASTM C847). Do not use non-galvanized lath; rust will bleed through the stone and compromise the mortar.
- Fasteners: 1-1/4 inch hot-dipped galvanized roofing nails (for wood framing) or Tapcon concrete screws (for masonry).
- Mortar: Type S Mortar Mix (e.g., Sakrete Type S or SPEC MIX Veneer Mortar). Type S provides a minimum compressive strength of 1,800 psi and superior flexural bond strength compared to Type N.
- Sealer: Breathable silane/siloxane penetrating sealer (e.g., PROSOCO Siloxane PD). Never use film-forming acrylic sealers, which trap internal moisture and cause stone spalling.
- Tools: Margin trowel, notched trowel (1/2-inch), wire brush, masonry hammer, diamond-blade wet saw, hawk, and a heavy-duty drill with a mixing paddle.
Step 1: Securing the Metal Lath
The metal lath acts as the structural skeleton for your scratch coat. Roll the lath horizontally across the wall. The Masonry Society dictates strict fastener spacing to ensure the lath can hold the immense weight of wet mortar and stone without pulling away from the sheathing.
| Substrate Type | Fastener Type | Vertical Spacing | Horizontal Spacing |
|---|---|---|---|
| Wood Studs (16" O.C.) | 1-1/4" Galvanized Roofing Nails | Every 6 inches | Every 16 inches (into studs) |
| Concrete / CMU | 1-3/4" Concrete Screws with washers | Every 8 inches | Every 16 inches |
Overlap all lath seams by a minimum of 1 inch horizontally and 2 inches vertically. Ensure the lath is pulled taut; any bubbling or sagging will result in an uneven scratch coat and weak mortar keys.
Step 2: Applying and Scoring the Scratch Coat
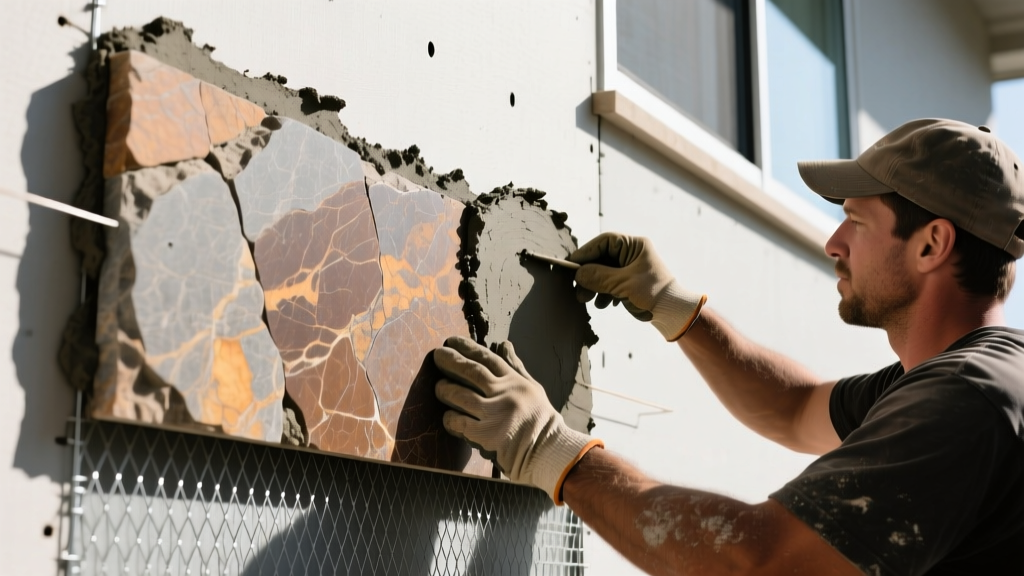
Mix the Type S mortar to a thick, peanut-butter consistency. Using a flat trowel, apply a 1/2-inch thick layer of mortar over the entire lath surface. Press the mortar aggressively into the mesh to ensure it encapsulates the wire and bonds to the WRB behind it.
While the scratch coat is still plastic (thumbprint hard), use a masonry rake or a notched trowel to score horizontal grooves into the surface. These horizontal ridges provide the mechanical lock for the final setting bed. Allow the scratch coat to cure for a minimum of 48 hours. Keep it damp by misting it with water twice a day if temperatures exceed 80°F to prevent rapid moisture loss and shrinkage cracking.
Step 3: Dry Layout and Mortar Preparation
Natural stone is not uniform. Before mixing your setting mortar, unbox at least 5 boxes of stone and lay them out on the ground. Sort the pieces by thickness, color, and size. Place corner pieces at the edges of your layout area. This dry-fitting process prevents you from realizing mid-installation that you have a cluster of identically colored or sized stones, which ruins the natural aesthetic.
The Mortar "Rib" Test
When mixing your setting mortar, add water incrementally. To test the consistency, scoop a trowel full of mortar and hold it vertically. The mortar should cling to the trowel without sliding off. Next, use the edge of your trowel to comb a ridge (a "rib") into the mortar on your hawk. If the rib holds its sharp shape without slumping or sagging, your water-to-cement ratio is correct. If it slumps, the mix is too wet and will cause the heavy stones to slide down the wall.
Step 4: Setting the Natural Stone Veneer
Always start from the bottom and work your way up. Install all corner pieces first, alternating the long and short legs to create a natural, interlocking pattern. Once corners are set, fill in the flat field stones.
- Prep the Stone: Use a wire brush to remove any loose dust or cutting slurry from the back of the stone. Lightly mist the back of highly porous stones (like sandstone or limestone) with water. This prevents the dry stone from sucking the moisture out of the mortar too quickly, which destroys the bond.
- Back-Buttering (Mandatory): Apply a 1/2-inch layer of mortar to the entire back of the stone using the flat side of your trowel. Press the mortar into the stone's pores.
- Wall Application: Apply a 1/2-inch layer of mortar to the scratch coat on the wall, covering an area slightly larger than the stone.
- Setting: Press the stone firmly into the wall mortar. Twist it slightly back and forth to squeeze out excess mortar and ensure full contact. The final mortar joint thickness should be between 1/2 inch and 1 inch, depending on your desired aesthetic.
Troubleshooting Common Installation Failures
Even experienced masons encounter issues when working with natural materials. Here is how to diagnose and prevent the most common failures recognized by the International Code Council (ICC) and building scientists:
- Efflorescence (White Powdery Stains): Caused by water migrating through the mortar and depositing soluble salts on the stone surface. Fix: Ensure proper roof overhangs, install weep screeds at the base of the wall, and use low-alkali Portland cement in your mortar mix. Clean existing stains with a specialized efflorescence cleaner, never straight muriatic acid, which can etch calcareous stones like limestone and marble.
- Delamination (Stones Falling Off): Almost always caused by failing to back-butter the stone, applying mortar to a dusty substrate, or letting the scratch coat dry out completely before setting. Fix: Remove the loose stone, wire-brush both the wall and the stone back to bare material, and reset using a polymer-modified thin-set mortar rated for natural stone.
- Mortar Smearing: Trying to clean mortar off the stone face while it is still wet. Fix: Let the mortar smears dry until they are crumbly (about 20-30 minutes), then brush them off with a stiff bristle brush. Never use a wet sponge, which will push the cement paste into the stone's pores.
Step 5: Jointing and Final Sealing
If your design calls for grouted joints (as opposed to dry-stacked), use a mortar bag to fill the gaps between the stones. Tool the joints with a convex jointer once the mortar is thumbprint hard to compress the surface and increase weather resistance. Wait a full 28 days for the mortar to completely cure before applying your breathable silane/siloxane sealer. Apply the sealer using a low-pressure pump sprayer, saturating the stone and joints until the liquid runs off, ensuring deep penetration without leaving a surface film.
2026 Cost Breakdown: Natural vs. Manufactured Veneer
When budgeting for an exterior project, it is critical to compare the true installed costs of natural stone against manufactured concrete alternatives. While natural stone carries a premium, it offers unmatched longevity and zero UV fading.
| Cost Factor | Natural Stone Veneer | Manufactured Stone Veneer |
|---|---|---|
| Material Cost (per sq. ft.) | $9.00 - $18.00 | $5.50 - $10.00 |
| Labor Cost (per sq. ft.) | $12.00 - $16.00 | $9.00 - $13.00 |
| Prep & Accessories | $2.50 - $4.00 | $2.50 - $4.00 |
| Total Installed (per sq. ft.) | $23.50 - $38.00 | $17.00 - $27.00 |
Labor costs for natural stone are inherently higher because the irregular thickness requires the mason to constantly adjust the mortar bed depth and spend more time cutting and fitting pieces around outlets, windows, and corners. However, for high-end residential builds and commercial facades, the return on investment and curb appeal of genuine natural stone consistently outpace manufactured alternatives.
Written by
James ThorntonJames Thornton is a construction industry veteran with 25 years of hands-on experience in wood framing, lumber grading, and residential building codes. He started as a framing carpenter in rural Oregon, earned his ICC Residential Building Inspector certification, and eventually became a senior plan reviewer for the City of Portland Bureau of Development Services. James holds a B.S. in Wood Science & Technology from Oregon State University and is a certified lumber grader through the West Coast Lumber Inspection Bureau (WCLIB). He has inspected over 3,000 residential construction sites and authored the city's internal guide on advanced framing techniques (2x6 at 24" O.C.). James lives in Bend, OR, where he builds custom timber-frame cabins and competes in lumberjack sports.
More from James Thornton
View all
Insulation
Best Home Insulation Materials: Complete 2026 Guide
Compare top home insulation materials for 2026. Find R-values, installed costs per square foot, and best uses for fiberglass, spray foam, and mineral wool.
Aug 4, 2026

Sustainable Building
Certify Your Green Building Material for LEED and WELL
Step-by-step guide to certifying a green building material for LEED v5 and WELL v2. Master EPDs, HPDs, and VOC limits for 2026 project specifications.
Aug 4, 2026

Stone & Masonry
Veneer Stacked Stone Panels: Interior Design & Style Showcase
Discover how veneer stacked stone panels transform interiors. Explore modern design profiles, material pairings, and technical installation specs.
Aug 4, 2026