Stone Veneer Garage Exteriors: Technical Specs and Load Limits
Technical specifications for stone veneer garage exteriors, covering structural load limits, substrate shear requirements, and moisture clearances.

Structural Load Requirements and Header Sizing
Applying a stone veneer garage exterior fundamentally alters the dead load profile of the structure. Unlike standard vinyl or fiber cement siding, which weighs less than 1.0 pound per square foot (psf), adhered manufactured stone veneer (MSV) typically imposes a dead load of 10 to 15 psf, while natural stone veneer can exceed 25 psf. The International Residential Code (IRC) Section R703.7 strictly limits adhered masonry veneer to a maximum dead load of 15 psf for wood-frame construction. If your specified natural stone exceeds this threshold, you must transition to an anchored veneer system with mechanical ties and a reinforced masonry wythe.
Garages present unique structural challenges due to massive door openings (typically 16x7 feet or 18x8 feet). These openings severely reduce the shear wall capacity of the facade. When adding 15 psf of stone veneer to a 24-foot wide garage wall with a 16-foot door, you are adding approximately 1,680 pounds of dead load to that single elevation. This additional weight must be transferred through the wall studs down to the foundation. For the header above the garage door, the added dead load often necessitates upgrading from a standard double 2x10 LVL (Laminated Veneer Lumber) to a triple 2x12 LVL or a steel I-beam, depending on the span and local snow load requirements. Always verify header sizing with a structural engineer before installing heavy cladding over large garage portals.
Wall Area (sq ft) x Veneer Weight (psf) = Total Dead Load.
Example: A 100 sq ft solid wall section using MSV (12 psf) = 1,200 lbs. Ensure the underlying 2x4 or 2x6 studs are graded for this additional axial load, particularly on corners where loads concentrate.
Substrate Preparation and Shear Wall Considerations
The substrate behind a stone veneer garage must resist both the sheer weight of the masonry and the lateral wind loads. While oriented strand board (OSB) is the default sheathing for most modern garage builds, it is highly susceptible to moisture degradation if the weather-resistive barrier (WRB) is compromised. For stone veneer applications, upgrading to 5/8-inch CDX plywood or installing a continuous rigid foam insulation layer over the OSB provides superior screw-holding strength for the lath fasteners and better moisture resilience.
| Substrate Material | Minimum Thickness | Fastener Penetration Req. | Moisture Risk Profile |
|---|---|---|---|
| OSB (Oriented Strand Board) | 7/16 inch | 1 inch into studs | High (swells if WRB fails) |
| CDX Plywood | 1/2 inch | 1 inch into studs | Moderate (delamination risk) |
| CMU (Concrete Block) | 8 inch nominal | N/A (direct adhered) | Low (requires parging first) |
| Rigid Foam over OSB | 1/2 inch foam + 7/16 OSB | 1.5 inches into studs | Low (dries to exterior) |
When fastening the required 2.5 lb/yd² self-furring galvanized metal lath, fasteners must penetrate the sheathing and embed a minimum of 1 inch into the underlying wood studs. According to the Masonry Veneer Manufacturers Association (MVMA), fasteners should be spaced no more than 6 inches apart along the studs. On garage corners, the lath must overlap by a minimum of 2 inches to prevent cracking at the structural seams.
Moisture Management and Driveway Clearances
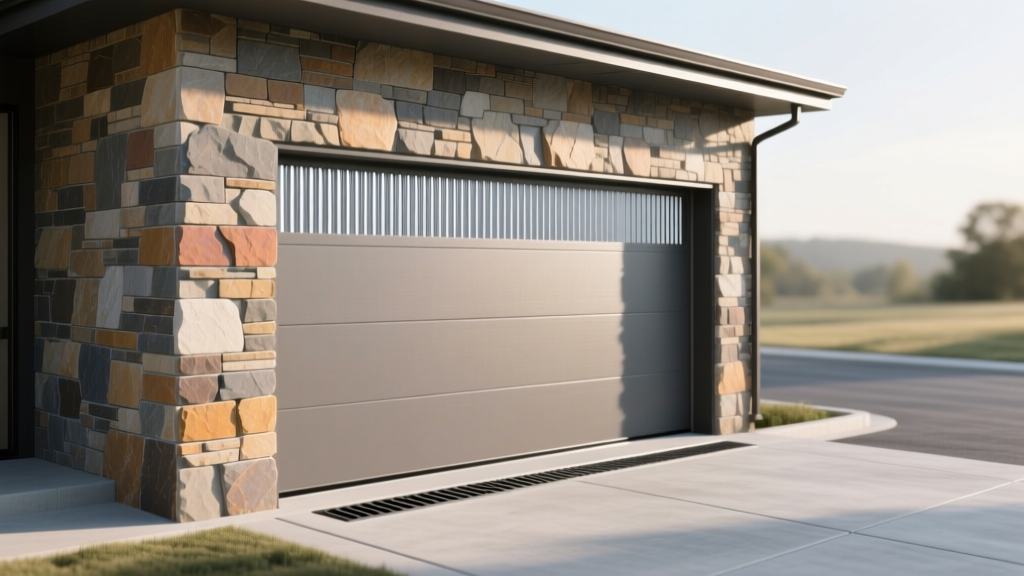
Garage exteriors endure severe moisture exposure, particularly at the base where the wall meets the driveway. Vehicles tracking in snow, rain, and de-icing salts create a highly aggressive splash zone. Proper moisture management requires a dual-layer WRB system (such as two layers of Grade D building paper or a specialized drainable housewrap) to create a capillary break between the sheathing and the mortar scratch coat.
Weep Screed and Flashing Details
A corrosion-resistant weep screed is mandatory at the base of all wood-frame stone veneer garage walls. The weep screed must feature a minimum 3.5-inch vertical attachment flange and a 3/16-inch weep hole spacing. Crucially, the placement of this screed relative to the driveway dictates the longevity of the installation.
- Unpaved Grade: Weep screed must be a minimum of 4 inches above the final soil grade.
- Paved Driveways: Weep screed must be a minimum of 2 inches above the concrete or asphalt driveway surface.
- Roof Drip Lines: Where garage roof runoff hits the ground without gutters, increase clearance to 6 inches to prevent soil erosion and mortar wicking.
For detailed moisture control strategies, the Building Science Corporation recommends integrating the weep screed flashing over the WRB but behind the lath, ensuring that any water penetrating the stone veneer is caught by the WRB and directed outward through the weep holes, rather than behind the weather barrier.
Mortar Selection and Cold-Weather Application
Because garages are typically unconditioned spaces, the interior temperature of the wall assembly will closely match the exterior ambient temperature. This makes mortar curing highly sensitive to weather conditions. For the scratch coat and the setting bed, Type S mortar is the industry standard for exterior stone veneer. Type S provides a minimum compressive strength of 1,800 psi and high tensile bond strength, which is critical for resisting the freeze-thaw cycles that garage exteriors experience.
The Portland Cement Association specifies that mortar should not be applied when ambient temperatures are below 40°F (4°C) unless cold-weather masonry protocols are followed. If you must install a stone veneer garage exterior in late autumn or early spring, you must use heated mixing water (up to 160°F) and protect the freshly applied veneer with insulated tarps for a minimum of 48 hours to prevent the moisture in the mortar from freezing before hydration is complete. Freezing mortar expands, destroying the crystalline bond and leading to catastrophic delamination.
Troubleshooting Common Garage Veneer Failures
Even with proper materials, specific failure modes plague garage stone veneer installations. Recognizing these edge cases during the planning phase prevents costly remediation.
- Efflorescence from Driveway Salts: If the bottom 12 inches of the stone veneer shows white, powdery deposits, it is likely wicking calcium chloride or sodium chloride from the driveway. Fix: Apply a silane/siloxane penetrating sealer to the bottom 2 feet of the veneer annually, and ensure the weep screed is not buried in mulch or soil that bridges the gap to the driveway.
- Diagonal Cracking Above Garage Doors: Cracks stepping diagonally from the top corners of the garage door indicate header deflection or shear wall failure. The heavy stone veneer is overstressing the portal frame. Fix: This requires structural reinforcement, such as adding steel tension ties or upgrading the hold-downs on the shear wall studs adjacent to the door.
- Delamination on CMU Stem Walls: If the garage is built on a concrete block stem wall and the stone falls off, it is usually because the CMU was not parged first. CMU is highly porous and sucks the moisture out of the setting mortar before it can cure. Fix: Always apply a 1/2-inch Portland cement parge coat to raw CMU and let it cure for 48 hours before setting stone.
Adhering strictly to these technical specifications ensures that a stone veneer garage exterior will not only achieve the desired aesthetic but will also perform structurally and resist moisture intrusion for decades. Always cross-reference local municipal building codes, as regional seismic or high-wind requirements may dictate stricter lath fastening schedules and lateral bracing protocols.
Written by
Elena RodriguezElena Rodriguez is a civil engineer and technical writer specializing in concrete technology, masonry systems, and ASTM/ACI compliance. She earned her B.S. in Civil Engineering from Texas A&M University and spent a decade at a materials testing laboratory, performing over 2,000 concrete compressive strength tests and masonry prism evaluations. Elena is an ACI-certified Field Testing Technician (Grade I) and a member of ASTM Committee C12 on Natural Building Stone. She currently consults on forensic engineering cases involving concrete failures and moisture intrusion. Based in San Antonio, TX, Elena is a proud member of the Society of Women Engineers (SWE) and coaches her daughter's FIRST Robotics team.
More from Elena Rodriguez
View all
Walls & Panels
Cost Analysis: Light Gauge Steel Framing Advantages and Disadvantages
Evaluate light gauge steel framing advantages and disadvantages through a strict cost analysis lens, comparing material, labor, and lifecycle expenses.
Aug 4, 2026

Walls & Panels
Gypsum Board Types: Exact Specifications, Thickness & Dimensions
Compare standard, Type X, and moisture-resistant gypsum board types. Get exact specifications, thicknesses, dimensions, and ASTM standards for your project.
Aug 4, 2026

Fire Resistance
Best Fire-Resistant Outdoor Decking Materials: 2026 Buyer Guide
Discover the best fire-resistant outdoor decking materials for 2026. Compare Class A PVC, aluminum, and hardwood options for WUI compliance and safety.
Aug 4, 2026