How to Install Round Stone Veneer on Exterior Walls
Learn how to install round stone veneer on exterior walls. Covers substrate prep, mortar mixing, back-buttering techniques, and sliding prevention.

The Physics of Round Stone Veneer: Why It Requires Special Techniques
Installing round stone veneer—often categorized as river rock, cobble, or rounded fieldstone—presents unique structural challenges compared to flat-backed ledger or ashlar stone. Flat stones offer a high surface-area-to-weight ratio, allowing them to bond easily to a scratch coat. Round stones, however, have a convex back with a minimal central contact point. This geometry shifts the center of gravity away from the wall, creating a rotational force that can cause the stone to peel off before the mortar cures.
To counteract this, masons must alter their standard veneer installation protocols. According to guidelines published by the Natural Stone Institute, rounded masonry units require deeper mortar beds, mandatory back-buttering, and specialized trowel profiles to ensure complete encapsulation of the stone's curvature. Failure to adapt your technique to the stone's geometry is the primary cause of delamination in round stone veneer projects.
Material Specifications and Mortar Selection
Standard thin-set adhesives used for interior tile are entirely inadequate for exterior round stone. You must use a Portland cement-based mortar fortified with polymers to increase flexural bond strength and accommodate thermal expansion.
| Material Component | Specification / Product Type | Purpose |
|---|---|---|
| Weather Barrier | Grade D asphalt felt (2 layers) or fluid-applied membrane | Prevents moisture migration into the wood substrate |
| Metal Lath | 2.5 lb/sq yd self-furring galvanized diamond mesh | Provides mechanical key for the scratch coat |
| Scratch Coat Mortar | Type S Masonry Cement mixed with coarse sand | Creates a rigid, scored base layer (1/2 inch thick) |
| Setting Mortar | Type S or N with acrylic fortifier (e.g., LATICRETE 3701) | Bonds the round stone; resists freeze-thaw cycling |
| Weep Screed | Extruded PVC or galvanized steel with 3/16 inch holes | Allows trapped moisture to escape the wall cavity |
Step 1: Substrate Preparation and Weatherproofing
Proper water management is the most critical factor in exterior veneer longevity. Begin by stripping the wall down to the structural sheathing (OSB or plywood). Install a water-resistive barrier (WRB). If using traditional Grade D building paper, apply two layers: the first layer acts as a slip sheet, and the second acts as the primary drainage plane.
Next, install the weep screed at the base of the wall. The International Building Code (IBC) mandates that the weep screed must be positioned a minimum of 4 inches above finished soil grade, or 2 inches above adjacent hardscapes like concrete patios. Secure the screed with galvanized roofing nails every 6 inches. All subsequent layers (WRB, lath, and mortar) must lap over the weep screed's attachment flange to ensure water drains outward, not behind the screed.
Step 2: Lath Application and the Scratch Coat
Roll out the 2.5 lb self-furring metal lath horizontally. The 'cups' of the diamond mesh should point upward and outward away from the wall, which allows the wet mortar to fall into them and create a mechanical lock. Overlap horizontal seams by 2 inches and vertical seams by 1 inch. Fasten the lath every 6 inches along the studs using 1-inch galvanized furring nails with 1/4-inch washers.
Mix your Type S scratch coat mortar to a thick, peanut-butter consistency. Apply a 1/2-inch layer over the lath using a flat trowel, forcing the mortar completely through the mesh. Before the mortar sets (usually within 45 to 90 minutes depending on ambient temperature), use a notched trowel or a specialized scratch rake to score the surface with deep horizontal lines. These horizontal grooves provide the mechanical grip necessary to hold the heavy round stones.
Step 3: Dry Layout and Back-Buttering Technique
Round stones vary wildly in diameter and profile. Before mixing your setting mortar, lay out the stones on the ground. Blend stones from multiple pallets to avoid color banding, and group them by size. Place the largest, heaviest cobbles at the bottom of the wall to anchor the visual weight, and use smaller stones to fill voids.
When setting the stone, you must use the 'back-buttering' method. Apply a 1/2-inch layer of fortified setting mortar directly to the back of the round stone. Because the stone is convex, you need to build up the mortar in the center to ensure it makes contact with the scratch coat. Press the stone firmly into the wall mortar bed with a slight twisting motion to squeeze out excess air and achieve 100% coverage.
Trowel Selection for Round Profiles
While flat stone veneer typically requires a 1/2-inch square-notch trowel for the wall bed, round stone veneer requires a 1/2-inch V-notch trowel. The V-notch creates deeper, more pronounced ridges of mortar on the wall. When the convex back of the round stone is pressed into these ridges, the mortar displaces outward, wrapping around the curvature of the stone and providing superior lateral support.
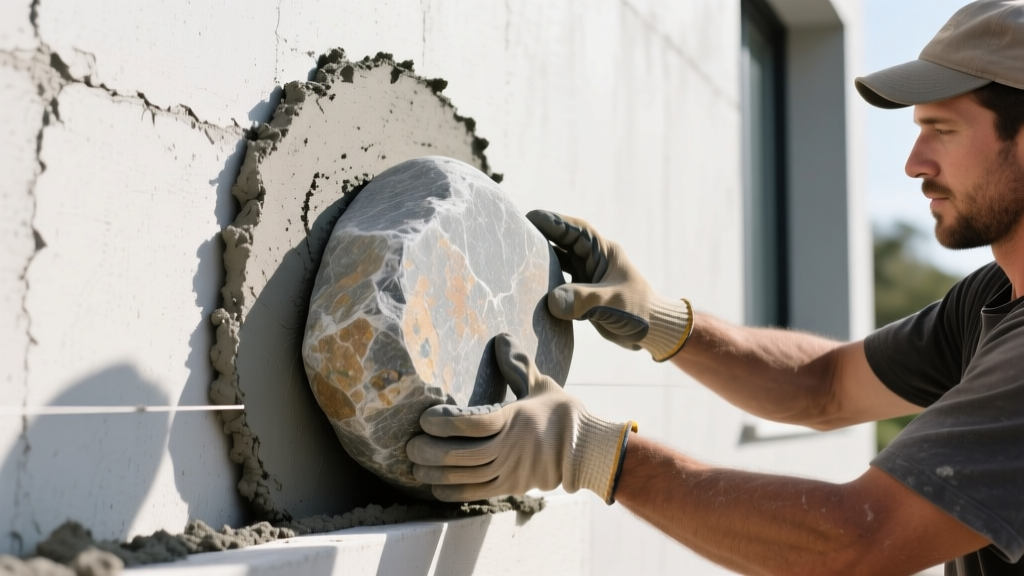
Step 4: Managing Mortar Slump and Stone Sliding
The most common frustration when installing round stone veneer is 'sliding'—stones slowly creeping down the wall under their own weight before the mortar achieves initial set. To combat this, control your mortar consistency and use physical bracing.
- Mortar Consistency: Mix the setting mortar slightly drier than you would for flat stone. It should hold its shape on the trowel without sagging. If the mortar is too wet, it acts as a lubricant, causing heavy cobbles to slide.
- Physical Bracing: For stones larger than 6 inches in diameter, use temporary wooden ledger boards nailed into the wall studs (outside the veneer plane) to support the bottom row while the mortar cures. Alternatively, use small wooden wedges or spacers between stones to hold them in place, removing them once the mortar has firmed up (usually 2 to 4 hours).
- Work in Lifts: Do not attempt to install the entire wall in one day. Work in horizontal 'lifts' or sections no higher than 3 to 4 feet per day. This allows the lower rows to bear the weight of the upper rows only after the mortar has achieved sufficient compressive strength.
Step 5: Jointing and Final Cleanup
Once the stones are set and the mortar has become thumbprint-hard (firm enough to resist indentation but soft enough to tool), begin jointing. Use a pointing trowel and a jointing iron to pack mortar into the gaps between the round stones. The joints in round stone veneer are typically wide and deeply recessed to emphasize the three-dimensional, natural shape of the cobbles.
Do not use a wet brush or sponge to clean the faces of the stones, as this will smear mortar into the natural pores of the rock, causing permanent staining. Instead, wait until the mortar smears have completely dried and crumbled, then use a stiff, dry natural-bristle brush to knock the residue off the stone faces. For stubborn spots, a specialized masonry cleaner diluted to the manufacturer's exact specifications may be used, but always test on an inconspicuous area first.
'The longevity of an exterior stone veneer installation is dictated not by the beauty of the stone, but by the rigor of the water management system behind it. A perfect scratch coat cannot save a wall that lacks a proper weep screed and drainage plane.'
— Adapted from Eldorado Stone Installation Best Practices
Troubleshooting Common Installation Failures
Even experienced masons can encounter issues when transitioning to round profiles. Here is a diagnostic framework for the most frequent failure modes:
- Symptom: Stones detach cleanly from the scratch coat after a freeze-thaw cycle.
Cause: Lack of back-buttering or mortar mixed too dry, resulting in less than 80% contact area on the convex stone back.
Fix: Ensure 100% mortar encapsulation. Use a polymer-modified mortar to increase flexural bond strength per ASTM C1384. - Symptom: White, powdery efflorescence appears on the stone faces within months.
Cause: Trapped moisture migrating through the stone, carrying soluble salts to the surface. Usually caused by omitting the weep screed or using a non-breathable sealant on the stone face.
Fix: Never apply film-forming sealers to exterior round stone. Ensure the weep screed is clear of debris and landscaping soil. - Symptom: Mortar joints crack and crumble when touched.
Cause: Mortar mixed too wet, or rapid drying due to high heat and direct sunlight during installation.
Fix: Mist the scratch coat and the stones with water before applying mortar in hot weather. Protect freshly laid walls from direct sun with burlap or shade cloth for 48 hours.
Written by
Priya KapoorPriya Kapoor is a real estate market analyst and construction economics researcher with expertise in housing affordability, development feasibility, and infrastructure investment. She holds a Master of Regional Planning from Cornell University and previously worked as a senior analyst at CBRE's Investment Properties group, where she modeled returns for $4B in mixed-use development pipelines. Priya now runs an independent research practice advising developers, municipalities, and REITs on construction cost forecasting and market timing. She publishes the quarterly "BuildMat Market Pulse" report tracking material price indices across 12 commodity categories. Based in Austin, TX, Priya serves on the board of Habitat for Humanity Austin and is a marathon runner.
More from Priya Kapoor
View all
Construction Cost
Cost to Build a 1600 Sq Ft Home in 2026: Full Breakdown
Accurate 2026 cost to build a 1600 sq ft home—material, labor, and regional pricing breakdowns included. Plan your budget with real-time estimates.
Aug 11, 2026

Wood & Lumber
Name the Types of Wood for Pressure Treatment and Preservation
Learn how to name the types of wood best suited for pressure treatment. Compare species treatability, chemical retention levels, and 2026 preservation costs.
Aug 4, 2026

Stone & Masonry
Stone Veneer Suppliers Lindenhurst: 2026 Cost Analysis
Analyze 2026 stone veneer costs in Lindenhurst, NY. Compare local supplier pricing, delivery fees, and Suffolk County installation labor rates.
Aug 4, 2026