Indoor Veneer Stone: Top Interior Design Styles & Layouts
Discover how to elevate your interiors with indoor veneer stone. Explore top design styles, texture pairings, and room-by-room installation layouts.

The Architectural Shift Toward Tactile Interiors
The integration of indoor veneer stone has transitioned from a rustic novelty to a foundational element in contemporary interior architecture. Designers are leveraging the material's depth and shadow-play to break up the monotony of flat painted drywall and large-format porcelain. Unlike full-thickness masonry, thin veneer profiles (typically 1 to 2.5 inches thick) allow for seamless integration into existing interior framing without requiring structural reinforcement. According to the Natural Stone Institute, the demand for interior stone cladding has surged as homeowners seek biophilic design elements that ground modern, minimalist spaces with organic texture.
Design Style Matrix: Matching Stone Profiles to Aesthetics
Selecting the correct stone profile is critical to achieving the intended architectural style. A mismatched profile can derail a room's visual hierarchy. Use this matrix to align your veneer choice with your overarching design theme.
| Design Style | Recommended Profile | Mortar Joint Technique | Optimal Color Palette |
|---|---|---|---|
| Modern Minimalist | Linear Ledgestone (e.g., Eldorado Stone's Shadowrock) | Dry-Stack (No visible mortar) | Monochromatic greys, charcoal, bleached whites |
| Rustic Farmhouse | Fieldstone or River Rock (e.g., Cultured Stone's Dressed Fieldstone) | Over-grouted or Raked (1/2 inch depth) | Warm earth tones, moss greens, weathered browns |
| Industrial Loft | Ashlar or Cut Stone | Flush or Weathered (Simulating aged brick) | Oxide reds, burnt umbers, slate blacks |
| Transitional | Stacked Stone or Limestone Veneer | Tight 1/8 inch joint with matching pigment | Warm beiges, taupes, soft creams |
Room-by-Room Application & Layout Strategies
The Statement Fireplace (Living Room)
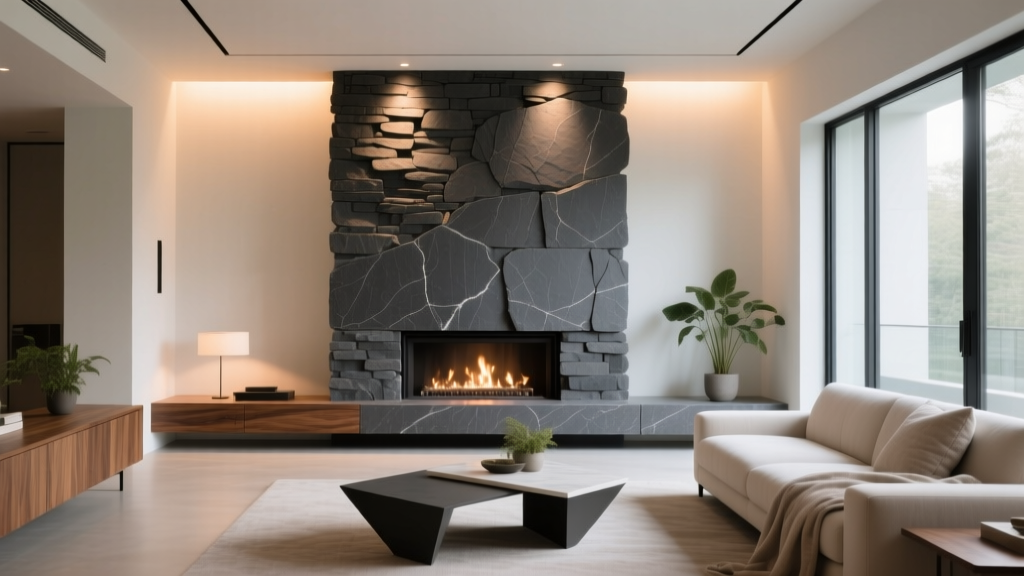
The fireplace remains the most common application for indoor veneer stone. For a contemporary aesthetic, extend the veneer floor-to-ceiling, bypassing the traditional mantel. When cladding a combustible wall surrounding a firebox, maintain the manufacturer's specified clearance zones (typically 12 to 18 inches from the firebox opening) and use a non-combustible cement backer board substrate like HardieBacker or Durock. For gas fireplaces, ensure the veneer does not obstruct the lower louver vents required for combustion air intake.
The Textured Backsplash (Kitchen)
Applying stone veneer behind kitchen countertops introduces high-contrast texture against smooth quartz or granite surfaces. However, the kitchen environment demands strict moisture and grease management. Avoid deeply recessed mortar joints or highly porous dry-stack profiles in the primary splash zone. If using a textured profile, apply a high-quality, water-based penetrating siloxane sealer (such as Miracle Sealants 511 Impregnator) post-installation. This prevents cooking oils from wicking into the stone's capillaries, which causes permanent dark staining.
The Spa Retreat Accent (Bathroom)
Bathroom installations require rigorous moisture mitigation. The National Kitchen and Bath Association (NKBA) emphasizes that stone veneer in wet areas must be installed over a waterproofed substrate. Apply a liquid waterproofing membrane (like RedGard) over your cement board before attaching the metal lath and scratch coat. Failure to waterproof the substrate can lead to moisture migration, resulting in efflorescence (white salt deposits) on the stone face or delamination of the veneer over time.
Lighting Temperature & Shadow Play
The visual impact of indoor veneer stone is entirely dependent on lighting design. To maximize the three-dimensional texture of the stone, utilize grazing light rather than washing light. Position recessed ceiling fixtures or linear LED strips 6 to 12 inches away from the stone wall. This acute angle creates deep shadows in the mortar joints and highlights the stone's natural fissures. For warm earth tones, use 2700K LED bulbs; for cool greys and slates, a 3000K to 3500K temperature will prevent the stone from looking muddy or overly yellow.
Material Spotlight: Manufactured vs. Natural Thin Veneer
Understanding the physical properties of your chosen material dictates both the installation method and the long-term maintenance requirements.
- Manufactured Stone Veneer (MSV): Cast from Portland cement, lightweight aggregates (like pumice), and iron oxide pigments. MSV weighs between 10 to 12 lbs per square foot. It offers consistent sizing, integrated color throughout the cross-section, and is highly uniform, making it faster to install. However, it can chip to reveal the concrete core if subjected to hard impacts.
- Natural Thin Stone Veneer: Real stone (granite, quartzite, limestone) sliced to a 1-inch thickness using diamond gang saws. Weighs 15 to 20 lbs per square foot. It offers unparalleled authenticity, extreme durability, and unique geological variations. It requires more skill to layout due to irregular thicknesses and shapes.
Budgeting for Visual Impact: Cost vs. ROI Breakdown
Accurate budgeting requires looking beyond the per-square-foot material cost. The The Masonry Society notes that substrate preparation and specialized labor often account for over 50% of the total project cost.
| Cost Category | Manufactured Veneer (MSV) | Natural Thin Veneer |
|---|---|---|
| Material Cost (per sq. ft.) | $8.00 - $14.00 | $15.00 - $28.00 |
| Substrate Prep (Lath, Scratch Coat) | $3.50 - $5.00 | $3.50 - $5.00 |
| Mortar & Adhesives | $1.50 - $2.50 | $2.00 - $3.50 |
| Professional Installation Labor | $12.00 - $18.00 | $18.00 - $30.00 |
| Sealing & Finishing | $1.00 - $2.00 | $1.50 - $3.00 |
| Total Estimated Cost (per sq. ft.) | $26.00 - $41.50 | $40.00 - $69.50 |
Installation Nuances That Dictate Design Success
The difference between a masterful installation and a subpar one lies in the detailing. Avoid these common failure modes to ensure your indoor veneer stone retains its architectural integrity:
- The 'Picture Frame' Effect: Never terminate stone veneer abruptly at an outside corner without using specialized corner pieces. Wrapping the stone around the corner (returning it at least 4 to 6 inches) creates the illusion of massive, structural masonry rather than a thin appliqué.
- Mortar Joint Consistency: If utilizing a grouted profile, maintain strict joint width consistency. Use a jointing tool to compress and smooth the mortar once it becomes 'thumbprint hard'. Raking the joints too early will smear the mortar onto the stone face, requiring immediate acid-washing which can etch certain manufactured pigments.
- Substrate Deflection: Interior walls framed with 2x4 studs at 24 inches on-center may experience slight deflection. This flexing can crack rigid mortar joints. For large expanses of indoor veneer stone, ensure wall framing is reinforced or reduce stud spacing to 16 inches on-center to provide a rigid, unyielding substrate.
By meticulously pairing the correct stone profile with strategic lighting, rigorous substrate preparation, and precise detailing, indoor veneer stone transcends mere decoration to become a defining architectural feature of the interior space.
Written by
Sarah WhitfieldSarah Whitfield is a chartered quantity surveyor (MRICS) and construction cost analyst with 15 years of experience in material pricing, procurement strategy, and project budgeting. She earned her degree in Construction Management from the University of Reading (UK) and has worked on projects ranging from $2M custom homes to $180M mixed-use developments across North America and Europe. Sarah currently leads cost estimating for BuildMat Insight, maintaining a proprietary database of 4,000+ material price points updated quarterly. She is a frequent contributor to RSMeans cost data panels and has presented at the International Cost Engineering Council (ICEC) congress. Based in Denver, CO, Sarah is an avid trail runner and volunteer mentor for Women in Construction.
More from Sarah Whitfield
View all
Wood & Lumber
What Are the Different Types of Wood? A Builder's Guide
Compare structural softwoods, finish hardwoods, and engineered lumber. Analyze Janka ratings, MOE values, and 2026 pricing for construction.
Aug 4, 2026

Walls & Panels
Steel Framing vs Wood Framing: Corrosion and Moisture Defense
Compare steel framing vs wood framing for moisture resistance. Learn about galvanized coatings, condensation risks, and corrosion protection strategies.
Jul 21, 2026

Stone & Masonry
How to Cut Stone Veneer: Wet Saw vs Grinder Comparison
Compare the best tools for cutting stone veneer. We review wet saws, angle grinders, and chop saws to help you achieve clean, chip-free cuts.
Jul 21, 2026