How to Install Stacked Stone Veneer: A Pro's Step-by-Step Guide
Learn how to install stacked stone veneer with this pro-level guide. Covers substrate prep, mortar mixing, layout, and sealing for interior and exterior walls.

Substrate Preparation: The Foundation of Veneer Longevity
Installing natural stacked stone veneer requires precise substrate preparation to prevent delamination and efflorescence. Unlike traditional grouted masonry, stacked stone (often sold as ledger panels or dry-stack profiles) relies entirely on the mechanical bond between the mortar, the scratch coat, and the stone's ungrouted edges. Because natural stone veneer weighs between 10 and 15 pounds per square foot, standard drywall or greenboard cannot support the load.
The Approved Layering Sequence
For both interior and exterior applications, your substrate must follow this exact layering sequence to meet building codes and manufacturer warranties:
- Structural Sheathing: OSB or plywood (exterior) or bare studs (interior).
- Weather-Resistive Barrier (WRB): Two layers of Grade D building paper or a high-performance house wrap (e.g., Tyvek) for exterior walls. Interior dry walls can omit the WRB but still require a moisture barrier if behind a wet area.
- Metal Lath: 2.5 lb self-furring galvanized steel lath. Attach with corrosion-resistant staples or nails every 6 inches on center into the studs. Overlap horizontal seams by 1 inch and vertical seams by 2 inches.
- Scratch Coat: A 1/2-inch thick layer of Type S masonry mortar, scored horizontally with a coarse wire rake to create a mechanical key for the final mortar bed.
Mortar Selection: Type S vs. Polymer-Modified
The most common failure point in stacked stone installation is using the wrong mortar. Because stacked stone lacks the structural interlocking of grout joints, the adhesive mortar must possess exceptional non-sag properties and high tensile bond strength.
| Mortar Type | Composition | Best Use Case | Drawbacks |
|---|---|---|---|
| Type S Masonry | Portland cement, lime, sand | Scratch coats, exterior base layers | Prone to sagging with heavy stone; lower bond strength |
| Type N Masonry | Lower cement, higher lime | Historic restoration, soft brick | Too weak for heavy natural stone veneer |
| Polymer-Modified (ANSI A118.4) | Cement, sand, polymer additives | Setting stacked stone panels & ledger stone | Higher material cost; shorter pot life |
For the actual stone placement, use a high-quality polymer-modified thin-set mortar that meets ANSI A118.4 standards, such as LATICRETE 254 Platinum or MAPEI Ultraflex LFT. These formulations contain polymers that prevent the heavy stone panels from sliding down the wall before the mortar cures.
Layout and Installation: The Dry Stack Technique
Stacked stone is designed to mimic dry-laid masonry, meaning there are no visible mortar joints. Achieving this shadow-line effect requires meticulous mortar management.
Before mixing any mortar, unbox 5 to 10 panels and dry-lay them on the floor. Stacked stone varies in thickness and color. Blend panels from different boxes to ensure a natural distribution of hues and avoid clustering identical stone profiles.
Step-by-Step Installation Flow
- Install Corner Pieces First: If your system includes interlocking corner returns, install these before the flat panels. Butter the back and the return edge with 1/2 inch of mortar, press firmly into the wall corner, and hold for 10 seconds to allow the polymer to grab.
- Work Bottom to Top: Start at the base of the wall. If the floor is uneven, snap a level chalk line and use a temporary ledger board to support the first course while the mortar cures.
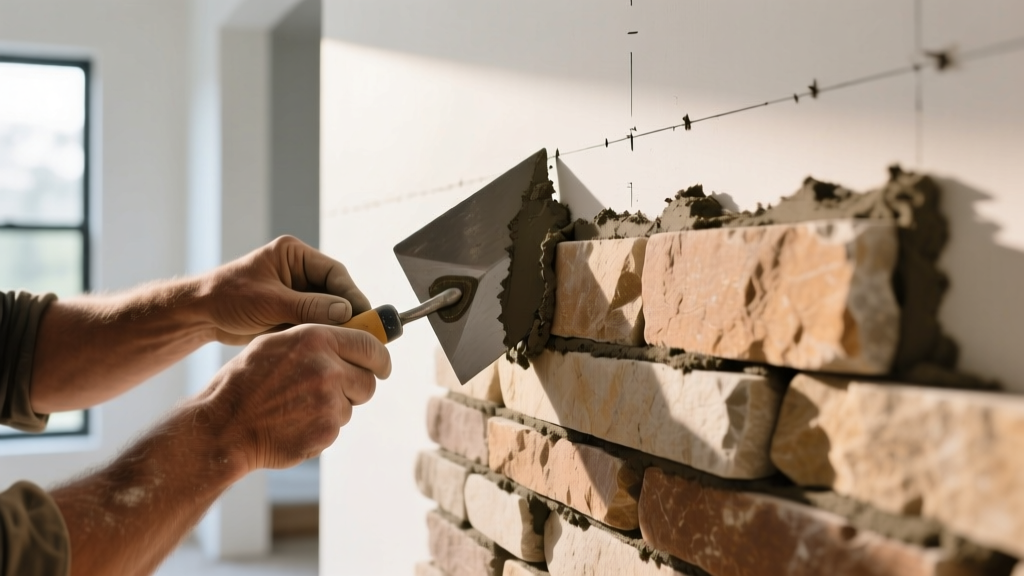
- Butter the Backing: Using a 1/2-inch notched trowel, apply mortar to the back of the stone panel. Crucial: Keep the mortar at least 1/2 inch away from the edges of the stone. When you press the stone to the wall, the mortar will spread outward but should not squeeze out into the visible face.
- Press and Wiggle: Press the panel firmly against the scratch coat and give it a slight lateral wiggle to collapse the mortar ridges and ensure 100% coverage. Do not tap the stone with a rubber mallet, as this can fracture the natural cleft face.
- Manage Squeeze-Out: If mortar squeezes onto the face of the stone, do not wipe it. Wiping will smear the cement into the porous stone, causing permanent staining. Allow the mortar to dry until it is crumbly (about 20-30 minutes), then brush it off with a stiff, dry bristle brush.
Cutting and Fitting: Achieving Seamless Joints
Natural stacked stone panels typically come in 6x24 inch or 12x24 inch dimensions. You will inevitably need to cut panels to fit around outlets, windows, or wall ends.
- Tool Selection: Use a 10-inch wet tile saw equipped with a continuous rim diamond blade. Segmented or turbo blades will chip the delicate edges of natural limestone, slate, or quartzite.
- Cutting Technique: Cut the stone face-up to minimize chipping on the visible surface. Feed the stone slowly; forcing the material will bind the blade and shatter the panel.
- Staggering Joints: Never align the vertical seams of adjacent panels. Stagger vertical cuts by at least 6 inches to maintain the illusion of random, natural masonry. If a cut piece is smaller than 3 inches, discard it and use a larger cut; tiny slivers look unnatural and are prone to popping off.
Sealing and Maintenance: Preventing Efflorescence
Efflorescence—the white, powdery salt deposit that appears on masonry—is the primary aesthetic enemy of stacked stone. It occurs when water migrates through the stone, dissolves naturally occurring salts in the mortar or stone, and evaporates on the surface.
To prevent this, you must seal the stone, but the timing and chemistry of the sealer are critical. According to industry installation guidelines, you must wait a minimum of 28 days after installation to allow the mortar to fully cure and off-gas its internal moisture.
Instead, use a breathable silane/siloxane penetrating sealer (such as PROSOCO Siloxane PD or Aqua Mix Sealer's Choice Gold). These sealers line the pores of the stone and mortar, repelling liquid water while allowing water vapor to escape. Apply two coats using a low-pressure pump sprayer, ensuring you flood the joints and the face of the stone evenly.
Frequently Asked Questions
Can I install stacked stone veneer over an existing brick fireplace?
Yes, but only if the brick is unpainted and thoroughly cleaned of soot and dust using a wire brush and TSP (trisodium phosphate) solution. If the brick is painted, you must sandblast it or install a layer of cement board over furring strips to provide a proper bonding surface.
Do I need expansion joints for interior stacked stone?
For interior applications, expansion joints are generally not required unless the wall exceeds 30 feet in length or spans across different structural materials (e.g., where a wood-framed wall meets a concrete foundation). For exterior applications, follow the standard masonry practices of placing soft expansion joints every 12 to 15 feet horizontally and vertically, filled with a color-matched polyurethane sealant.
How do I handle electrical outlets on a stacked stone wall?
Because stacked stone adds 1 to 2 inches of thickness to the wall, standard outlet covers will sit recessed. Before installing the stone, turn off the power, remove the outlet cover, and install a plastic outlet box extender ring. Cut the stone panels precisely around the extender ring so the final cover plate sits flush against the stone face.
Written by
Marcus ChenMarcus Chen is a licensed structural engineer (PE) and building materials analyst with over 12 years of experience across residential, commercial, and industrial construction. He holds a Master of Science in Civil Engineering from UC Berkeley and spent six years at Thornton Tomasetti before transitioning to independent consulting and technical writing. Marcus specializes in material selection for seismic-prone regions, concrete reinforcement strategies, and lifecycle cost analysis. His work has been cited by the American Concrete Institute (ACI) and the Structural Engineers Association of California (SEAOC). When he is not on a job site or at his desk, you will find him hiking the Sierra Nevada or restoring a 1920s craftsman bungalow in Oakland, CA.
More from Marcus Chen
View all
Construction Cost
How Much Did the Eiffel Tower Cost to Build?
How much did the Eiffel Tower cost to build in 1889? We adjust for inflation and compare its budget to modern skyscraper construction.
Aug 4, 2026

Fire Resistance
What Is a Fire Resistant Material? Testing & Certification Guide
Discover what is a fire resistant material through ASTM and UL testing. Learn how fire ratings, certifications, and assemblies work in construction.
Aug 4, 2026

Construction Cost
How Much Did the Burj Khalifa Cost to Build?
How much did the Burj Khalifa cost to build? We break down the $1.5B project and extract 5 money-saving strategies for your next build.
Jul 30, 2026