DIY Guide: Installing Stone Veneer on Brick Fireplace Surrounds
Learn how to install stone veneer on a brick fireplace with our step-by-step guide. Covers prep, mortar types, 2026 costs, and pro tips for a flawless finish.

Substrate Assessment: Why Brick is a Unique Canvas
Applying stone veneer on a brick fireplace surround is one of the most structurally sound masonry upgrades you can undertake. Unlike drywall or cement board, an existing brick chimney breast provides a rigid, non-combustible, and moisture-tolerant base. However, the very properties that make brick an excellent substrate—its porosity and surface texture—also introduce specific failure modes if preparation is rushed. The primary enemy of veneer adhesion on brick is not the masonry itself, but surface contaminants: soot, efflorescence, form-release oils, and most critically, paint.
If your brick fireplace has been painted or sealed, you cannot apply mortar directly to the surface. Paint acts as a bond-breaker. As the mortar cures and shrinks, it will pull the paint away from the brick, causing the entire veneer assembly to delaminate and collapse. Painted brick always requires mechanical fastening via galvanized metal lath and a scratch coat.
Evaluating Your Brick Condition
Before purchasing materials, perform a water-drop test. Splash a cup of water onto the brick. If it absorbs the water within 60 seconds, the substrate is unsealed and ready for mechanical prep. If the water beads up, a siloxane sealer or paint is present, mandating the use of metal lath. For unpainted, highly porous brick, a polymer-modified mortar can often be applied directly, though many master masons still prefer a lath-and-scratch-coat foundation for heavy natural stone to guarantee long-term shear strength.
2026 Material Selection and Cost Matrix
Choosing the right veneer and bonding agent dictates both your budget and your installation method. Manufactured Stone Veneer (MSV) is lighter (typically 10-12 lbs per square foot) and more forgiving for DIYers, while natural stone (15-25 lbs per square foot) demands rigorous substrate preparation. Below is a breakdown of current material costs and specifications for fireplace applications.
| Material Component | Product Type / Specification | Avg. Cost (2026) | Best Use Case |
|---|---|---|---|
| Stone Veneer | Manufactured Stacked Stone (MSV) | $8.50 - $14.00 / sq ft | Direct-to-brick (unpainted) or lath |
| Stone Veneer | Natural Limestone / Slate Panels | $16.00 - $28.00 / sq ft | Lath and scratch coat required |
| Bonding Mortar | Type S Masonry Mortar (e.g., QUIKRETE) | $14.00 - $18.00 / 80lb bag | Scratch coats and natural stone |
| Bonding Mortar | Polymer-Modified Veneer Mortar | $24.00 - $32.00 / 50lb bag | Direct-to-masonry MSV applications |
| Metal Lath | 2.5 lb Self-Furring Galvanized Steel | $1.75 - $2.50 / sq ft | Painted brick or heavy natural stone |
Step-by-Step Installation Framework
Installing stone veneer on a brick fireplace requires a methodical approach to manage weight, mortar curing times, and aesthetic blending. Follow this sequence to ensure structural integrity and a professional finish.
Step 1: Surface Preparation and Lath Installation
For unpainted brick, scrub the surface with a stiff wire brush and a Trisodium Phosphate (TSP) solution to remove soot and dust. Rinse thoroughly and allow 24 hours to dry. If your brick is painted, or if you are using heavy natural stone, attach 2.5 lb self-furring galvanized metal lath. Overlap horizontal seams by 1 inch and vertical seams by 2 inches. Fasten the lath using 1.5-inch masonry nails or Tapcon screws driven directly into the brick (not the mortar joints) every 6 inches along the studs and masonry backing.
Step 2: The Scratch Coat (For Lath Applications)
Mix a standard Type S mortar to a thick, peanut-butter consistency. Using a flat trowel, press the mortar completely through the lath dimples to ensure a mechanical lock against the brick behind it. Apply a uniform 1/2-inch layer over the entire surface. While the mortar is still wet, use a notched trowel or a scratch rake to score horizontal grooves into the surface. This 'scratch coat' must cure for a minimum of 24 to 48 hours. According to the Portland Cement Association, Type S mortar achieves the necessary 1,800 psi compressive strength and high tensile bond required for vertical veneer loads.
Step 3: Dry Layout and Mortar Mixing
Open multiple boxes of stone veneer and arrange them on the floor in front of the fireplace. Blend stones from different boxes to distribute color variations and avoid clustering identical shapes. When mixing your bonding mortar (or polymer-modified adhesive), mix only what you can apply in 45 minutes. Mortar that begins to 'slake' (stiffen in the bucket) cannot be re-tempered with water; doing so destroys the chemical bond and guarantees future failure.
Step 4: Setting the Stone
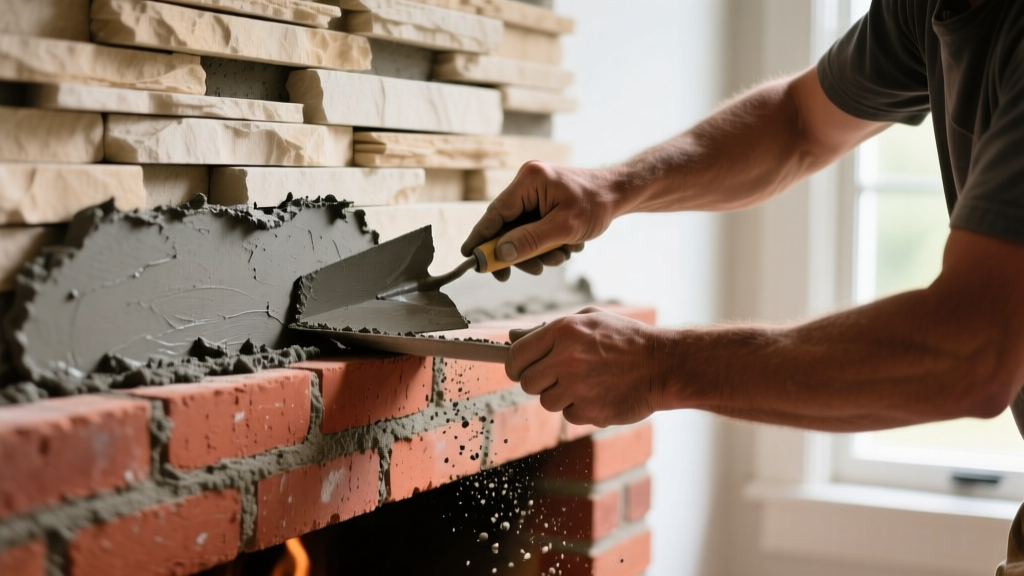
Always start from the bottom and work upward. If your kit includes corner pieces, install these first to establish clean, mitered edges. Apply a 1/2-inch layer of mortar to the scratch coat using a 1/2-inch square-notched trowel. Next, 'butter' the back of the stone with a thin 1/4-inch layer of mortar. Press the stone firmly into the wall bed, wiggling it slightly to squeeze out excess mortar and eliminate air pockets. Maintain a 1/2-inch to 3/4-inch gap between stones for the grout joints. Do not apply mortar to the edges of the stone; this makes grouting difficult and creates weak, crumbly joints.
Step 5: Grouting and Tooling
Once the mortar bed has set enough to support the stone's weight (usually 1-2 hours), fill the joints using a mortar bag, similar to a baker's piping bag. Overfill the joints slightly. Wait 30 to 45 minutes until the grout is 'thumbprint hard'—meaning you can press your thumb into it without it sticking or slumping. Use a convex jointing tool or a stiff-bristled brush to compress and smooth the joints. Compressing the grout forces it against the stone edges, creating a watertight seal and a professional, finished profile.
Where the bottom course of stone veneer meets the existing brick or stone hearth, leave a 1/4-inch expansion gap. Fill this gap with a high-temperature, color-matched silicone caulk rather than rigid mortar. Fireplaces experience significant thermal cycling; a rigid mortar joint at the base will inevitably crack due to differential expansion between the hearth and the vertical chimney breast.
Troubleshooting Edge Cases and Code Compliance
Preventing Efflorescence on Brick Substrates
Efflorescence is the white, powdery salt deposit that sometimes bleeds through stone veneer grout lines months after installation. On brick fireplaces, this occurs when residual moisture inside the chimney breast migrates outward, carrying water-soluble salts from the original brick and mortar into the new veneer joints. To prevent this, ensure the chimney cap is intact and flashing is secure. If the brick is highly porous, apply a breathable, siloxane-based penetrating sealer to the brick before installing the metal lath. This blocks liquid water transmission while allowing water vapor to escape.
NFPA Clearances and Mantel Integration
While stone veneer and masonry mortar are entirely non-combustible, the surrounding architectural elements are not. When building out a fireplace surround with stone, the added thickness of the lath, mortar, and stone (often 2 to 3 inches total) pushes the finished surface closer to the firebox and any existing wooden mantels. According to the NFPA 211 Standard for Chimneys, Fireplaces, Vents, and Solid Fuel-Burning Appliances, combustible trim and mantels must maintain a minimum 6-inch clearance from the firebox opening on the sides and top, or 12 inches if the mantel projects more than 1.5 inches from the wall. Always measure your clearances from the finished stone surface, not the original brick face, to ensure code compliance and prevent scorching.
Direct-to-Brick Polymer Mortar Applications
For unpainted, unsealed brick, manufacturers like Eldorado Stone approve the use of polymer-modified veneer mortars directly over the brick without metal lath, provided the brick is in sound condition. Polymer-modified mortars contain acrylic additives that dramatically increase flexural bond strength and reduce water permeability. If choosing this route, the brick must be dampened (not soaked) immediately before mortar application to prevent the dry brick from sucking the moisture out of the polymer mortar too quickly, which would halt the hydration process and result in a chalky, weak bond.
Written by
David NakamuraDavid Nakamura is a licensed architect (AIA) and construction technology writer focused on sustainable building methods, mass timber engineering, and high-performance building envelopes. He holds a Master of Architecture from the University of Washington and is a certified Passive House Consultant (CPHC). David spent eight years at the Seattle firm Mithun, where he led the design of three LEED Platinum projects, before founding his own practice specializing in net-zero residential design. He serves on the editorial advisory board of GreenBuilder Magazine and has authored peer-reviewed papers on cross-laminated timber (CLT) connections for the Journal of Structural Engineering. In his spare time, David teaches woodworking at Pratt Fine Arts Center and kayaks the Puget Sound.
More from David Nakamura
View all
Construction Cost
Labor Cost to Build a Deck Per Sq Ft: 2026 Installation Guide
Discover the exact labor cost to build a deck per sq ft in 2026. This installation guide breaks down contractor rates, complexity factors, and hidden fees.
Aug 4, 2026

Construction Cost
How Much Does It Cost to Build a 3 Bedroom House? Financing Guide
Learn exactly how much it costs to build a 3 bedroom house and explore 2026 financing options, construction loan types, and budget frameworks for your build.
Aug 4, 2026

Construction Cost
Cost to Build a Tennis Court: 2026 Guide
How much does it cost to build a tennis court in 2026? Breakdowns for asphalt, concrete, and synthetic surfaces plus fencing and lighting.
Jul 30, 2026