Dry Stacking Stone Veneer Installation: Pro Step-by-Step Guide
Master dry stacking stone veneer installation. Learn substrate prep, mortarless interlocking techniques, corner mitering, and adhesion specs.

The Mechanics of Mortarless Joint Veneer
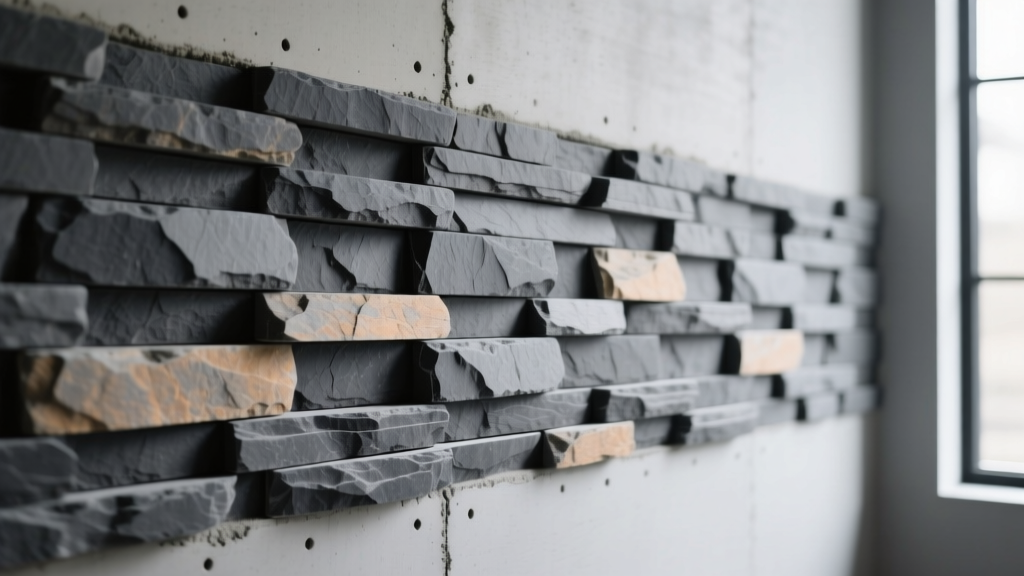
When professionals refer to 'dry stacking stone veneer,' they are describing the visual profile—a tight, mortarless joint where stones sit flush against one another—not the absence of wall adhesive. Unlike traditional masonry where mortar acts as both the structural binder and the joint filler, dry stack veneer relies on 100% back-buttered, high-strength polymer-modified mortar for wall adhesion, while the face remains completely free of joint compound. This creates a modern, linear aesthetic but demands flawless substrate preparation and precise cutting, as the lack of mortar joints means there is zero tolerance for uneven stone thicknesses or bowed substrates.
Substrate Engineering and Weatherproofing
The longevity of a dry stack installation is dictated entirely by what lies beneath it. For exterior applications, the assembly must manage bulk water and vapor. Begin with a weather-resistive barrier (WRB) like Tyvek CommercialWrap, followed by a corrosion-resistant weep screed at the base. Over this, apply 2.5 lb galvanized metal lath, securely fastened with 1-inch roofing nails or staples into the wall studs every 6 inches.
Once the lath is secured, apply a 1/2-inch scratch coat of Type S masonry mortar. Use a notched trowel to score horizontal grooves into the scratch coat while it is still workable, then cure it for a minimum of 48 hours. For interior applications over wood or metal studs, skip the lath and scratch coat; instead, install 1/2-inch or 5/8-inch cement backer board (such as USG Durock or James Hardie HardieBacker). Tape the seams with alkali-resistant fiberglass mesh tape and thinset, then prime the entire surface with an acrylic masonry primer to control the suction rate of the cement board during the veneer installation.
Material Quantities and Tool Calibration
Dry stacking requires specific tooling to ensure tight, uniform seams. Below is the required specification list for a standard 100-square-foot interior or exterior project.
| Category | Specification / Product Example | Quantity / Notes |
|---|---|---|
| Adhesive Mortar | LATICRETE Mason Veneer Mortar or ProSpec Veneer Stone Mortar (Polymer-modified) | ~8 bags (80 lb each) |
| Trowel | 1/2' x 1/2' square-notched steel trowel | 1 (Replace if teeth wear down) |
| Cutting Saw | 10-inch wet tile saw with continuous rim diamond blade | 1 (Essential for tight miters) |
| Leveling | 48-inch magnetic torpedo level and laser level | 1 of each |
| Ledger Board | 1x4 straight pine or aluminum screed | 1 (To support first course) |
Execution: The Bottom-Up Installation Sequence
According to Eldorado Stone's official installation guidelines, proper sequencing prevents structural slippage and ensures color consistency. Follow this exact workflow:
- Establish the Ledger: Snap a level chalk line exactly one stone-height above your starting point (floor or weep screed). Screw a temporary 1x4 ledger board into the wall studs along this line. This board carries the dead load of the first three courses while the polymer-modified mortar cures.
- Dry-Fit and Blend: Open a minimum of three boxes of stone veneer simultaneously. Dry stack a 4-foot section on the floor to blend color variations and ensure you aren't placing two identical stone shapes or colors adjacent to one another.
- Apply the Scratch Bond: Using the flat side of your trowel, apply a 1/2-inch layer of mortar directly to the substrate. Comb the mortar horizontally with the 1/2' notched side. Horizontal ridges allow air to escape when the stone is pressed into place, preventing void pockets.
- Back-Butter Every Stone: This is non-negotiable for dry stack profiles. Skim the back of each stone with the flat side of the trowel, ensuring 100% coverage, particularly on the edges. The total mortar thickness between the substrate and the stone should be between 1/2' and 1'.
- Set and Seat: Press the stone firmly into the substrate with a slight twisting motion until mortar squeezes out slightly at the edges. Because you are dry stacking, immediately use a stiff, dry bristle brush to sweep away any mortar that squeezes onto the face of the stone before it skins over.
Pro Tip for Height Management: Natural stone varies in thickness. When dry stacking, you must 'shim' thinner stones from behind using extra mortar to ensure the front face remains perfectly plumb and flush with adjacent stones. If a stone is too thick, grind the back down with a cup wheel on an angle grinder rather than forcing it and bowing the wall plane.
Managing Outside Corners and Transitions
Outside corners are the most visible part of a dry stack installation and the most common area for failure. You have two options: manufactured corner pieces or site-mitering.
If using manufactured interlocking corners, install them first, alternating the long and short legs as you move up the wall. Maintain a strict 1/8-inch gap between the corner pieces and the flat wall stones, filling the gap with mortar behind the face. If site-mitering natural stone, use your 10-inch wet saw to cut precise 45-degree bevels on the meeting edges. Apply a color-matched polyurethane construction adhesive (like OSI QUAD) to the mitered joint before pressing them together. This prevents the joint from cracking due to thermal expansion, a common issue noted in The Home Depot's masonry installation resources.
Troubleshooting Matrix: Adhesion and Alignment Failures
Dry stacking leaves no room for error. Use this diagnostic matrix to identify and correct issues during the installation process.
| Symptom | Root Cause | Corrective Action |
|---|---|---|
| Stones slipping or sagging before mortar cures | Mortar mixed too wet, or building too many courses without letting the ledger set. | Reduce water ratio. Limit installation to 36 inches of vertical height per day. |
| Visible mortar squeezing into the dry-stack joints | Over-troweling the substrate or failing to clean the edges of the stones. | Pull the stone off, scrape the joint clean, and reset. Use a margin trowel to score mortar away from edges. |
| Horizontal seams drifting out of level | Failing to snap chalk lines every 12 inches to act as visual guides. | Snap horizontal lines every foot. Use a 4-foot level constantly to check the top edge of the current course. |
| White powdery residue (efflorescence) on stone face | Moisture migrating through the substrate, pulling soluble salts to the surface. | Clean with a specialized efflorescence remover. Ensure weep screeds are clear and WRB is intact. |
Post-Installation Sealing and Maintenance
Because dry stack veneer lacks mortar joints to act as a secondary moisture barrier, the stone itself is the primary shield. However, natural stone is porous. For exterior applications or interior wet areas (like shower surrounds), sealing is mandatory.
Do not use film-forming acrylic sealers; they trap moisture behind the stone, leading to spalling and freeze-thaw damage in cold climates. Instead, specify a breathable, penetrating silane/siloxane sealer (such as Prosoco Sure Klean Weather Seal Siloxane WB). Apply two coats using a low-pressure pump sprayer, ensuring the sealer penetrates deeply into the stone's capillary network without altering the natural matte finish. Reapply every 3 to 5 years depending on UV exposure and driving rain conditions.
Written by
Priya KapoorPriya Kapoor is a real estate market analyst and construction economics researcher with expertise in housing affordability, development feasibility, and infrastructure investment. She holds a Master of Regional Planning from Cornell University and previously worked as a senior analyst at CBRE's Investment Properties group, where she modeled returns for $4B in mixed-use development pipelines. Priya now runs an independent research practice advising developers, municipalities, and REITs on construction cost forecasting and market timing. She publishes the quarterly "BuildMat Market Pulse" report tracking material price indices across 12 commodity categories. Based in Austin, TX, Priya serves on the board of Habitat for Humanity Austin and is a marathon runner.
More from Priya Kapoor
View all
Construction Cost
Cost to Build a 1600 Sq Ft Home in 2026: Full Breakdown
Accurate 2026 cost to build a 1600 sq ft home—material, labor, and regional pricing breakdowns included. Plan your budget with real-time estimates.
Aug 11, 2026

Wood & Lumber
Name the Types of Wood for Pressure Treatment and Preservation
Learn how to name the types of wood best suited for pressure treatment. Compare species treatability, chemical retention levels, and 2026 preservation costs.
Aug 4, 2026

Stone & Masonry
Stone Veneer Suppliers Lindenhurst: 2026 Cost Analysis
Analyze 2026 stone veneer costs in Lindenhurst, NY. Compare local supplier pricing, delivery fees, and Suffolk County installation labor rates.
Aug 4, 2026