Installing Stone Veneer on a Fireplace: Step-by-Step Guide
Learn how to install stone veneer on a fireplace with our expert step-by-step guide. Covers prep, mortar, lath, and layout for a flawless finish.

Substrate Preparation and Fire Code Clearances
Applying stone veneer on a fireplace transforms a standard builder-grade surround into a custom architectural focal point. However, the extreme temperature fluctuations and strict fire codes governing fireplaces demand a precise installation methodology. You cannot apply manufactured or natural stone veneer directly to drywall, painted brick, or plywood. The intense heat radiating from the firebox will cause organic materials to expand, contract, and eventually degrade the mortar bond.
According to the National Fire Protection Association (NFPA 211) and most local building codes, combustible materials (including wood framing and standard drywall) must maintain a minimum 6-inch clearance from the firebox opening. Always verify the specific clearance requirements in your fireplace insert or masonry unit manufacturer's manual, as some high-efficiency zero-clearance units allow non-combustible veneer to abut the metal chassis.
Preparing the Substrate
For interior fireplace surrounds framed with wood studs, you must strip the existing drywall down to the studs. Install a 1/2-inch cement backer board, such as James Hardie HardieBacker, using corrosion-resistant alkali-resistant (AR) glass fiber mesh tape on the seams. Secure the board with 1-5/8-inch cement board screws spaced every 8 inches along the studs. If you are veneering over an existing masonry or brick fireplace, the surface must be unpainted and free of sealers. If the brick is painted, you must either sandblast it or mechanically scarify the surface to expose the porous masonry beneath.
Material and Tool Specifications
Using the correct mortar and lath is non-negotiable for fireplace applications due to thermal cycling. Standard tile thin-set will fail under repeated heating and cooling.
| Material | Specification | Purpose |
|---|---|---|
| Metal Lath | 2.5 lb self-furring galvanized (ASTM C847) | Provides mechanical key for scratch coat |
| Scratch Coat Mortar | Type S Masonry Cement + Sand | High compressive strength, thermal stability |
| Setting Mortar | Polymer-modified Type S or ANSI A118.4 | Adheres veneer to scratch coat |
| Fasteners | 1-1/2 in. galvanized roofing nails / staples | Secures lath without rusting |
Step 1: Weather Barrier and Metal Lath Installation
While interior fireplaces are not exposed to rain, a moisture barrier is still required by the Metal Lath Manufacturers Association (MLMA) to prevent the porous substrate from rapidly sucking moisture out of your scratch coat, which causes premature curing and weak bonds.
- Apply the Barrier: Staple a layer of Grade D building paper or 15-lb asphalt felt directly over the cement board. Overlap horizontal seams by 2 inches and vertical seams by 6 inches.
- Cut the Lath: Cut the 2.5 lb self-furring galvanized metal lath using aviation snips. Ensure the lath cups (the small dimples) face outward, away from the wall. These dimples keep the lath suspended slightly off the paper, allowing mortar to wrap behind the wire.
- Fasten Securely: Nail or staple the lath every 6 inches along the studs. The lath must be pulled drum-tight. If the lath bubbles or sags, your scratch coat will crack under the weight of the stone.
- Overlap Seams: Overlap all lath seams by a minimum of 1 inch horizontally and 2 inches vertically. Wrap the lath around outside corners by at least 3 inches to prevent corner cracking.
Step 2: The Scratch Coat Application
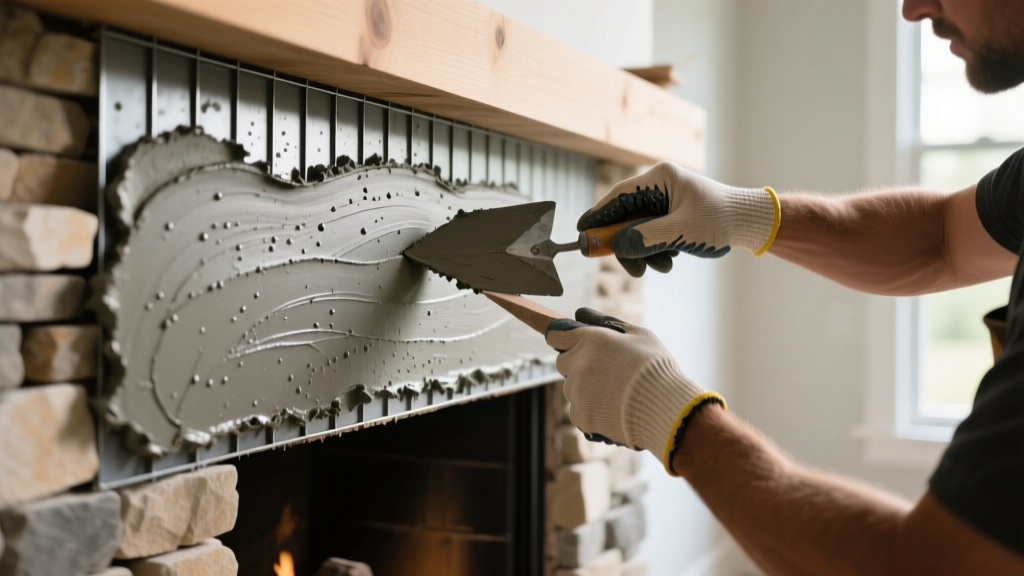
The scratch coat is the foundational layer of mortar that locks into the metal lath and provides a flat, stable surface for the veneer.
- Mix the Mortar: Combine Type S masonry cement with washed masonry sand at a 1:3 ratio. Add water gradually until the mixture reaches the consistency of thick peanut butter. It must hold its shape on a trowel held vertically.
- Apply the Coat: Using a flat trowel, force the mortar completely through the lath holes to ensure a complete mechanical wrap. Then, apply a second layer to bring the total thickness to exactly 1/2 inch.
- Score the Surface: While the mortar is still plastic but firm enough to hold a groove, use a scratching tool or a notched trowel to score horizontal lines into the surface. This provides a mechanical grip for the setting mortar.
- Cure Time: Mist the scratch coat lightly with water twice a day and allow it to cure for a minimum of 48 hours before applying any stone.
Step 3: Dry Layout and Veneer Setting
Never pull stones randomly from the box. Manufactured stone veneer is packaged with varying sizes and color gradients that require strategic placement.
For fireplace surrounds, always use the 'back-buttering' technique. Apply a 1/2-inch to 1-inch layer of setting mortar directly to the back of the stone, creating a raised ridge in the center. When you press the stone against the scratch coat, the mortar will squeeze out to the edges, ensuring 100% coverage and eliminating air pockets that cause delamination.
- Dry Fit the Corners: Install all corner pieces first. Alternate long and short legs of the corners to mimic natural masonry bonding patterns. Corners dictate the layout for the rest of the wall.
- Set the Field Stone: Work from the bottom up. Press each buttered stone firmly into the scratch coat, giving it a slight twisting motion to seat the mortar. Maintain a 1/2-inch to 1-inch gap between stones if you are planning a grouted joint profile.
- Cut as Needed: Use a 4-inch angle grinder with a continuous rim diamond blade to trim stones around the mantel or hearth. Always cut from the back of the stone to prevent chipping the visible face.
Step 4: Grouting and Joint Tooling
Wait at least 24 hours after setting the stone before applying grout. Premature grouting can bump stones out of alignment while the setting mortar is still curing.
- Fill the Joints: Load a canvas mortar bag with a slightly wetter batch of Type S mortar or a specialized veneer grout mix. Pipe the mortar deeply into the joints, slightly overfilling them.
- Tool the Joints: Wait 30 to 60 minutes until the grout is 'thumbprint hard' (firm but slightly pliable). Use a convex jointing tool or a piece of PVC pipe to compress and smooth the joints. Compressing the grout increases its density and water resistance.
- Clean the Face: Once the grout has set further, use a dry, stiff-bristle brush to sweep away excess crumbs from the stone face. Never use a wet sponge or acid wash on manufactured stone veneer, as this will smear pigment into the pores and permanently stain the surface.
Troubleshooting Common Fireplace Veneer Failures
Fireplace installations are subjected to intense thermal stress. Understanding these failure modes will save you from costly rework.
Thermal Cracking at the Firebox Edge
Cause: Installing veneer too close to the direct flame path without an expansion gap, or using a rigid mortar that cannot absorb micro-movements.
Fix: Maintain the manufacturer's specified clearance (usually 2 to 6 inches). If the design requires stone abutting the metal chassis, use a high-temperature silicone caulk in a color-matched shade at the exact seam where the stone meets the metal, allowing the metal to expand independently of the masonry.
Efflorescence (White Powdering)
Cause: Moisture migrating through the masonry substrate dissolves soluble salts, depositing them on the stone surface as it evaporates.
Fix: Ensure the scratch coat is fully cured before setting stone. If efflorescence appears, brush it off dry. For persistent cases, apply a breathable, silane-siloxane penetrating sealer specifically formulated for manufactured stone, which repels water while allowing water vapor to escape.
Veneer Delamination (Stones Falling Off)
Cause: Dust on the back of the manufactured stones preventing a mortar bond, or applying veneer in temperatures below 40°F (4°C).
Fix: Always use a stiff wire brush to remove the dusty release agent from the back of every manufactured stone before buttering. Never install mortar-based systems in freezing conditions without heated enclosures.
2026 Cost Breakdown: DIY vs. Professional Installation
The cost to install stone veneer on a fireplace varies significantly based on the stone profile (e.g., stacked ledge stone vs. fieldstone) and regional labor rates. Below is a realistic cost matrix for a standard 40-square-foot fireplace surround (excluding the hearth).
| Cost Category | DIY Installation | Professional Mason |
|---|---|---|
| Stone Veneer Material ($9 - $16 / sq ft) | $360 - $640 | $360 - $640 |
| Substrate, Lath & Mortar | $120 - $180 | $150 - $220 |
| Labor (Prep, Lath, Set, Grout) | $0 (15-20 Hours) | $1,200 - $2,400 |
| Total Estimated Cost | $480 - $820 | $1,710 - $3,260 |
When budgeting for professional installation, verify that the mason's quote includes the removal and disposal of the existing builder-grade tile or drywall. Demolition and debris hauling frequently add $250 to $400 to the final invoice if not explicitly outlined in the contract.
For comprehensive installation specifications and warranty requirements, always consult the Eldorado Stone Installation Guidelines or the specific technical data sheets provided by your veneer manufacturer prior to mixing your first batch of mortar.
Written by
Marcus ChenMarcus Chen is a licensed structural engineer (PE) and building materials analyst with over 12 years of experience across residential, commercial, and industrial construction. He holds a Master of Science in Civil Engineering from UC Berkeley and spent six years at Thornton Tomasetti before transitioning to independent consulting and technical writing. Marcus specializes in material selection for seismic-prone regions, concrete reinforcement strategies, and lifecycle cost analysis. His work has been cited by the American Concrete Institute (ACI) and the Structural Engineers Association of California (SEAOC). When he is not on a job site or at his desk, you will find him hiking the Sierra Nevada or restoring a 1920s craftsman bungalow in Oakland, CA.
More from Marcus Chen
View all
Construction Cost
How Much Did the Eiffel Tower Cost to Build?
How much did the Eiffel Tower cost to build in 1889? We adjust for inflation and compare its budget to modern skyscraper construction.
Aug 4, 2026

Fire Resistance
What Is a Fire Resistant Material? Testing & Certification Guide
Discover what is a fire resistant material through ASTM and UL testing. Learn how fire ratings, certifications, and assemblies work in construction.
Aug 4, 2026

Construction Cost
How Much Did the Burj Khalifa Cost to Build?
How much did the Burj Khalifa cost to build? We break down the $1.5B project and extract 5 money-saving strategies for your next build.
Jul 30, 2026