Designing and Installing a Grey House with Stone Veneer
Learn the exact steps to install stone veneer on a grey house exterior, including substrate prep, lath fastening, and mortar selection for fiber cement.

Substrate Evaluation: Preparing Grey Siding for Masonry
The modern grey house with stone veneer accents typically relies on high-performance sidings like fiber cement (e.g., James Hardie Artisan in Iron Gray) or engineered wood (e.g., LP SmartSide in Slate). While these substrates provide excellent weather resistance, they are entirely incompatible with direct mortar adhesion. Attempting to adhere manufactured or natural stone veneer directly to painted or primed grey siding will result in catastrophic delamination within the first freeze-thaw cycle.
According to installation standards published by the Masonry Veneer Manufacturers Association (MVMA), all veneer applications over wood-frame construction require a continuous weather-resistive barrier (WRB), corrosion-resistant metal lath, and a Portland cement scratch coat. When retrofitting an existing grey exterior, you must treat the current siding as a structural sheathing layer rather than a bonding surface.
Design Matrix: Pairing Veneer and Mortar with Grey Siding
The visual success of a grey exterior depends heavily on the contrast between the siding shade, the stone profile, and the mortar joint color. Below is a field-tested pairing matrix for 2026 exterior design trends.
| Grey Siding Shade | Recommended Veneer Profile | Optimal Mortar Joint Color | Design Effect |
|---|---|---|---|
| Light Pewter / Silver | Fieldstone (e.g., Eldorado Stone River Rock) | White or Light Buff | High contrast, coastal or farmhouse aesthetic |
| Medium Slate / Ash | Stacked Ledgestone (e.g., Cultured Stone Iron Ore) | Charcoal or Graphite | Monochromatic, modern transitional blend |
| Dark Charcoal / Iron | Warm Limestone or Sandstone Blend | Warm Grey / Taupe | Temperature balance, prevents exterior from feeling cold |
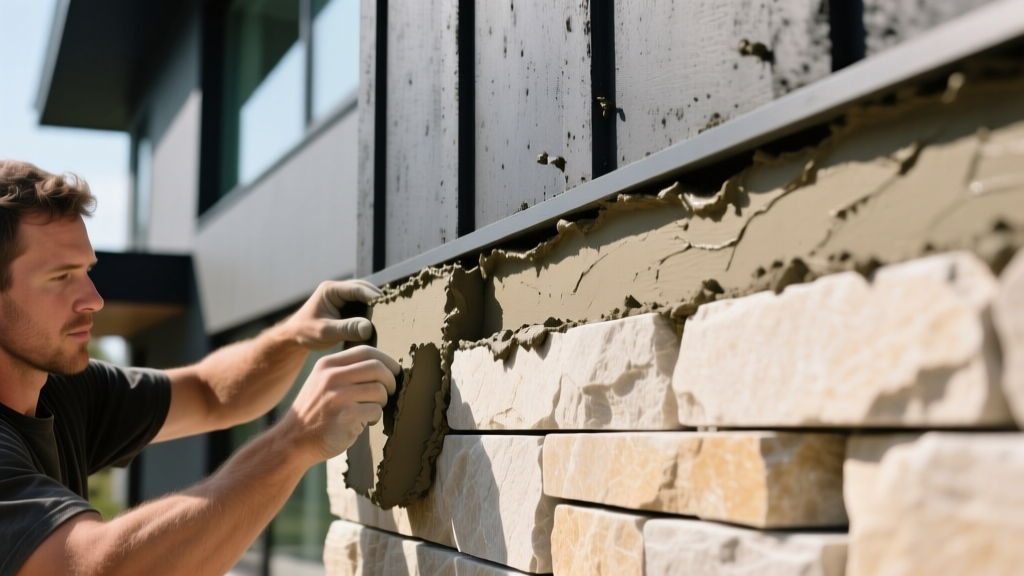
Step-by-Step Installation Protocol Over Existing Siding
Executing a proper installation over an existing grey exterior requires precise fastener calculations and moisture management. Follow this sequential protocol to ensure structural integrity and code compliance.
Step 1: Weather-Resistive Barrier (WRB) and Flashing
If the existing grey siding is being removed down to the OSB/plywood sheathing, install two layers of Grade D building paper or a high-performance commercial WRB like Tyvek CommercialWrap. If you are installing over the existing siding (a common retrofit to save demolition costs), you must still install a WRB over the siding to protect it from the moisture in the scratch coat.
- Flashing: Install a corrosion-resistant weep screed (minimum 0.019-inch thick galvanized steel) at the base of the wall. The weep screed must extend at least 1/4 inch below the foundation line to allow trapped moisture to escape.
- Overlaps: Ensure all WRB horizontal laps are a minimum of 2 inches, and vertical laps are 6 inches, shingled to shed water downward.
Step 2: Metal Lath Fastening (The Math Matters)
Use 2.5 lb/sq yd self-furring galvanized expanded metal lath. The 'self-furring' dimples are non-negotiable; they hold the lath 1/4 inch away from the WRB, allowing the scratch coat to fully encapsulate the metal.
Fastener Calculation: Your nails must penetrate through the lath, the siding, the sheathing, and embed at least 1 inch into the structural wall studs. Consult James Hardie Building Products or your specific siding manufacturer for exact thicknesses.
| Substrate Assembly | Total Thickness | Required Nail Length | Fastener Type |
|---|---|---|---|
| 5/16' Fiber Cement + 1/2' OSB | 0.8125 inches | 2.0 inches minimum | Hot-dipped galvanized roofing nails |
| 5/8' Engineered Wood + 1/2' Plywood | 1.125 inches | 2.5 inches minimum | Corrosion-resistant lath nails with 7/16' heads |
Space fasteners every 6 inches on center vertically (into studs) and 16 inches on center horizontally. Overlap lath seams by 1 inch horizontally and 2 inches vertically.
Step 3: The Scratch Coat Application
Mix a Type S mortar (such as QUIKRETE Veneer Stone Mortar) to a consistency that holds its shape on a trowel held at a 90-degree angle. Do not add excess water to make it spreadable; this weakens the compressive strength and increases shrinkage cracking.
- Apply a 1/2-inch thick layer of mortar over the metal lath using a flat trowel, pressing firmly to force the mortar through the lath dimples.
- While the mortar is still plastic but thumbprint-hard (typically 45-90 minutes depending on ambient humidity), 'scratch' the surface horizontally using a wire rake or scarifier. These horizontal grooves provide the mechanical tooth for the final stone adhesion.
- Cure the scratch coat for a minimum of 48 hours, misting it lightly with water twice daily if temperatures exceed 80°F to prevent rapid moisture loss.
Step 4: Veneer Placement and Jointing
Begin installation at the corners and the bottom weep screed line. Apply a 1/2-inch to 1-inch layer of mortar to the back of each stone (back-buttering) and press it firmly into the scratch coat until a small amount of mortar squeezes out the edges. For a grey house with stone veneer utilizing a dry-stack profile (no visible mortar joints), keep the back-buttering contained to the center of the stone to prevent mortar from staining the front face.
Troubleshooting Common Failure Modes
Even with meticulous preparation, environmental factors can compromise a veneer installation. Monitor for these specific failure modes:
- Efflorescence (White Salt Deposits): Highly common when grey stone is paired with dark mortar. Caused by water migrating through the masonry and depositing soluble salts on the surface. Fix: Ensure weep screeds are unblocked. Clean with a diluted solution of white vinegar and water, or a commercial masonry efflorescence cleaner. Never use muriatic acid on manufactured stone veneer, as it will etch the cementitious surface.
- Lath Pull-Out at Seams: Occurs when fasteners miss the structural studs and only bite into the OSB sheathing or the fiber cement siding itself. Fix: Use a stud finder before lathing. If a seam pulls away, cut a 6-inch relief in the lath, drive new 3-inch structural screws directly into the framing, and patch with a fresh scratch coat.
- Mortar Shrinkage Cracking: Spider-web cracks in the jointing mortar. Fix: This is almost always caused by over-watering the mortar mix or applying stone in direct, hot sunlight without shading the wall. Rake out cracked joints to a depth of 1/2 inch and repoint with a stiff, low-slump mortar mix.
2026 Material & Labor Cost Breakdown
Budgeting for a stone veneer retrofit requires accounting for both the decorative materials and the concealed structural prep. Below is the current national average cost data per square foot of wall area.
Estimated Cost per Square Foot (Installed)
- WRB & Flashing Prep: $1.50 - $2.25 / sq ft
- Metal Lath & Scratch Coat: $3.00 - $4.50 / sq ft
- Manufactured Stone Veneer (Material): $6.00 - $12.00 / sq ft
- Natural Stone Veneer (Material): $14.00 - $28.00 / sq ft
- Professional Masonry Labor: $12.00 - $18.00 / sq ft
- Total Installed Range (Manufactured): $22.50 - $36.75 / sq ft
"When calculating material yields, always factor in a 10% to 15% waste allowance for cutting and fitting around exterior electrical fixtures, hose bibs, and window casings. Complex profiles like ledgestone generate more offcut waste than smooth fieldstone profiles."
Executing a flawless installation on a grey house with stone veneer requires respecting the moisture dynamics of the underlying siding. By prioritizing proper fastener penetration, utilizing self-furring lath, and allowing adequate curing times for the scratch coat, the resulting masonry accent will remain structurally sound and visually striking for decades.
Written by
Marcus ChenMarcus Chen is a licensed structural engineer (PE) and building materials analyst with over 12 years of experience across residential, commercial, and industrial construction. He holds a Master of Science in Civil Engineering from UC Berkeley and spent six years at Thornton Tomasetti before transitioning to independent consulting and technical writing. Marcus specializes in material selection for seismic-prone regions, concrete reinforcement strategies, and lifecycle cost analysis. His work has been cited by the American Concrete Institute (ACI) and the Structural Engineers Association of California (SEAOC). When he is not on a job site or at his desk, you will find him hiking the Sierra Nevada or restoring a 1920s craftsman bungalow in Oakland, CA.
More from Marcus Chen
View all
Construction Cost
How Much Did the Eiffel Tower Cost to Build?
How much did the Eiffel Tower cost to build in 1889? We adjust for inflation and compare its budget to modern skyscraper construction.
Aug 4, 2026

Fire Resistance
What Is a Fire Resistant Material? Testing & Certification Guide
Discover what is a fire resistant material through ASTM and UL testing. Learn how fire ratings, certifications, and assemblies work in construction.
Aug 4, 2026

Construction Cost
How Much Did the Burj Khalifa Cost to Build?
How much did the Burj Khalifa cost to build? We break down the $1.5B project and extract 5 money-saving strategies for your next build.
Jul 30, 2026