Scratch Coat for Veneer Stone: Cost Breakdown & Guide
Analyze the costs of a scratch coat for veneer stone, including Type S vs polymer mortar, metal lath, labor rates, and failure remediation expenses.

The True Cost of a Proper Scratch Coat System
When budgeting for a natural or manufactured stone veneer project, homeowners and contractors often hyper-focus on the cost of the stone itself. However, the longevity of the installation relies entirely on the substrate preparation. The scratch coat—a 1/2-inch layer of mortar applied over metal lath—is the critical structural bridge between your wall framing and the stone setting bed. According to industry installation standards, skipping or improperly executing this step is the leading cause of veneer delamination.
Understanding the cost of a scratch coat for veneer stone requires looking beyond the price of a bag of cement. You must account for weather-resistive barriers (WRB), galvanized lath, corrosion-resistant fasteners, weep screeds, and the specialized labor required to score and cure the mortar correctly.
Quick Cost Summary (2026 Averages)
- Total Prep Cost (Materials + Labor): $6.50 to $11.50 per square foot
- Material Only: $2.75 to $4.50 per square foot
- Labor Only: $4.00 to $7.00 per square foot
- Average Timeframe: 2 to 3 days (including mandatory curing time before stone installation)
Material Cost Breakdown: Mortar, Lath, and Accessories
The material costs for a scratch coat system are relatively low compared to the stone veneer, but using the wrong grade of materials will result in catastrophic failure. Below is the current pricing breakdown for a standard wood-framed exterior wall preparation.
| Component | Unit Cost | Coverage | Cost Per Sq. Ft. |
|---|---|---|---|
| Type S Masonry Mortar (80lb bag) | $18 - $24 | ~30 sq ft (at 1/2 in.) | $0.60 - $0.80 |
| Polymer-Modified Veneer Mortar (80lb) | $28 - $36 | ~30 sq ft (at 1/2 in.) | $0.95 - $1.20 |
| 2.5 lb Galvanized Expanded Metal Lath | $16 - $22 (8ft sheet) | 8 sq ft (with overlaps) | $2.00 - $2.75 |
| Corrosion-Resistant Weep Screed (10ft) | $14 - $18 | 10 linear ft | $1.40 - $1.80 / LF |
| 1-inch Galvanized Roofing Nails | $25 / lb | ~50 fasteners / lb | $0.15 - $0.20 |
Mortar Selection: Type S vs. Polymer-Modified
Not all mortars are created equal. The Portland Cement Association outlines specific mortar types based on compressive strength and bondability. For a scratch coat, you generally have two viable options:
1. Standard Type S Masonry Mortar
Type S is a mix of Portland cement, hydrated lime, and masonry sand (typically a 1:0.5:4.5 ratio). It offers high tensile bond strength and is the traditional choice for scratch coats. It is highly cost-effective but requires strict water management during the curing process to prevent shrinkage cracking.
2. Polymer-Modified Veneer Stone Mortar
Brands like QUIKRETE® and SPEC MIX® offer pre-blended polymer-modified mortars specifically engineered for veneer applications. These contain latex polymers that drastically improve adhesion, water retention, and flexural strength. While it costs roughly 50% more per bag than standard Type S, polymer-modified mortar is highly recommended for manufactured stone (which has low absorption rates) and for installations in high-wind or seismic zones where shear stress is a concern.
Labor Costs and Timeframes
Applying a scratch coat is a multi-day process that cannot be rushed. According to national remodeling cost data, professional masons charge between $4.00 and $7.00 per square foot for the complete substrate preparation (WRB, lath, and scratch coat).
The Mandatory Timeline:
- Day 1: Install weather-resistive barrier (WRB) and flash all penetrations. Nail 2.5 lb galvanized lath to the studs (maximum 6-inch vertical spacing). Install weep screed at the base with a minimum 4-inch clearance above grade.
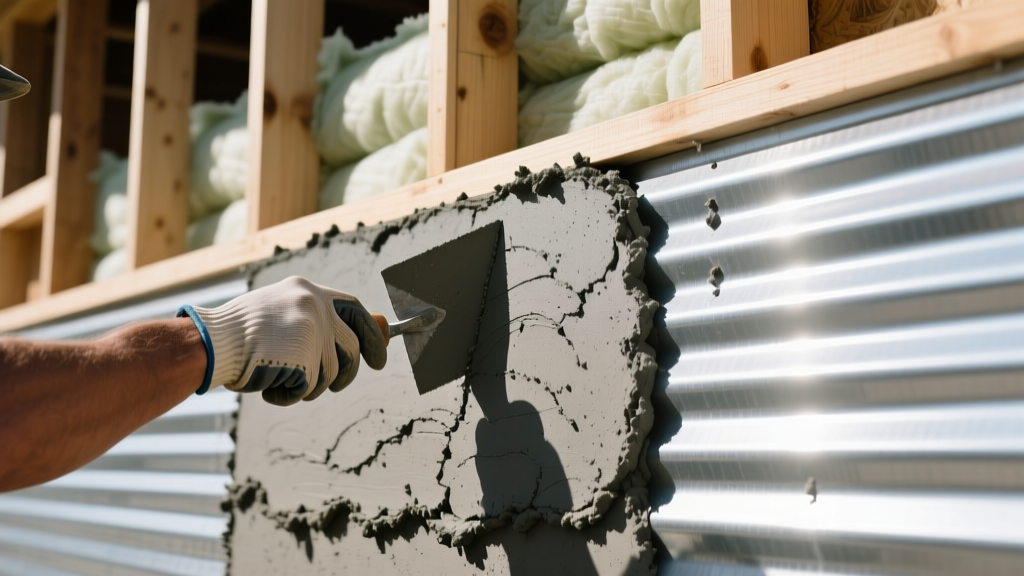
- Day 2: Mix and trowel the 1/2-inch scratch coat. Force the mortar completely through the lath to create a mechanical lock on the backside. Score the surface with a scarifier or stiff bristle brush to create horizontal grooves 1/8-inch deep.
- Days 3-4: Mist-cure the scratch coat 2 to 3 times daily. ASTM C1063 requires the scratch coat to cure for a minimum of 48 hours before the setting bed and stone can be applied.
The Hidden Cost of Skipping the Scratch Coat
A common question among DIYers and budget-conscious contractors is whether the scratch coat can be omitted to save time and money. The answer depends entirely on the substrate.
- Wood or Steel Framing: Skipping the lath and scratch coat over framed walls is a severe building code violation. The mortar will not adhere to the WRB, and the stone will fall off within months.
- CMU (Cinder Block) or Poured Concrete: If the masonry substrate is clean, unpainted, and has an open pore structure, many manufacturer guidelines allow you to skip the lath and scratch coat. You can apply a thin slurry bond coat directly to the block and immediately set the stone. This saves roughly $4.00 per square foot in labor and materials.
- Painted or Sealed CMU: If the block has been painted or sealed, you MUST sandblast it, or revert to installing lath and a full scratch coat system.
Common Failure Modes and Remediation Costs
When a scratch coat is installed incorrectly, the resulting damage far exceeds the initial cost of doing it right. Remediation typically involves tearing down the stone, removing the failed mortar, replacing rotted sheathing, and starting over. Remediation costs average $45 to $85 per square foot.
Delamination from Improper Curing
If the scratch coat dries too quickly in hot or windy conditions without being misted, the water evaporates before the cement can fully hydrate. This causes the mortar to shrink, crack, and lose its bond to the lath. When the heavy stone is later applied, the dead load pulls the weakened scratch coat off the wall.
Efflorescence and Moisture Trapping
Failing to install a weep screed at the bottom of the scratch coat system traps moisture inside the wall cavity. As water migrates through the mortar, it brings soluble salts to the surface, creating a white, crusty efflorescence. Worse, the trapped moisture will rot the wooden sheathing behind the WRB, leading to structural framing repairs that can cost tens of thousands of dollars.
Frequently Asked Questions
How thick should the scratch coat be?
The scratch coat should be exactly 1/2-inch thick. It must be thick enough to completely encapsulate the metal lath and provide a solid 1/8-inch of mortar behind the lath wires for a mechanical lock. Applying it too thin will result in the lath rusting and the coat cracking.
Do I need to wet the scratch coat before applying the stone?
Yes. Before applying the setting bed and stone veneer, you must lightly dampen the cured scratch coat with a spray bottle or misting hose. If the scratch coat is bone dry, it will rapidly suck the moisture out of the fresh setting bed mortar, causing a weak, powdery bond line between the two layers.
Can I use a scratch coat over existing drywall or interior plaster?
No. Interior drywall and plaster cannot support the weight of stone veneer, nor can they handle the moisture introduced by the mortar. For interior applications, you must strip the drywall down to the studs, install a moisture barrier, attach metal lath, and then apply your scratch coat.
Written by
Sarah WhitfieldSarah Whitfield is a chartered quantity surveyor (MRICS) and construction cost analyst with 15 years of experience in material pricing, procurement strategy, and project budgeting. She earned her degree in Construction Management from the University of Reading (UK) and has worked on projects ranging from $2M custom homes to $180M mixed-use developments across North America and Europe. Sarah currently leads cost estimating for BuildMat Insight, maintaining a proprietary database of 4,000+ material price points updated quarterly. She is a frequent contributor to RSMeans cost data panels and has presented at the International Cost Engineering Council (ICEC) congress. Based in Denver, CO, Sarah is an avid trail runner and volunteer mentor for Women in Construction.
More from Sarah Whitfield
View all
Wood & Lumber
What Are the Different Types of Wood? A Builder's Guide
Compare structural softwoods, finish hardwoods, and engineered lumber. Analyze Janka ratings, MOE values, and 2026 pricing for construction.
Aug 4, 2026

Walls & Panels
Steel Framing vs Wood Framing: Corrosion and Moisture Defense
Compare steel framing vs wood framing for moisture resistance. Learn about galvanized coatings, condensation risks, and corrosion protection strategies.
Jul 21, 2026

Stone & Masonry
How to Cut Stone Veneer: Wet Saw vs Grinder Comparison
Compare the best tools for cutting stone veneer. We review wet saws, angle grinders, and chop saws to help you achieve clean, chip-free cuts.
Jul 21, 2026