Installing Stone Veneer Indoor Accent Walls: Step-by-Step Guide
Learn how to install stone veneer indoor fireplace surrounds and accent walls. Includes substrate prep, mortar mixing, and cutting techniques.

Substrate Preparation: Beyond Standard Drywall
The most critical failure point in any stone veneer indoor project is the substrate. Manufactured and natural stone veneers weigh between 10 and 15 pounds per square foot. Standard 1/2-inch drywall lacks the sheer strength and moisture resistance to support this load, especially when subjected to the heavy water content of masonry mortar during installation. Attempting to adhere stone directly to painted drywall using construction adhesive is a widespread DIY error that inevitably leads to catastrophic detachment.
For interior accent walls and fireplace surrounds, you must install a cementitious backer board. Use 1/2-inch cement board (such as HardieBacker or Durock) or a traditional wire-lath and mud-bed system over the existing wall framing. Fasten the cement board directly to the wall studs using 1-5/8-inch corrosion-resistant cement board screws, spaced every 8 inches along the studs.
Material and Tool Matrix
Sourcing the correct materials ensures compliance with current 2026 ANSI A118 masonry standards. Do not substitute thin-set tile mortar for stone veneer mortar; they possess different rheological properties and sag-resistance profiles.
| Component | Specification | Purpose |
|---|---|---|
| Weather Barrier | Grade D building paper or 6-mil poly | Protects interior framing from mortar moisture |
| Metal Lath | 2.5 lb self-furring galvanized expanded | Provides mechanical key for scratch coat |
| Scratch Coat Mortar | Type S Masonry Cement + Sand (1:2.25) | Creates a rigid, scored base layer |
| Setting Mortar | Polymer-modified veneer stone mortar | High-tack, non-sag adhesive for setting stones |
| Fasteners | 1-1/4" galvanized roofing nails or staples | Secures lath to studs through backer board |
Step 1: Moisture Barrier and Lath Installation
Even for an interior installation, a moisture barrier is mandatory. The water in the scratch coat and setting mortar will migrate into the wall cavity if unimpeded. Staple Grade D building paper horizontally over the cement board, overlapping each course by 2 inches.
Lath Overlap and Fastening Specifics
Unroll the 2.5 lb self-furring galvanized expanded metal lath horizontally. The self-furring dimples must face outward, away from the wall, to allow the mortar to wrap behind the wire. Overlap horizontal seams by 1 inch and vertical seams by 2 inches. Fasten the lath directly into the wall studs—not just the cement board—using galvanized roofing nails or staples every 6 inches on center. According to the Eldorado Stone Installation Guidelines, the lath should feel completely rigid when pushed; any flexing will cause the scratch coat to crack during the curing process.
Step 2: The Scratch Coat Application
Mix Type S masonry cement with washed plaster sand at a 1:2.25 ratio, adding water until the mixture reaches a thick, peanut-butter consistency. Using a flat trowel, apply a 1/2-inch thick layer of mortar over the lath, pressing firmly to force the mortar through the mesh and embed the lath completely.
Step 3: Layout Strategy and Dry-Fitting
Before mixing your setting mortar, open 3 to 4 boxes of stone veneer and lay them out on the floor. Manufactured stone varies in color and thickness by batch. Blending multiple boxes prevents noticeable color banding on your finished wall. Identify your corner pieces first; corners dictate the rhythm of the wall. Always install corner pieces before flat pieces, alternating the long and short legs of the corners to mimic natural masonry coursing.
Step 4: Setting the Stone Veneer Indoor Pieces
Use a pre-blended, polymer-modified veneer stone mortar for the setting bed. These modern formulations contain latex additives that provide superior non-sag properties and higher bond strength compared to traditional site-mixed mortars. Follow the Boral Culture Stone Installation Manual recommendations for exact water-to-powder ratios, as over-watering destroys the polymer matrix.
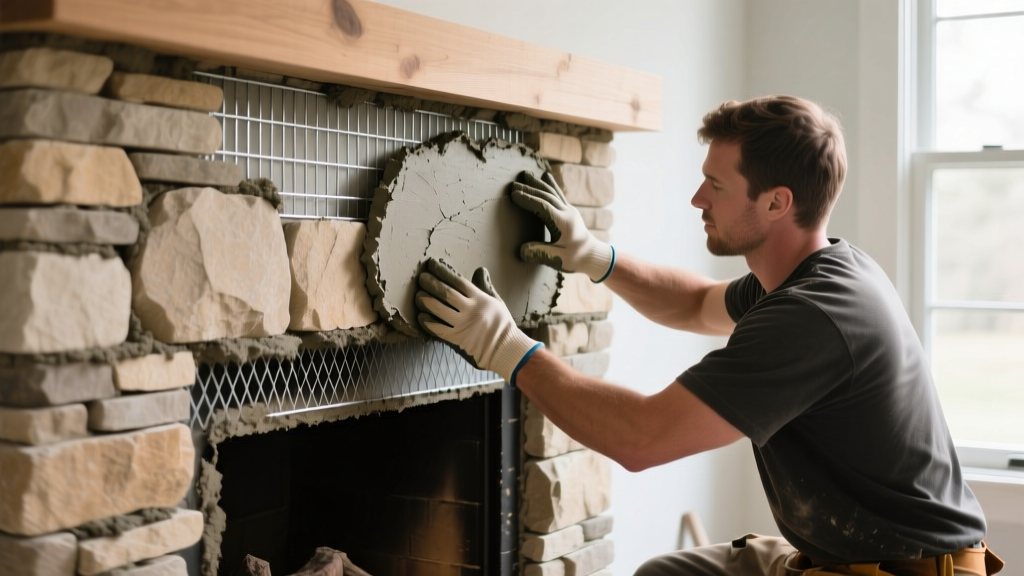
Apply a 1/2-inch to 1-inch layer of mortar to the back of each stone (the 'buttering' method). Press the stone firmly against the scratch coat, wiggling it slightly to squeeze out excess mortar and eliminate air pockets. Maintain a 1/2-inch to 1-inch joint space between stones if you are planning a grouted profile, or push them tight together for a dry-stack profile. Work from the bottom up, using a level every third course to ensure your lines are not drifting.
Step 5: Cutting and Silica Dust Mitigation
Cutting manufactured stone veneer generates respirable crystalline silica dust, a known carcinogen. When trimming pieces to fit around outlets or fireplace inserts, never dry-cut indoors without proper containment.
- Wet Saw Method: Use a continuous-rim diamond blade on a wet tile saw. This eliminates 99% of airborne dust and provides the cleanest edge.
- Angle Grinder Method: If using a 4.5-inch angle grinder with a masonry blade, you must attach a dust shroud connected to a HEPA-filtered vacuum. The NIOSH Silica Dust Guidelines mandate strict engineering controls for silica exposure; a standard shop-vac without a HEPA filter will simply exhaust microscopic silica particles back into your living space.
- Stone Nippers: For small, intricate cuts, use wide-jaw masonry nippers to nibble away the edges, followed by a rubbing stone to smooth the cut face.
Step 6: Grouting and the Thumbprint Test
For grouted profiles, wait until the setting mortar has fully cured (usually 24 hours). Load a canvas grout bag with a stiff, sanded masonry mortar and pipe it into the joints, slightly overfilling them. The critical timing factor here is the 'thumbprint test'. Wait until the grout in the joint is firm enough that pressing your thumb into it leaves a clean impression without sticking or pulling the mortar out. Once it reaches this state, use a concave jointing tool to compact and smooth the grout. Finally, use a stiff, dry bristle brush to sweep away excess crumbs and texture the mortar joints to match the stone.
Common Indoor Installation Failure Modes
Understanding why interior stone veneer fails allows you to preemptively avoid these costly mistakes:
1. Efflorescence Blooming
White, powdery deposits on the stone surface are caused by water-soluble salts migrating to the surface. Indoors, this is almost always the result of using unwashed sand (which contains high salt content) or adding too much water to the mortar mix. Always use washed, graded plaster sand and strictly adhere to the manufacturer's water limits.
2. Mortar Starvation
Applying mortar only to the wall and pressing the dry stone into it leaves voids on the back of the veneer. These voids compromise the bond and create hollow spots that can snap off if bumped. The buttering method (applying mortar to the back of the stone) guarantees 100% coverage.
3. Lath Telegraphing
If the scratch coat is applied too thin (less than 3/8-inch), the diamond pattern of the metal lath will physically telegraph through the setting mortar and become visible in the joints. Ensure the scratch coat completely buries the lath with a minimum 1/2-inch thickness.
Properly executed, an interior stone veneer installation adds immense architectural weight and thermal mass aesthetics to a room. By respecting the substrate requirements, utilizing polymer-modified mortars, and adhering to strict moisture and silica protocols, your accent wall or fireplace surround will remain structurally sound and visually flawless for decades.
Written by
Priya KapoorPriya Kapoor is a real estate market analyst and construction economics researcher with expertise in housing affordability, development feasibility, and infrastructure investment. She holds a Master of Regional Planning from Cornell University and previously worked as a senior analyst at CBRE's Investment Properties group, where she modeled returns for $4B in mixed-use development pipelines. Priya now runs an independent research practice advising developers, municipalities, and REITs on construction cost forecasting and market timing. She publishes the quarterly "BuildMat Market Pulse" report tracking material price indices across 12 commodity categories. Based in Austin, TX, Priya serves on the board of Habitat for Humanity Austin and is a marathon runner.
More from Priya Kapoor
View all
Construction Cost
Cost to Build a 1600 Sq Ft Home in 2026: Full Breakdown
Accurate 2026 cost to build a 1600 sq ft home—material, labor, and regional pricing breakdowns included. Plan your budget with real-time estimates.
Aug 11, 2026

Wood & Lumber
Name the Types of Wood for Pressure Treatment and Preservation
Learn how to name the types of wood best suited for pressure treatment. Compare species treatability, chemical retention levels, and 2026 preservation costs.
Aug 4, 2026

Stone & Masonry
Stone Veneer Suppliers Lindenhurst: 2026 Cost Analysis
Analyze 2026 stone veneer costs in Lindenhurst, NY. Compare local supplier pricing, delivery fees, and Suffolk County installation labor rates.
Aug 4, 2026