How to Install Stone Veneer: Complete Material & Application Guide
Learn how to install stone veneer with our complete material guide. Covers mortar mixes, metal lath specs, prep steps, and pro application tips.

The Anatomy of a Stone Veneer Installation
Successfully completing a project where you install stone veneer requires understanding the assembly as a multi-layered moisture-management system, not just a decorative finish. Whether you are using manufactured architectural stone or natural thin veneer, the structural integrity relies on five distinct layers: the structural substrate, the weather-resistive barrier (WRB), the metal lath, the mortar scratch coat, and the veneer itself. Failure in any single layer compromises the entire facade, leading to delamination, efflorescence, or moisture intrusion into the wall cavity.
- WRB: 2 layers of Grade D building paper or equivalent code-approved housewrap.
- Weep Screed: 10 linear feet of corrosion-resistant weep screed (ASTM C1063).
- Metal Lath: 2.5 lb/yd² galvanized, self-furring woven wire lath (ASTM C847).
- Fasteners: 1.5-inch minimum penetration corrosion-resistant roofing nails or staples.
- Mortar: 3 bags (80 lb each) of Type S Veneer Stone Mortar (for scratch coat and setting).
Phase 1: Substrate Preparation and Weather Barriers
Before you install stone veneer, the substrate must be rigid, clean, and properly flashed. Wood-framed walls require structural sheathing (OSB or plywood) covered by a weather-resistive barrier. According to the Building Science Corporation, exterior veneer assemblies act as reservoir claddings; they absorb and hold water. Therefore, a ventilated rain screen gap or a dual-layer WRB is critical to allow moisture to drain downward and exit the system.
Installing the Weep Screed and WRB
The installation must begin at the bottom. Attach a corrosion-resistant weep screed at the base of the wall. The International Residential Code (IRC) mandates a minimum clearance of 4 inches between the weep screed and the finished earth grade, or 2 inches above paved surfaces like concrete driveways. This prevents ground moisture from wicking into the mortar base and stops soil-borne salts from causing efflorescence. Overlap your WRB material over the weep screed's flange so that any water draining down the back of the lath is directed outward.
Phase 2: Metal Lath and Scratch Coat Specifications
Metal lath provides the mechanical key for the mortar. Do not use interior-grade lath or non-self-furring varieties for exterior applications. The lath must have 1/4-inch self-furring dimples that hold the wire away from the WRB, allowing mortar to envelop the wire completely.
| Component | Specification / Standard | Installation Rule |
|---|---|---|
| Metal Lath | 2.5 lb/yd² Galvanized (ASTM C847) | Overlap horizontal joints by 1 inch; vertical by 2 inches. |
| Fasteners | Galvanized roofing nails / staples | 6 inches o.c. vertically; 16 inches o.c. horizontally into studs. |
| Scratch Coat | Type S Mortar (ASTM C270) | 3/8 to 1/2 inch thick; scored horizontally; cure 48 hours. |
Mixing and Applying the Scratch Coat
Use a high-quality Type S mortar mix, such as QUIKRETE® Veneer Stone Mortar, which contains polymer modifiers for enhanced bond strength and water retention. Mix the mortar to a consistency that holds its shape on a trowel held vertically. Apply a 3/8-inch to 1/2-inch thick layer over the lath, forcing the mortar through the wire to encapsulate it completely. Once applied, use a notched trowel or a raking tool to score horizontal lines into the wet mortar. This mechanical scoring creates a shear key for the final setting bed. Allow the scratch coat to moist-cure for a minimum of 48 hours before proceeding.
Phase 3: How to Install Stone Veneer (The Application)
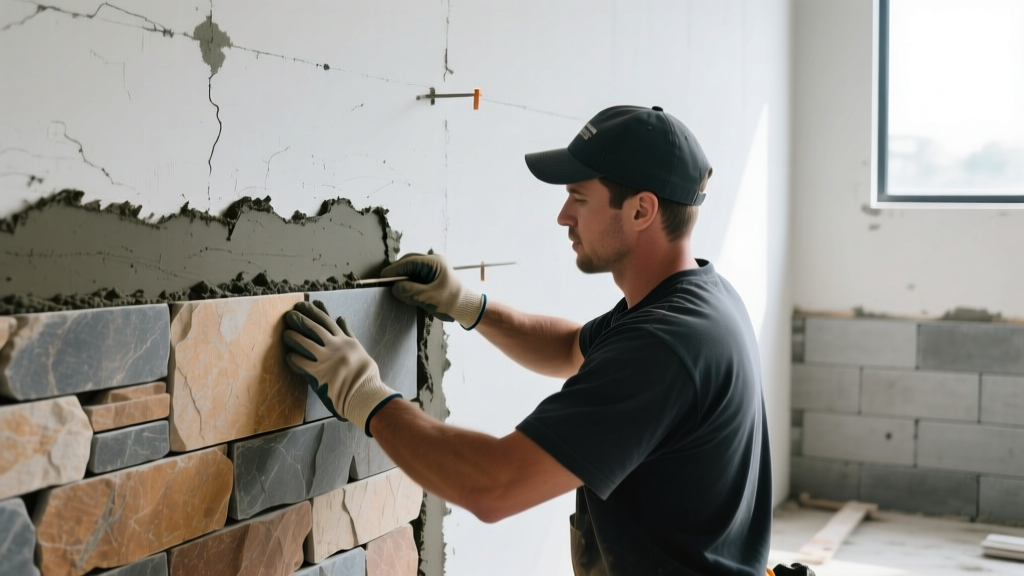
When you are ready to install stone veneer, the setting bed mortar should be mixed to the same consistency as the scratch coat. Always refer to the specific manufacturer's installation instructions, as proprietary stone blends may require specific admixtures or modified setting materials.
The Back-Buttering Technique
Never simply press a dry stone into a mortar bed. The back of every stone must be 'back-buttered' with a 1/2-inch layer of mortar. Press the stone firmly into the scratch coat, pushing until a small bead of mortar squeezes out around the perimeter. This ensures 100% coverage and eliminates air pockets behind the veneer. Air pockets trap moisture, which expands during freeze-thaw cycles and causes the stone face to spall or pop off the wall.
Always start your layout by installing corner pieces first. Work from the outside edges toward the center of the wall. When framing windows and doors, ensure the veneer maintains a minimum 1/2-inch clearance from the window weep holes and vinyl/wood trim to prevent moisture damming and material degradation.
Phase 4: Grouting, Jointing, and Cleanup
For grouted applications (such as traditional fieldstone or ashlar patterns), maintain a consistent 1/2-inch to 1-inch joint between stones. Once the setting mortar has stiffened (usually 30 to 60 minutes depending on ambient temperature and humidity), use a pointing tool to compact the mortar into the joints. Compacting the mortar, rather than just smoothing it, increases its density and weather resistance.
For dry-stack veneer profiles, no mortar joint is visible, but the stones must still be fully back-buttered and bonded to the scratch coat. Clean excess mortar from the stone faces immediately using a stiff, dry bristle brush. Never use acid-based cleaners or high-pressure water on fresh or cured manufactured stone veneer, as this will etch the cementitious surface and permanently alter the color.
Cost Breakdown: Material vs. Labor
Understanding the financial scope is crucial when planning to install stone veneer. Costs vary significantly based on whether you choose manufactured architectural stone or natural thin veneer (NTV), as well as regional labor rates.
| Cost Category | Manufactured Stone | Natural Thin Veneer (NTV) |
|---|---|---|
| Material (Stone) | $5.00 - $9.00 / sq. ft. | $9.00 - $16.00 / sq. ft. |
| Prep Materials (Lath, Mortar, WRB) | $2.50 - $3.50 / sq. ft. | $2.50 - $3.50 / sq. ft. |
| Professional Labor | $8.00 - $14.00 / sq. ft. | $12.00 - $20.00 / sq. ft. |
| Total Installed Cost | $15.50 - $26.50 / sq. ft. | $23.50 - $39.50 / sq. ft. |
Common Installation Failures and How to Avoid Them
Even premium materials will fail if the underlying building science is ignored. The three most common failure modes in stone veneer installations are:
- Efflorescence (White Staining): Caused by water-soluble salts migrating through the mortar to the stone surface. This is almost always the result of missing weep screeds, blocked drainage planes, or using unwashed, high-salt masonry sand in the mortar mix. Always use bagged, pre-blended mortar mixes with washed aggregates.
- Freeze-Thaw Spalling: Occurs when water gets trapped behind the stone and freezes, expanding and popping the veneer off the wall. Prevent this by ensuring 100% mortar coverage via the back-buttering method and maintaining proper roof overhangs and gutter systems to divert bulk water away from the facade.
- Lath Delamination: If the metal lath is installed upside down (with the dimples facing the wall instead of outward), the mortar cannot wrap around the wire. The scratch coat will simply sit on top of the smooth wire, resulting in zero mechanical bond and eventual structural collapse of the veneer.
By strictly adhering to material specifications, respecting moisture management principles, and utilizing proper back-buttering techniques, your stone veneer installation will remain structurally sound and aesthetically pristine for decades.
Written by
Sarah WhitfieldSarah Whitfield is a chartered quantity surveyor (MRICS) and construction cost analyst with 15 years of experience in material pricing, procurement strategy, and project budgeting. She earned her degree in Construction Management from the University of Reading (UK) and has worked on projects ranging from $2M custom homes to $180M mixed-use developments across North America and Europe. Sarah currently leads cost estimating for BuildMat Insight, maintaining a proprietary database of 4,000+ material price points updated quarterly. She is a frequent contributor to RSMeans cost data panels and has presented at the International Cost Engineering Council (ICEC) congress. Based in Denver, CO, Sarah is an avid trail runner and volunteer mentor for Women in Construction.
More from Sarah Whitfield
View all
Wood & Lumber
What Are the Different Types of Wood? A Builder's Guide
Compare structural softwoods, finish hardwoods, and engineered lumber. Analyze Janka ratings, MOE values, and 2026 pricing for construction.
Aug 4, 2026

Walls & Panels
Steel Framing vs Wood Framing: Corrosion and Moisture Defense
Compare steel framing vs wood framing for moisture resistance. Learn about galvanized coatings, condensation risks, and corrosion protection strategies.
Jul 21, 2026

Stone & Masonry
How to Cut Stone Veneer: Wet Saw vs Grinder Comparison
Compare the best tools for cutting stone veneer. We review wet saws, angle grinders, and chop saws to help you achieve clean, chip-free cuts.
Jul 21, 2026