Installing Exterior White Stone Veneer: Pro Step-by-Step Guide
Master the installation of exterior white stone veneer. Learn substrate prep, white mortar selection, and sealing to prevent efflorescence.

The Hidden Challenge of White Stone Veneer
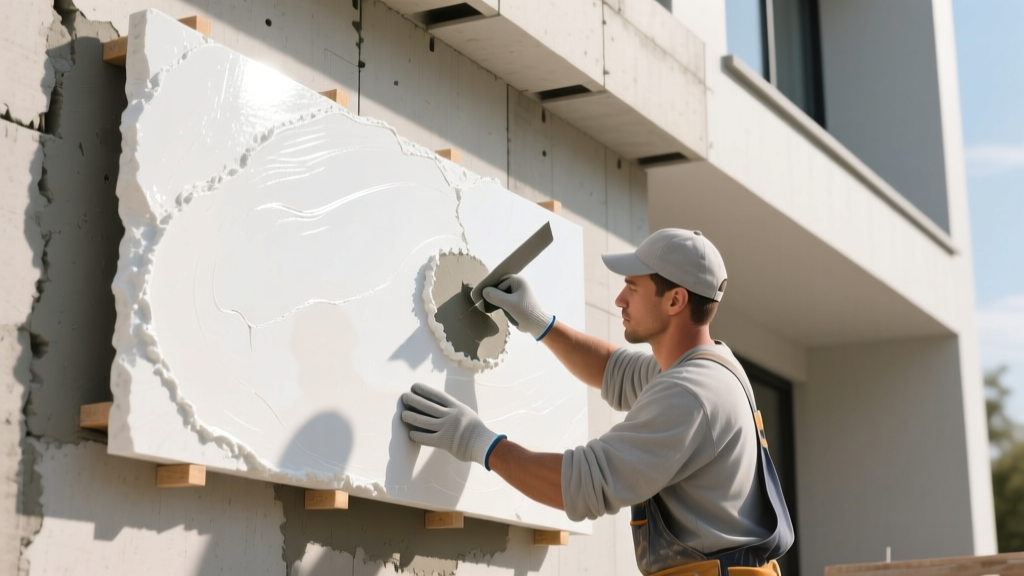
Installing exterior white stone veneer—whether natural white limestone, marble, or manufactured white ledge stone—requires a fundamentally different approach than standard gray or earth-toned veneers. The primary vulnerability of bright white masonry is staining. Iron oxide bleeding from standard gray mortar, dirt accumulation during installation, and efflorescence (white, powdery salt deposits) can permanently ruin the aesthetic of a white facade. According to the Masonry Veneer Manufacturers Association (MVMA), improper mortar selection and inadequate weatherization account for over 80% of premature veneer failures and aesthetic degradation.
This guide details the exact substrate preparation, specialized mortar mixing, and sealing protocols required to install exterior white stone veneer flawlessly, ensuring long-term durability and pristine color retention.
Material and Tool Checklist
Before beginning, procure materials specifically rated for exterior masonry veneer applications. Do not substitute interior adhesives or standard brick mortar.
- Weather Barrier: Two layers of Grade D asphalt-impregnated felt paper or a high-performance house wrap (e.g., Tyvek CommercialWrap).
- Weep Screed: Minimum 26-gauge galvanized steel or PVC weep screed with a 3.5-inch vertical flange.
- Lath: 2.5 lb self-furring galvanized diamond mesh metal lath (ASTM C847).
- Mortar: Polymer-modified white veneer mortar (e.g., Sakrete White Veneer Mortar or PRO-MIX White).
- Fasteners: 1.5-inch galvanized roofing nails or corrosion-resistant staples (minimum 1-inch penetration into studs).
- Sealer: Penetrating silane/siloxane water repellent (e.g., Prosoco Siloxane PD).
Phase 1: Substrate Prep and Weatherization
Step 1: Weather Barrier and Weep Screed Installation
Moisture management is the most critical factor in exterior stone installation. Begin by applying your weather-resistant barrier (WRB) over the exterior sheathing. If using felt paper, overlap horizontal seams by 2 inches and vertical seams by 6 inches.
Next, install the weep screed at the base of the wall. The International Residential Code (IRC Section R703.7) mandates specific clearances to prevent ground moisture from wicking into the stone assembly:
- Above Soil: The weep screed must be installed at least 4 inches above finished earth grade.
- Above Paved Surfaces: Maintain a minimum 2-inch clearance above concrete patios, driveways, or walkways.
Overlap the WRB over the vertical flange of the weep screed by at least 2 inches to ensure water drains outward, not behind the screed.
Step 2: Lath Application and the Scratch Coat
Roll out the 2.5 lb self-furring metal lath horizontally. The dimples on the lath must face outward, away from the wall, to create a mechanical key for the mortar. Overlap horizontal seams by 1 inch and vertical seams by 2 inches. Fasten the lath every 6 inches along the studs using galvanized nails or staples, ensuring a tight, wrinkle-free fit.
Once the lath is secured, mix a standard gray scratch coat mortar (gray is acceptable here as it will be fully encapsulated and will not contact the white stone). Apply a 3/8-inch to 1/2-inch thick layer of mortar, completely embedding the lath. While the mortar is still wet, use a notched trowel or a scratch rake to score deep horizontal lines into the surface. This "scratch coat" provides the mechanical grip for the final stone application. Allow the scratch coat to cure for a minimum of 24 to 48 hours, keeping it lightly misted with water if temperatures exceed 85°F to prevent rapid, weak curing.
Phase 2: Mortar Selection and Mixing
The mortar used to adhere and joint exterior white stone veneer must be specifically formulated to prevent staining while providing high bond strength. Polymer-modified white mortars contain acrylic or latex additives that improve adhesion, increase flexural strength, and reduce water permeability.
| Mortar Type | Composition | Staining Risk | Bond Strength | Recommendation |
|---|---|---|---|---|
| Standard Gray Type N/S | Portland cement, lime, sand | High (Iron oxide bleed) | Moderate | Never use on white stone |
| Standard White Type N | White cement, lime, sand | Moderate (Efflorescence risk) | Moderate | Acceptable for interior only |
| Polymer-Modified White | White cement, sand, acrylic polymers | Very Low | Very High | Required for exterior white veneer |
Mix the polymer-modified white mortar according to the manufacturer's exact water-to-powder ratio. Use a low-speed drill (under 400 RPM) with a mud paddle to mix for 5 to 10 minutes. Let the mixture "slake" (rest) for 5 minutes to allow the polymers to fully activate, then remix briefly without adding more water. The ideal consistency is similar to thick peanut butter; it should hold its shape on a trowel held vertically.
Phase 3: Laying the Exterior White Stone Veneer
Corner First, Then Field
Always begin installation at the corners of the building. Apply a generous layer of white mortar to the back of the corner stone (back-buttering) and press it firmly into the scratch coat. Twist the stone slightly to squeeze out excess mortar and ensure full contact. Alternate long and short corner pieces to create a natural, interlocking structural bond. Work your way up the corner, checking for plumb and level every three courses.
Back-Buttering and Placement
Once corners are set, move to the field stones. Back-buttering is non-negotiable. Apply a 1/2-inch layer of white mortar to the entire back surface of each stone. Press the stone into the wall, wiggling it slightly until mortar squeezes out the edges. Do not tap stones with a hard mallet, as this can fracture natural white limestone or marble; use a rubber mallet or the heel of your hand.
White stone is highly porous. If white mortar smears onto the face of the stone, do not wipe it with a wet sponge, as this will drive the cement paste deep into the pores. Instead, let the mortar smudge dry until it becomes crumbly (usually 15-20 minutes), then brush it off with a stiff, dry natural-bristle brush. Save wet cleaning only for the final wash-down.
Jointing and Tooling
If your design calls for grouted joints (as opposed to dry-stack), use a pointing trowel to pack the joints with white mortar. Wait until the mortar is "thumbprint hard" (firm enough to resist light pressure but soft enough to indent with a fingernail) before tooling the joints with a concave jointer. This compresses the mortar against the stone edges, creating a watertight seal.
Phase 4: Sealing Against Efflorescence
Efflorescence occurs when water-soluble salts within the mortar or stone are carried to the surface by moisture evaporation, leaving a chalky white residue. While this is less visually jarring on white stone than on dark stone, it alters the texture and can trap dirt over time.
Wait a full 28 days after installation for the mortar to fully cure and release its initial moisture. Before sealing, wash the wall with a specialized masonry cleaner (like Prosoco Sure Klean Vana Trol) to remove any construction dirt or early-stage efflorescence. Rinse thoroughly and allow the wall to dry completely for 48 hours.
Apply a penetrating silane/siloxane sealer using a low-pressure pump sprayer. Siloxane sealers react chemically with the silica in the stone and mortar to form a hydrophobic barrier below the surface. Unlike film-forming acrylic sealers, siloxane will not trap moisture inside the wall, will not yellow under UV exposure, and will not alter the bright, natural matte finish of the white stone. Apply two coats wet-on-wet for complete saturation.
2026 Cost Breakdown for Exterior White Veneer
Budgeting for exterior white stone veneer requires accounting for both the premium material costs and the specialized prep materials required to protect the finish. Below is the current national average cost per square foot for a professional-grade installation.
| Cost Component | Manufactured White Veneer | Natural White Limestone/Marble |
|---|---|---|
| Stone Material | $8.50 - $14.00 | $16.00 - $28.00 |
| White Polymer Mortar & Prep | $4.50 - $6.00 | $4.50 - $6.00 |
| Labor (Installation & Pointing) | $12.00 - $18.00 | $18.00 - $26.00 |
| Siloxane Sealer Application | $1.50 - $2.50 | $1.50 - $2.50 |
| Total Estimated Cost | $26.50 - $40.50 / sq ft | $40.00 - $62.50 / sq ft |
Note: Always factor in a 10% waste overage for manufactured stone and a 15% overage for natural stone, as cutting white stone to fit around windows, doors, and rooflines generates significant unusable offcuts.
By strictly adhering to white-mortar protocols, maintaining rigorous moisture management via weep screeds, and finishing with a penetrating siloxane sealer, your exterior white stone veneer will maintain its brilliant, unblemished appearance for decades without succumbing to the staining and efflorescence that plague improperly installed light-colored masonry.
Written by
James ThorntonJames Thornton is a construction industry veteran with 25 years of hands-on experience in wood framing, lumber grading, and residential building codes. He started as a framing carpenter in rural Oregon, earned his ICC Residential Building Inspector certification, and eventually became a senior plan reviewer for the City of Portland Bureau of Development Services. James holds a B.S. in Wood Science & Technology from Oregon State University and is a certified lumber grader through the West Coast Lumber Inspection Bureau (WCLIB). He has inspected over 3,000 residential construction sites and authored the city's internal guide on advanced framing techniques (2x6 at 24" O.C.). James lives in Bend, OR, where he builds custom timber-frame cabins and competes in lumberjack sports.
More from James Thornton
View all
Insulation
Best Home Insulation Materials: Complete 2026 Guide
Compare top home insulation materials for 2026. Find R-values, installed costs per square foot, and best uses for fiberglass, spray foam, and mineral wool.
Aug 4, 2026

Sustainable Building
Certify Your Green Building Material for LEED and WELL
Step-by-step guide to certifying a green building material for LEED v5 and WELL v2. Master EPDs, HPDs, and VOC limits for 2026 project specifications.
Aug 4, 2026

Stone & Masonry
Veneer Stacked Stone Panels: Interior Design & Style Showcase
Discover how veneer stacked stone panels transform interiors. Explore modern design profiles, material pairings, and technical installation specs.
Aug 4, 2026