Step-by-Step Stone Veneer Backsplash Kitchen Installation
Learn how to install a stone veneer backsplash kitchen wall with our step-by-step guide covering substrate prep, mortar selection, and sealing.

Why Stone Veneer Excels in Kitchen Environments
Installing a stone veneer backsplash kitchen wall introduces significant thermal mass, non-combustible surfaces, and high-end aesthetics to a cooking space. Unlike ceramic tile, natural and manufactured stone veneers possess irregular profiles that hide minor wall imperfections and resist heat degradation from nearby ranges. However, the kitchen environment introduces unique challenges: airborne cooking grease, high humidity, heavy moisture exposure near sinks, and strict electrical codes regarding GFCI outlets. Standard fireplace installation methods will fail in a kitchen if grease resistance and substrate weight limits are not properly engineered.
Material Specifications and 2026 Cost Estimates
Before beginning, procure materials rated specifically for interior wet and high-heat zones. Do not use exterior masonry mortar, which lacks the polymer flexibility required for interior temperature fluctuations and cabinet deflection.
| Material Category | Recommended Specification / Product Example | Est. Cost (Per Sq. Ft.) |
|---|---|---|
| Substrate | 1/2-inch Cement Backer Board (e.g., HardieBacker 500 or USG Durock) | $1.50 - $2.25 |
| Adhesive | ANSI A118.15 Polymer-Modified Thinset (e.g., Laticrete 254 Platinum) | $0.85 - $1.20 |
| Veneer | Lightweight Stacked Stone Panels or Ledgestone (e.g., Eldorado Stone) | $9.00 - $16.00 |
| Sealer | Penetrating Fluoropolymer Impregnator (e.g., Miracle Sealants 511) | $0.90 - $1.50 |
| Edge Trim | Schluter-QUDEC or RONDEC (Anodized Aluminum or Stainless) | $2.50 / linear ft |
Phase 1: Substrate Engineering and Waterproofing
Stone veneer weighs between 8 and 15 pounds per square foot. Standard 1/2-inch drywall cannot support this shear load long-term, especially when subjected to the vibration of nearby appliances and the humidity of a kitchen sink. The Tile Council of North America (TCNA) Handbook mandates rigid, moisture-resistant substrates for heavy stone installations.
Substrate Preparation Steps
- Demo and Clear: Remove existing tile or backsplash down to the wall studs. Inspect studs for plumb; shim any studs that deviate more than 1/8-inch over 8 feet.
- Install Cement Board: Screw 1/2-inch cement backer board directly to the studs using corrosion-resistant backer board screws every 6 inches along the edges and 8 inches in the field. Leave a 1/8-inch gap between panels.
- Tape and Mud Seams: Embed alkali-resistant fiberglass mesh tape into the joints and cover with a thin layer of your polymer-modified thinset. Do not use standard drywall mesh tape, which will degrade in the alkaline environment of cement mortar.
- Waterproofing (Sink Zones): In areas directly behind the kitchen sink, apply a liquid-applied waterproofing membrane (such as RedGard or Hydro Ban) over the cured cement board to protect the wall cavity from splashing.
If your backsplash extends to the ceiling, do not adhere stone veneer directly to the underside or face of wooden upper cabinets. The differential expansion rates between wood and stone will cause the veneer to delaminate. Terminate the stone at the bottom of the upper cabinets using a metal Schluter edge trim or a wood cap molding.
Phase 2: Electrical Box Extensions (NEC Compliance)
Adding 1/2-inch cement board and 1-inch stone veneer pushes the finished wall surface out by 1.5 inches. This leaves your existing electrical outlets deeply recessed, creating a severe fire hazard and violating the National Electrical Code. According to NFPA 70 (NEC) Article 314.20, electrical boxes must be flush with the finished surface.
Before installing any stone, purchase non-combustible electrical box extenders (such as the Arlington Industries BE1 series). Turn off the breaker, unscrew the GFCI outlets, snap the plastic or metal extenders over the existing boxes, and reinstall the outlets so they sit perfectly flush with the future face of the stone veneer.
Phase 3: Mortar Application and Veneer Adhesion
For interior kitchen stone veneer, you must use an ANSI A118.4 or A118.15 polymer-modified thinset mortar. These mortars contain latex or acrylic additives that provide superior bond strength and flexibility compared to unmodified masonry cement. Products like Custom Building Products FlexBond or Laticrete 254 Platinum are industry standards for this application.
The Back-Buttering Technique
Achieving 95% mortar coverage is critical to prevent hollow spots where moisture can collect and breed mold. Follow this dual-application method:
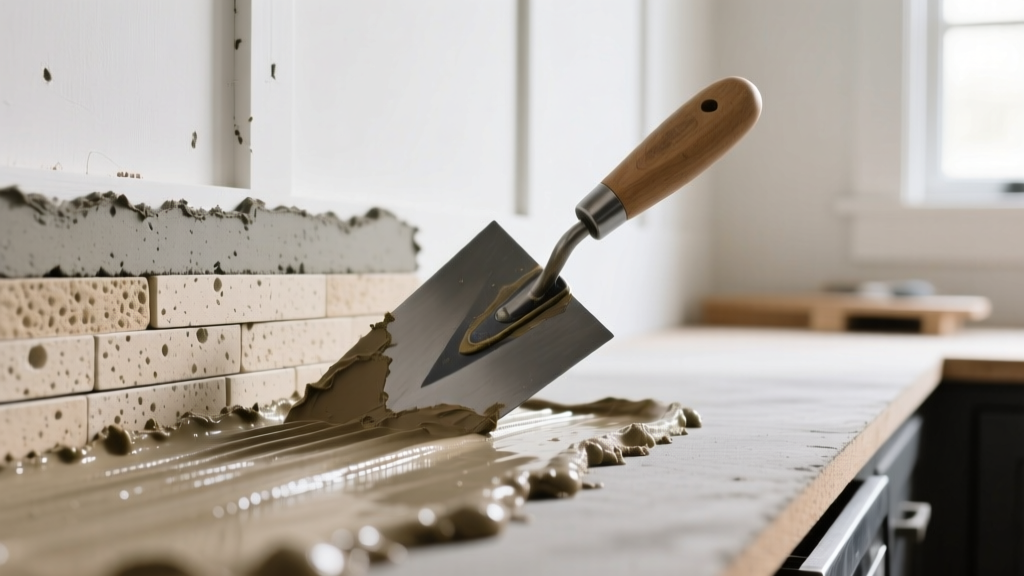
- Wall Application: Use a 1/2-inch by 1/2-inch square-notched trowel to comb the thinset onto the wall at a consistent 45-degree angle. Only spread enough mortar for 2 to 3 panels at a time to prevent the thinset from skinning over.
- Back-Buttering: Use the flat edge of your trowel to scrape a thin, 1/16-inch layer of mortar directly onto the back of the stone veneer panel. This breaks the surface tension and ensures a mechanical bond.
- Setting: Press the panel firmly into the wall combing, twisting slightly to collapse the ridges. Maintain a 1/8-inch to 1/4-inch gap at the countertop intersection to allow for countertop deflection; this gap will be filled with a color-matched silicone caulk later.
Phase 4: Cutting and Fitting Around Obstacles
Kitchen backsplashes require precise cuts for outlets, switches, and window sills. Because stone veneer has an irregular, three-dimensional profile, standard tile nippers will shatter the stone.
Phase 5: Sealing for Grease and Moisture Resistance
This is the most frequently skipped step in DIY kitchen installations, leading to permanent staining. Cooking oil, tomato sauce, and wine will penetrate the porous capillaries of natural and manufactured stone. You must apply a penetrating impregnating sealer, never a topical acrylic sealer. Topical sealers form a plastic-like film that will yellow from UV exposure, trap grease underneath, and eventually peel in high-heat zones near the stove.
Sealer Selection Matrix for Kitchens
| Sealer Type | Chemical Base | Kitchen Suitability | Maintenance Cycle |
|---|---|---|---|
| Penetrating Impregnator | Fluoropolymer / Siloxane | Excellent (Repels oil and water) | Reapply every 3-5 years |
| Topical Film-Forming | Acrylic / Polyurethane | Poor (Traps grease, yellows, peels) | Requires stripping annually |
| Color-Enhancing Penetrating | Silicone Resin | Good (Deepens color, moderate oil resistance) | Reapply every 2-3 years |
Apply a high-quality fluoropolymer impregnator (such as Miracle Sealants 511 Impregnator or Aqua Mix Sealer's Choice Gold) using a low-pressure pump sprayer or a dense foam brush. Allow the sealer to penetrate for 5 to 15 minutes, then aggressively buff off any excess with a clean microfiber cloth. If the excess is left to dry on the surface, it will create a hazy, irreversible film that requires chemical stripping to remove.
Troubleshooting Common Installation Failures
1. Efflorescence (White Powdery Residue)
Cause: Water-soluble salts from the mortar or the stone itself are drawn to the surface by evaporating moisture. This is common if unmodified masonry cement was used or if the wall was exposed to high humidity before sealing. Fix: Dry-brush the residue with a stiff nylon brush. If it persists, wash with a diluted solution of sulfamic acid (never use muriatic acid, which will etch the stone and corrode kitchen metals). Rinse thoroughly and allow to dry completely before sealing.
2. Adhesive Delamination Near the Stove
Cause: Thermal shock from high-BTU gas burners causes rapid expansion and contraction of the stone, breaking the bond of rigid mortars. Fix: Ensure you used an ANSI A118.15 improved modified thinset, which retains elastomeric properties after curing. Maintain a minimum 4-inch clearance between the flame source and the veneer, and ensure the range hood is properly vented to the exterior to reduce ambient heat buildup.
3. Grout Haze on Unsealed Stone
Cause: If you are using a grouted stone veneer profile (like fieldstone) rather than dry-stacked ledgestone, applying grout before the stone is sealed will result in permanent haze trapped in the stone's pores. Fix: Always apply the first coat of penetrating sealer before grouting. This creates a temporary barrier that allows you to wipe away grout residue easily with a damp sponge. Apply the second, final coat of sealer after the grout has fully cured (typically 72 hours).
Written by
Elena RodriguezElena Rodriguez is a civil engineer and technical writer specializing in concrete technology, masonry systems, and ASTM/ACI compliance. She earned her B.S. in Civil Engineering from Texas A&M University and spent a decade at a materials testing laboratory, performing over 2,000 concrete compressive strength tests and masonry prism evaluations. Elena is an ACI-certified Field Testing Technician (Grade I) and a member of ASTM Committee C12 on Natural Building Stone. She currently consults on forensic engineering cases involving concrete failures and moisture intrusion. Based in San Antonio, TX, Elena is a proud member of the Society of Women Engineers (SWE) and coaches her daughter's FIRST Robotics team.
More from Elena Rodriguez
View all
Walls & Panels
Cost Analysis: Light Gauge Steel Framing Advantages and Disadvantages
Evaluate light gauge steel framing advantages and disadvantages through a strict cost analysis lens, comparing material, labor, and lifecycle expenses.
Aug 4, 2026

Walls & Panels
Gypsum Board Types: Exact Specifications, Thickness & Dimensions
Compare standard, Type X, and moisture-resistant gypsum board types. Get exact specifications, thicknesses, dimensions, and ASTM standards for your project.
Aug 4, 2026

Fire Resistance
Best Fire-Resistant Outdoor Decking Materials: 2026 Buyer Guide
Discover the best fire-resistant outdoor decking materials for 2026. Compare Class A PVC, aluminum, and hardwood options for WUI compliance and safety.
Aug 4, 2026