Installing Limestone Building Material: Step-by-Step Veneer Guide
Master installing limestone building material with our step-by-step veneer guide. Covers mortar mixes, substrate prep, and sealing for lasting results.

Substrate Preparation & Moisture Management
Proper substrate preparation is the single most critical factor in preventing delamination and moisture intrusion when installing a limestone building material veneer. Limestone is a highly porous sedimentary rock; if trapped moisture freezes behind the stone, it will cause spalling and catastrophic system failure.
Weather-Resistive Barrier (WRB) & Lath Specifications
For exterior wood-framed or steel-stud walls, you must install a code-compliant WRB. Apply two layers of Grade D building paper or a high-performance fluid-applied membrane. Overlap horizontal joints by a minimum of 2 inches and vertical joints by 6 inches.
Next, attach corrosion-resistant, self-furring galvanized steel lath. The lath must meet ASTM C847 standards with a minimum weight of 2.5 lbs per square yard. Fasten the lath using corrosion-resistant nails or staples that penetrate the structural framing by at least 1 inch. Space fasteners no more than 6 inches apart vertically and 16 inches apart horizontally.
Never omit the weep screed at the base of the wall. Install a corrosion-resistant weep screed (per ASTM C1063) at least 4 inches above finished soil grade or 2 inches above paved surfaces. This allows trapped moisture to escape and prevents ground wicking into the limestone.
Selecting the Right Mortar for Limestone
Standard masonry cements are often too rigid or contain high alkali levels that can stain calcium carbonate-based stones. When installing a limestone building material, you must use a mortar that accommodates slight thermal movement while preventing chemical staining.
| Mortar Type | Composition / Specification | Best Application |
|---|---|---|
| Type N | 1 Part Portland, 1 Part Lime, 6 Parts Sand (ASTM C270) | Standard exterior/interior limestone veneer. Offers excellent flexibility and breathability. |
| Polymer-Modified | Pre-blended with latex/acrylic polymers (e.g., SPEC MIX Veneer Stone Mortar) | High-wind zones, seismic areas, or non-porous substrates where maximum bond strength is required. |
| Type S | 1 Part Portland, 0.5 Part Lime, 4.5 Parts Sand | Avoid for limestone. High compressive strength can trap stress and crack the softer stone. |
The Scratch Coat & Curing Timeline
Before setting any stone, apply a scratch coat of your selected mortar directly over the metal lath. The scratch coat must be exactly 1/2 inch thick. Use a notched trowel or a scratch rake to score horizontal lines into the wet mortar. This creates a mechanical key for the setting bed.
Allow the scratch coat to cure for a minimum of 24 to 48 hours. During hot or windy conditions, mist the scratch coat with clean water twice daily to prevent rapid drying, which leads to shrinkage cracking. The substrate should be damp (but not saturated) when you begin laying the limestone.
Step-by-Step Limestone Veneer Installation
Follow this exact sequence to ensure proper adhesion and joint uniformity. According to the Natural Stone Institute Technical Resources, back-buttering is non-negotiable for natural stone veneers.
- Layout and Dry-Fit: Lay out the limestone pieces on the ground. Mix stones from multiple pallets to ensure color and texture variation. Pre-arrange corner pieces and capstones first.
- Apply the Setting Bed: Trowel a 1/2-inch to 3/4-inch layer of fresh mortar onto the cured scratch coat. Work in small sections (no more than 4 square feet at a time) to prevent the mortar from skinning over.
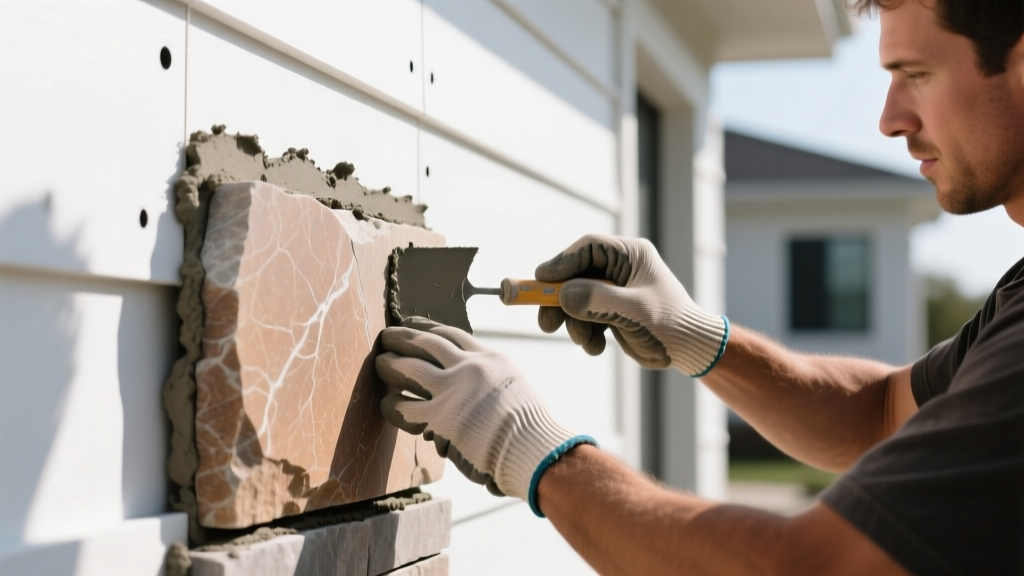
- Back-Butter the Stone: Using a masonry trowel, apply a 1/4-inch layer of mortar to the entire back of the limestone piece. Press the mortar into the stone's pores to eliminate air pockets.
- Set and Press: Press the stone firmly into the setting bed with a slight twisting motion. Mortar should squeeze out slightly at the edges, indicating full contact. Maintain a 1/2-inch to 1-inch joint width for standard rustic profiles, or tighter 1/8-inch joints for precision-cut ashlar patterns.
- Strike the Joints: Once the mortar has firmed up (usually 30 to 60 minutes, depending on humidity), strike the joints using a pointing trowel or jointing tool. Compress the mortar tightly against the stone edges to create a weather-tight seal.
Cutting & Shaping Techniques
Limestone is relatively soft (3 to 4 on the Mohs scale), making it easy to cut but highly susceptible to chipping and blowouts. Never use a dry masonry saw or an angle grinder with a segmented blade for finish cuts.
- Wet Saw Requirement: Use a continuous-rim diamond blade on a bridge wet saw. The water cools the blade and suppresses silica dust while preventing the stone's edges from micro-fracturing.
- Drilling Holes: For plumbing or electrical penetrations, use diamond-tipped core bits. Drill from the finished face inward to prevent blowout on the back, and reduce RPMs to minimize heat buildup.
- Edge Finishing: Rub cut edges with a carborundum rubbing stone to remove sharp arrises and blend the cut edge with the natural stone texture.
Sealing & Efflorescence Prevention
Because limestone is highly permeable, sealing is mandatory for exterior applications and highly recommended for interiors. You must use a breathable, penetrating sealer that allows water vapor to escape while blocking liquid water intrusion. Film-forming sealers will trap moisture inside the stone, leading to sub-surface spalling.
Never apply a sealer immediately after installation. Wait a minimum of 28 days to allow the mortar and scratch coat to fully cure and release their initial moisture and alkalinity. Applying a silane/siloxane sealer like PROSOCO Siloxa-Tek 8500 too early will trap alkali salts, guaranteeing severe efflorescence.
Acid Washing Prohibition: Never clean limestone with muriatic acid or any acidic masonry cleaner. Calcium carbonate reacts violently with acids, permanently etching the surface and destroying the stone's natural finish. Always use a pH-neutral stone cleaner and a stiff natural-bristle brush.
Troubleshooting Common Installation Failures
Even with careful installation, environmental factors can cause issues. Use this diagnostic matrix to identify and resolve common limestone veneer failures.
| Symptom | Root Cause | Corrective Action |
|---|---|---|
| Efflorescence (White powdery deposits) | Moisture migrating through the wall, carrying soluble salts to the surface. | Dry brush the deposits. Improve drainage at the weep screed. Apply a breathable siloxane sealer after 28 days. |
| Spalling (Stone face flaking off) | Freeze-thaw cycles combined with trapped moisture or a non-breathable film sealer. | Remove affected stones. Strip any acrylic sealers chemically. Reinstall with proper WRB and weep screeds. |
| Delamination (Stone detaching from wall) | Failure to back-butter, mortar skinning over before setting, or inadequate lath fastening. | Remove loose stones. Re-secure lath if necessary. Reinstall using polymer-modified mortar and strict back-buttering. |
| Iron Staining (Rust-colored bleeding) | Use of non-galvanized lath, nails, or mortar contaminated with iron oxides. | Apply a specialized rust-removing poultice. Replace any exposed non-corrosion-resistant fasteners. |
Installing a limestone building material requires strict adherence to moisture management and material compatibility. By specifying the correct Type N or polymer-modified mortar, ensuring robust substrate preparation, and utilizing breathable sealers, you guarantee a structurally sound and aesthetically enduring masonry facade.
Written by
Priya KapoorPriya Kapoor is a real estate market analyst and construction economics researcher with expertise in housing affordability, development feasibility, and infrastructure investment. She holds a Master of Regional Planning from Cornell University and previously worked as a senior analyst at CBRE's Investment Properties group, where she modeled returns for $4B in mixed-use development pipelines. Priya now runs an independent research practice advising developers, municipalities, and REITs on construction cost forecasting and market timing. She publishes the quarterly "BuildMat Market Pulse" report tracking material price indices across 12 commodity categories. Based in Austin, TX, Priya serves on the board of Habitat for Humanity Austin and is a marathon runner.
More from Priya Kapoor
View all
Construction Cost
Cost to Build a 1600 Sq Ft Home in 2026: Full Breakdown
Accurate 2026 cost to build a 1600 sq ft home—material, labor, and regional pricing breakdowns included. Plan your budget with real-time estimates.
Aug 11, 2026

Wood & Lumber
Name the Types of Wood for Pressure Treatment and Preservation
Learn how to name the types of wood best suited for pressure treatment. Compare species treatability, chemical retention levels, and 2026 preservation costs.
Aug 4, 2026

Stone & Masonry
Stone Veneer Suppliers Lindenhurst: 2026 Cost Analysis
Analyze 2026 stone veneer costs in Lindenhurst, NY. Compare local supplier pricing, delivery fees, and Suffolk County installation labor rates.
Aug 4, 2026