Installing Stone Veneer on Fireplace: Design & Layout Guide
Master installing stone veneer on fireplace surrounds with our design showcase. Discover trending styles, layout patterns, and pro installation tips.

The Design-First Approach to Hearth Makeovers
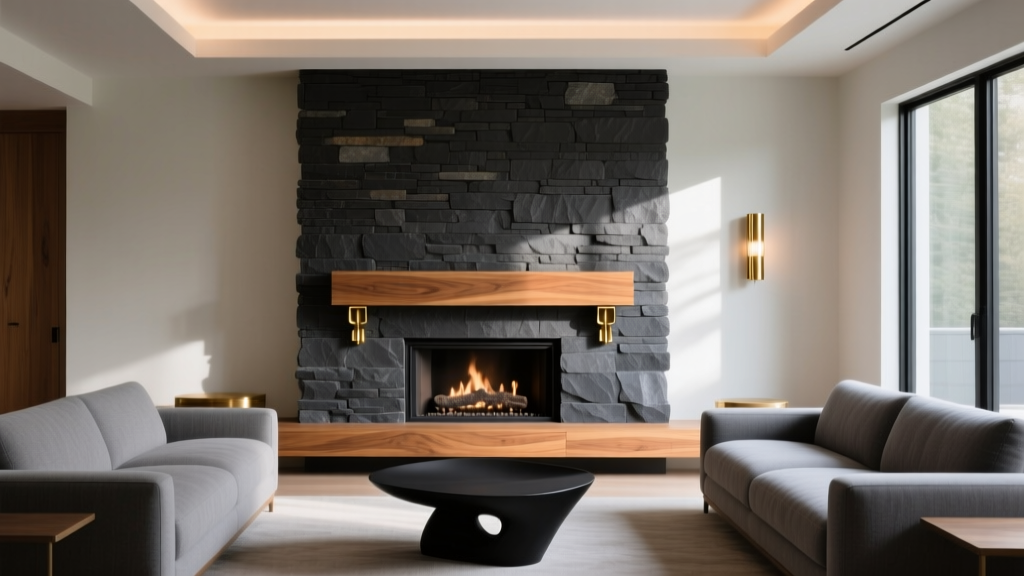
The fireplace is the undisputed anchor of a living space. When upgrading from builder-grade brick or plain drywall, installing stone veneer on fireplace surrounds transforms the room's entire architectural weight. However, a successful hearth makeover relies on more than just adhering stone to a wall; it requires a meticulous design layout to ensure the final product looks like solid, structural masonry rather than a thin appliqué. This guide bridges the gap between interior design trends and rigorous masonry installation standards, ensuring your fireplace commands the room.
Selecting Your Stone Profile: A Design Matrix
Before mixing mortar, you must select a profile that aligns with your interior design objectives. Stone veneer profiles dictate the shadow lines, texture, and visual rhythm of the surround.
| Stone Profile | Visual Impact & Shadow Lines | Ideal Design Style | Installation Complexity |
|---|---|---|---|
| Stacked Ledger | Horizontal, linear, tight joints. Minimal shadow depth. | Mid-Century Modern, Contemporary, Minimalist. | Low to Medium (Z-pattern alignment required). |
| Country Rubble | Organic, irregular, deep joints. High shadow contrast. | Rustic, Craftsman, Farmhouse, Traditional. | High (Requires extensive cutting and fitting). |
| Ashlar / Fieldstone | Squared but varied sizes, moderate joints. Balanced rhythm. | Transitional, Industrial, Modern Classic. | Medium (Modular sizing aids layout). |
For 2026 design trends, dark charcoal and limewashed ledger profiles are dominating modern builds, while warm, earth-toned rubble remains a staple for high-end rustic renovations.
The Dry-Lay Phase: Where Design Meets Execution
The most critical step in achieving a natural aesthetic is the dry-lay process. Never pull stones directly from the box and apply them to the wall. Manufactured stone veneer is packaged with color and size variations that will create obvious "blocks" of repeating patterns if not blended.
The 36-Inch Blending Rule
Clear a 36-inch by 36-inch space on the floor directly in front of the fireplace. Open at least three to four different boxes of veneer and mix them on the ground. As you pull stones for installation, draw from this blended pile. According to Westlake Royal Stone Veneers installation guidelines, dry-laying a 4-foot section of the wall at a time allows you to step back and evaluate the color distribution and joint alignment before committing to mortar.
Avoid placing two stones of the exact same size, shape, or color adjacent to one another. Visually divide your hearth into thirds and ensure that large "anchor" stones are distributed evenly across these zones to prevent the eye from catching repetitive clusters.
Step-by-Step Installation for Design Integrity
Proper substrate preparation ensures the veneer does not crack or detach, which would ruin both the structural integrity and the visual design. Follow these precise steps when installing stone veneer on fireplace surrounds.
- Substrate & Lath Application: Ensure the fireplace surround is backed by cement board or a masonry substrate. Over wood framing, apply a weather-resistant barrier, followed by 18-gauge galvanized wire lath. Fasten the lath every 6 inches into the studs. The lath must be tight; loose lath causes mortar cracking.
- The Scratch Coat: Apply a 1/2-inch layer of Type S masonry mortar over the lath. Before it fully cures, "scratch" horizontal grooves into the surface with a notched trowel. This creates a mechanical bond for the final setting bed. Allow this to cure for 24 to 48 hours.
- Setting Corners First: If your design utilizes corner pieces, install them before the flat stones. Corners provide the illusion of full-thickness masonry. Stagger the corner lengths (e.g., long-short-long) to avoid a manufactured, stair-step appearance.
- Back-Buttering and Setting: Apply a 1/2-inch mortar bed to the scratch coat. "Back-butter" the back of each stone veneer with a thin layer of mortar, pressing it firmly into the wall bed until mortar squeezes out slightly at the edges. This ensures 100% coverage and prevents hollow spots.
Mortar Selection and Jointing Techniques
The mortar joint contributes up to 20% of the visible surface area on a rubble or ashlar fireplace. The joint profile drastically alters the final design:
- Flush Joints: Mortar is struck flush with the stone face. Creates a clean, modern look, especially with ledger stone.
- Recessed (Raked) Joints: Mortar is pushed back 1/4 to 1/2 inch. Maximizes shadow lines, making each stone pop. Ideal for rustic profiles.
- Overgrouted (Extruded) Joints: Mortar is allowed to squeeze out and partially cover the stone edges, then brushed. Creates an aged, Old World, or reclaimed aesthetic.
"Always use a polymer-modified Type S mortar for interior fireplace surrounds. Type N lacks the compressive strength required for vertical load-bearing veneer applications, and standard thinset does not provide the necessary sag resistance for heavy stone profiles." — Masonry Magazine Veneer Best Practices
When installing stone veneer on fireplace surrounds, you must adhere to NFPA codes and standards regarding clearances to combustibles. Stone veneer and mortar do not inherently provide a fire rating to the wall assembly behind them. Maintain the manufacturer-specified clearance (typically 12 to 18 inches) from the firebox opening to any combustible mantel or trim, regardless of the stone covering.
Troubleshooting Common Aesthetic Failures
Even with premium materials, poor execution can ruin the design. Watch for these specific failure modes:
- Picture Framing: Occurs when installers run a continuous, unbroken line of stones around the perimeter of the fireplace or mantel, creating an artificial "frame." Break up the perimeter by letting stones stagger naturally off the edges.
- Lippage: When adjacent stones protrude at different depths. While some variation is natural, excessive lippage catches harsh side-lighting from modern LED fixtures, creating messy shadows. Keep depth variations under 1/4 inch for ledger profiles.
- Efflorescence: White, powdery salt deposits on the stone surface. This happens when moisture from the mortar migrates to the surface. Prevent it by ensuring the scratch coat is fully cured before setting stones and avoiding excess water when mixing mortar.
Cost Breakdown for Hearth Projects
Budgeting accurately requires looking beyond the per-square-foot cost of the stone itself. Here is a realistic cost matrix for a standard 50-square-foot fireplace surround project.
| Material / Service | Estimated Cost Range | Notes |
|---|---|---|
| Stone Veneer (Flats) | $8.00 - $16.00 / sq ft | Varies by profile; ledger is typically cheaper than hand-laid rubble. |
| Corner Pieces | $12.00 - $22.00 / linear ft | Essential for exposed edges; calculate outside corners carefully. |
| Type S Mortar & Lath | $1.50 - $2.50 / sq ft | Includes 18-gauge lath, fasteners, and polymer-modified mortar. |
| Professional Installation | $15.00 - $30.00 / sq ft | Highly dependent on profile complexity and regional labor rates. |
✓ Verify substrate is cement board or properly lathed drywall.
✓ Dry-lay and blend at least 3 boxes of stone.
✓ Confirm NFPA clearance to combustible mantels.
✓ Select jointing tool (tuck pointer, wire brush, or jointer) based on design profile.
✓ Mix mortar to a "peanut butter" consistency to prevent sagging on vertical applications.
Written by
Marcus ChenMarcus Chen is a licensed structural engineer (PE) and building materials analyst with over 12 years of experience across residential, commercial, and industrial construction. He holds a Master of Science in Civil Engineering from UC Berkeley and spent six years at Thornton Tomasetti before transitioning to independent consulting and technical writing. Marcus specializes in material selection for seismic-prone regions, concrete reinforcement strategies, and lifecycle cost analysis. His work has been cited by the American Concrete Institute (ACI) and the Structural Engineers Association of California (SEAOC). When he is not on a job site or at his desk, you will find him hiking the Sierra Nevada or restoring a 1920s craftsman bungalow in Oakland, CA.
More from Marcus Chen
View all
Construction Cost
How Much Did the Eiffel Tower Cost to Build?
How much did the Eiffel Tower cost to build in 1889? We adjust for inflation and compare its budget to modern skyscraper construction.
Aug 4, 2026

Fire Resistance
What Is a Fire Resistant Material? Testing & Certification Guide
Discover what is a fire resistant material through ASTM and UL testing. Learn how fire ratings, certifications, and assemblies work in construction.
Aug 4, 2026

Construction Cost
How Much Did the Burj Khalifa Cost to Build?
How much did the Burj Khalifa cost to build? We break down the $1.5B project and extract 5 money-saving strategies for your next build.
Jul 30, 2026