Installing Stone Veneer Outside: Step-by-Step Guide for Exteriors
Learn the exact steps for installing stone veneer outside. This guide covers weatherproofing, lath, mortar mixing, and layout for durable exterior walls.

Moisture Management: The Foundation of Exterior Veneer
When installing stone veneer outside, the primary adversary is not gravity, but moisture. Exterior cladding must manage hydrostatic pressure, wind-driven rain, and freeze-thaw cycles. Unlike interior applications, exterior stone veneer requires a continuous drainage plane. The International Residential Code (IRC) mandates a water-resistive barrier (WRB) and a weep screed to allow trapped moisture to escape. According to Building Science Corporation, failing to integrate the WRB with the weep screed is the leading cause of substrate rot behind masonry veneers.
- Maintain a minimum 4-inch clearance between the bottom of the weep screed and finished soil grade.
- Maintain a minimum 2-inch clearance above paved surfaces (driveways, patios, walkways).
- Maintain a minimum 1/2-inch clearance above rooflines or deck surfaces.
Material Specifications for Exterior Climates
Exterior installations demand materials rated for high tensile strength and weather resistance. Using interior-grade mortar or non-galvanized lath will result in catastrophic failure within a few freeze-thaw cycles.
| Component | Specification / Standard | Why It Matters for Exteriors |
|---|---|---|
| Mortar | Type S (ASTM C270) | High tensile strength (1,800 psi) resists wind loads and thermal expansion. The Mortar Industry Association recommends Type S for exterior applications subject to severe weather. |
| Metal Lath | 2.5 lb/yd² Self-Furring (ASTM C847) | Galvanized coating prevents rust stains (efflorescence) from bleeding through the stone. Self-furring dimples hold the lath 1/4" away from the WRB. |
| Weep Screed | 0.019" Corrosion-Resistant (ASTM C2288) | Provides a rigid stop for the scratch coat and features weep holes to drain water from the cavity. |
| WRB | Grade D Paper or House Wrap | Acts as the secondary drainage plane. For high-moisture climates, two layers of Grade D paper are recommended. |
Step-by-Step Installation Protocol
Follow this sequence to ensure structural integrity and code compliance. The Masonry Veneer Manufacturers Association (MVMA) outlines these core phases for all adhered masonry veneer systems.
Phase 1: Substrate Prep and Flashing
- Install the Weep Screed: Nail the corrosion-resistant weep screed to the bottom of the wall framing using galvanized roofing nails every 6 inches. Ensure the vertical flange extends UP the wall.
- Apply the WRB: Roll out your house wrap or Grade D paper horizontally. Overlap horizontal seams by 2 inches and vertical seams by 6 inches. Critical Detail: The WRB must lap OVER the vertical flange of the weep screed by at least 2 inches to direct water out of the weep holes, not behind the screed.
Phase 2: Lath and Scratch Coat
- Attach the Lath: Unroll the 2.5 lb galvanized lath horizontally. Wrap it around corners by at least 16 inches. Overlap horizontal seams by 1 inch and vertical seams by 2 inches. Fasten every 6 inches along studs using 1-inch galvanized staples or nails driven into the framing, not just the sheathing.
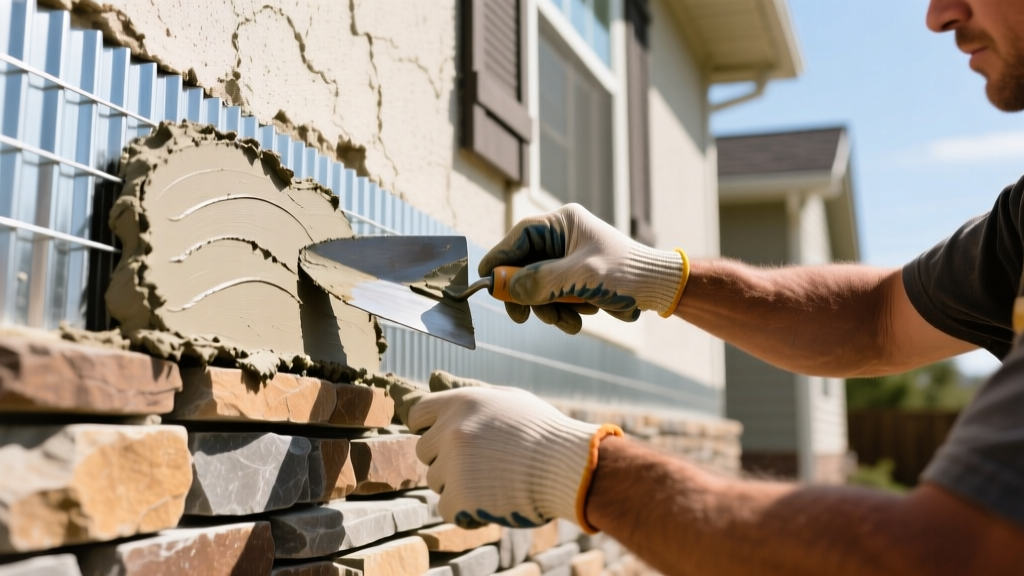
- Apply the Scratch Coat: Mix Type S mortar to a thick, peanut-butter consistency. Using a flat trowel, push the mortar completely through the lath to ensure full encapsulation. Apply a total thickness of 1/2 inch.
- Score the Surface: Before the mortar sets, use a notched trowel or a scratch rake to create horizontal grooves across the entire surface. This provides a mechanical key for the final stone application.
- Cure Time: Mist the scratch coat with water lightly and allow it to cure for a minimum of 48 hours before applying stone.
Never attempt to clean wet mortar off the face of the stone with a wet sponge or water spray. This drives cement pigments into the porous stone matrix, causing permanent staining. Always allow mortar droplets to dry to a crumbly state, then brush them off with a dry, stiff-bristle masonry brush.
Phase 3: Stone Layout and Application
- Dry Layout: Arrange the stone veneer pieces on the ground in front of the wall. Mix pieces from different boxes to blend color variations and distribute stone sizes evenly.
- Install Corners First: Always begin with corner pieces. Butter the back of the corner stone with a 1/2-inch layer of Type S mortar, pressing it firmly into the scratch coat. Give it a slight twisting motion to squeeze out excess mortar and ensure a full bond.
- Work Upward: Install the field stones from the bottom up. Maintain a 1/2-inch mortar bed behind each stone. For tight-fit (dry-stack) styles, still apply a 1/4-inch butter coat to the back to ensure adhesion to the scratch coat, even if the joints are hidden.
- Tool the Joints: If your design requires grouted joints, fill them with a mortar bag. Once the mortar is thumbprint-hard (usually 30-45 minutes), tool the joints with a concave jointer to compress the mortar and seal it against water intrusion.
Common Exterior Failure Modes & Prevention
Understanding how exterior stone veneer fails allows you to preemptively address vulnerabilities during installation.
- Efflorescence: The white, powdery residue on stone faces. It occurs when water-soluble salts within the mortar or stone are brought to the surface by evaporating moisture. Prevention: Use low-alkali Portland cement, ensure proper WRB drainage, and apply a breathable, siloxane-based masonry sealer 30 days after installation.
- Freeze-Thaw Spalling: The face of the stone chips or pops off. This happens when water absorbs into the stone, freezes, and expands. Prevention: Verify the manufactured stone has a freeze-thaw rating per ASTM C1670. Ensure overhangs and gutters direct bulk water away from the veneer.
- Picture Framing: A visible outline of mortar around the stone, creating a halo effect. Prevention: Avoid over-tooling the joints or using a mortar color that contrasts too sharply with the stone's edge. Keep the mortar slightly recessed (1/8 inch) from the stone face to create natural shadow lines.
2026 Cost Analysis: Exterior Stone Veneer Installation
Costs for installing stone veneer outside vary significantly based on material origin, wall height (scaffolding requirements), and regional labor rates. Below is a breakdown of current market averages per square foot of wall area.
| Cost Factor | Manufactured Stone Veneer (MSV) | Natural Stone Veneer |
|---|---|---|
| Material Cost (Stone) | $6.50 - $11.00 / sq ft | $12.00 - $24.00 / sq ft |
| Accessories (Lath, Mortar, Screed) | $2.50 - $3.50 / sq ft | $2.50 - $3.50 / sq ft |
| Professional Labor | $14.00 - $22.00 / sq ft | $18.00 - $35.00 / sq ft |
| Total Installed Cost | $23.00 - $36.50 / sq ft | $32.50 - $62.50 / sq ft |
Note: Natural stone requires specialized diamond-blade wet saws for cutting and heavier structural support in some cases, driving up both labor time and equipment costs. Manufactured stone can often be cut with standard carbide-tipped masonry blades, accelerating the installation timeline.
Final Inspection Checklist
Before finalizing the project, verify these critical exterior-specific details:
- Weep holes are completely clear of mortar droppings and debris.
- The 4-inch grade clearance is maintained; no soil or mulch is piled against the bottom edge of the stone.
- All penetrations (exterior light fixtures, hose bibs, electrical outlets) are sealed with a high-grade polyurethane masonry sealant, not standard silicone.
- Roof flashing integrates properly over the top edge of the stone veneer, preventing water from tracking behind the cladding system.
Written by
Elena RodriguezElena Rodriguez is a civil engineer and technical writer specializing in concrete technology, masonry systems, and ASTM/ACI compliance. She earned her B.S. in Civil Engineering from Texas A&M University and spent a decade at a materials testing laboratory, performing over 2,000 concrete compressive strength tests and masonry prism evaluations. Elena is an ACI-certified Field Testing Technician (Grade I) and a member of ASTM Committee C12 on Natural Building Stone. She currently consults on forensic engineering cases involving concrete failures and moisture intrusion. Based in San Antonio, TX, Elena is a proud member of the Society of Women Engineers (SWE) and coaches her daughter's FIRST Robotics team.
More from Elena Rodriguez
View all
Walls & Panels
Cost Analysis: Light Gauge Steel Framing Advantages and Disadvantages
Evaluate light gauge steel framing advantages and disadvantages through a strict cost analysis lens, comparing material, labor, and lifecycle expenses.
Aug 4, 2026

Walls & Panels
Gypsum Board Types: Exact Specifications, Thickness & Dimensions
Compare standard, Type X, and moisture-resistant gypsum board types. Get exact specifications, thicknesses, dimensions, and ASTM standards for your project.
Aug 4, 2026

Fire Resistance
Best Fire-Resistant Outdoor Decking Materials: 2026 Buyer Guide
Discover the best fire-resistant outdoor decking materials for 2026. Compare Class A PVC, aluminum, and hardwood options for WUI compliance and safety.
Aug 4, 2026