Ledgestone Stone Veneer: The Complete Material & Installation Guide
Explore our complete guide to ledgestone stone veneer. Compare natural vs. manufactured costs, installation methods, and moisture management for 2026.

The Anatomy of Ledgestone: Natural vs. Manufactured Profiles
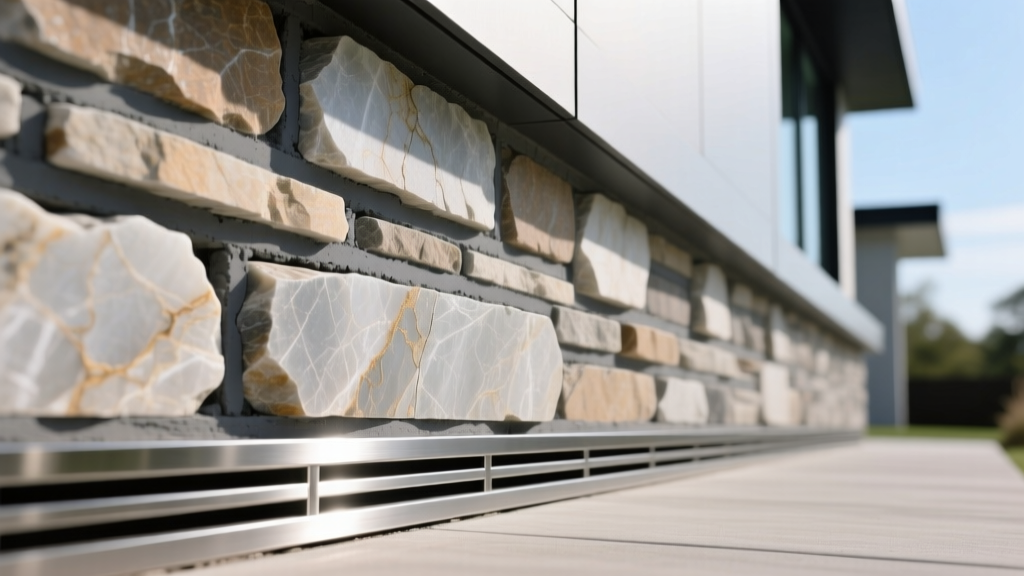
Ledgestone veneer is characterized by its linear, horizontal stacking pattern, utilizing thin, elongated stone cuts to create a rustic yet highly structured aesthetic. Unlike fieldstone or ashlar patterns that rely on varied geometric shapes, ledgestone demands precise horizontal coursing. When specifying materials for a 2026 build, contractors and architects must choose between three primary material classes, each with distinct structural weights, thicknesses, and substrate requirements.
| Material Class | Composition | Avg. Thickness | Weight (per sq. ft.) | Best Application |
|---|---|---|---|---|
| Natural Stone | Quarried quartzite, slate, or limestone | 0.75" - 1.5" | 11 - 15 lbs | High-end exterior wainscoting, luxury interior fireplaces |
| Manufactured Concrete | Portland cement, lightweight aggregates, iron oxide pigments | 0.5" - 1.25" | 7 - 10 lbs | Full-home exterior cladding, commercial accent walls |
| High-Density Polyurethane | Closed-cell polyurethane foam panels (e.g., GenStone) | 1.0" - 2.0" | 1 - 2 lbs | DIY interior accents, non-structural exterior retrofits |
Natural quartzite remains the premium standard for ledgestone due to its extreme compressive strength and natural clefting, which catches light dynamically. However, manufactured concrete veneers (such as Eldorado Stone's Chestnut Hill Ledgestone profile) have closed the visual gap significantly, offering consistent sizing that reduces installation labor by up to 18% compared to irregular natural cuts.
2026 Cost Matrix: Material, Labor, and Hidden Expenses
Pricing for stone veneer fluctuates based on regional freight costs and quarry output. As of 2026, supply chain stabilization has normalized natural stone pricing, while manufactured concrete has seen a slight uptick due to cement and pigment cost increases. The following matrix breaks down the true installed cost for a standard 200-square-foot exterior accent wall.
| Cost Category | Natural Quartzite | Manufactured Concrete | Polyurethane Panels |
|---|---|---|---|
| Material Cost (per sq. ft.) | $11.50 - $16.00 | $7.50 - $11.00 | $12.00 - $14.50 |
| Labor & Mortar (per sq. ft.) | $16.00 - $22.00 | $14.00 - $18.00 | $3.00 - $5.00 (Fasteners only) |
| Corner Pieces (per linear ft.) | $18.00 - $25.00 | $12.00 - $16.00 | $15.00 - $19.00 |
| Total Installed (200 sq. ft.) | $6,200 - $8,400 | $4,600 - $6,200 | $3,000 - $3,900 |
Substrate Preparation and Moisture Management
The most common cause of ledgestone veneer failure is not the stone itself, but catastrophic moisture mismanagement behind the cladding. Because ledgestone creates a dense, overlapping horizontal barrier, it can trap hydrostatic pressure if the wall assembly cannot breathe or drain.
According to the Department of Energy's moisture control protocols, any exterior adhered masonry veneer must incorporate a continuous drainage plane. For wood-framed structures, this requires two layers of Grade D building paper or a high-performance housewrap over the sheathing, followed by a corrosion-resistant metal weep screed installed a minimum of 4 inches above grade or 2 inches above paved surfaces.
Following the weep screed, a 2.5 lb self-furring galvanized steel lath must be fastened with corrosion-resistant nails or staples penetrating the structural studs by at least 1 inch. The lath provides the mechanical key for the 3/8-inch scratch coat. As detailed in Eldorado Stone's official installation guidelines, the scratch coat must cure for a minimum of 48 hours before any mortar or stone is applied, ensuring the base layer has achieved sufficient tensile strength to support the dead load of the veneer.
Design Profiles: Dry-Stack vs. Grouted Joints
Ledgestone veneer can be installed using two distinct joint profiles, each requiring specific mortar techniques and altering the final architectural weight of the wall.
1. Dry-Stack (Mortarless Appearance)
Dry-stack ledgestone is installed with mortar, but the joints are kept incredibly tight (1/16-inch or less), and the mortar is recessed or wiped flush so it remains invisible. This creates a sleek, modern shadow-line effect.
- Mortar Requirement: You must use a polymer-modified veneer mortar (such as PRO-MIX or Custom Building Products' Polymer Modified Veneer Mortar). Standard Type N or Type S mortar lacks the bond strength required for tight, zero-slump dry-stack applications and will crack along the hairline joints.
- Edge Case: Dry-stack ledgestone is highly susceptible to water infiltration through the micro-joints. It is strictly prohibited for exterior applications in climates with heavy wind-driven rain unless a secondary waterproofing membrane is applied directly to the scratch coat.
2. Grouted (Standard Joint)
Grouted ledgestone features visible mortar joints, typically ranging from 1/4-inch to 1/2-inch. The mortar is struck or raked to create depth.
- Mortar Requirement: Standard Type N masonry cement is acceptable and cost-effective. Type S should be avoided for veneers, as its high compressive strength can prevent the wall from flexing slightly, leading to cracked stones rather than cracked joints during thermal expansion.
- Aesthetic Control: Use integral liquid pigments mixed directly into the mortar batch. Surface-applied stains or paints will flake off within three years due to UV degradation and efflorescence push-through.
Mortared vs. Mortarless Installation Workflows
While traditional mortared installation remains the standard for natural and concrete ledgestone, mortarless interlocking systems have disrupted the interior market.
- Traditional Mortared Workflow: Apply a 1/2-inch layer of polymer-modified mortar to the back of the stone (back-buttering) and a 1/2-inch layer to the scratch coat. Press firmly until mortar squeezes out, ensuring 95% coverage to prevent hollow voids where water can pool and freeze.
- Panelized Mortarless Workflow: Systems like GenStone utilize high-density polyurethane panels that interlock via a shiplap edge and screw directly into the substrate or furring strips. This eliminates the need for lath, scratch coats, and masonry labor, reducing a 3-day exterior install to a 4-hour project. However, these panels cannot be used within 18 inches of a direct heat source (like a fireplace firebox) due to the material's melting point.
Troubleshooting Efflorescence and Delamination
Efflorescence—the white, powdery salt deposit that blooms on ledgestone surfaces—is the most frequent post-installation complaint. It occurs when water-soluble salts present in Portland cement or natural stone are dissolved by moisture and pushed to the surface as the wall dries.
The Fix: Do not use muriatic acid on manufactured concrete ledgestone or limestone; it will etch the calcium carbonate and permanently scar the surface. Instead, use a stiff natural-bristle brush to dry-scrub the deposits. For stubborn blooms, apply a specialized efflorescence remover containing phosphoric acid, followed by a breathable, silane-siloxane penetrating sealer to prevent future moisture ingress.
Delamination Diagnosis: If ledgestone panels are pulling away from the wall, tap the surrounding stones with a rubber mallet. A hollow sound indicates a failure in the scratch coat bond, usually caused by applying mortar to a dusty, unprimed scratch coat, or installing the veneer in temperatures below 40°F (4°C) without heated enclosures, which halts the cement hydration process before structural adhesion can occur.
Written by
David NakamuraDavid Nakamura is a licensed architect (AIA) and construction technology writer focused on sustainable building methods, mass timber engineering, and high-performance building envelopes. He holds a Master of Architecture from the University of Washington and is a certified Passive House Consultant (CPHC). David spent eight years at the Seattle firm Mithun, where he led the design of three LEED Platinum projects, before founding his own practice specializing in net-zero residential design. He serves on the editorial advisory board of GreenBuilder Magazine and has authored peer-reviewed papers on cross-laminated timber (CLT) connections for the Journal of Structural Engineering. In his spare time, David teaches woodworking at Pratt Fine Arts Center and kayaks the Puget Sound.
More from David Nakamura
View all
Construction Cost
Labor Cost to Build a Deck Per Sq Ft: 2026 Installation Guide
Discover the exact labor cost to build a deck per sq ft in 2026. This installation guide breaks down contractor rates, complexity factors, and hidden fees.
Aug 4, 2026

Construction Cost
How Much Does It Cost to Build a 3 Bedroom House? Financing Guide
Learn exactly how much it costs to build a 3 bedroom house and explore 2026 financing options, construction loan types, and budget frameworks for your build.
Aug 4, 2026

Construction Cost
Cost to Build a Tennis Court: 2026 Guide
How much does it cost to build a tennis court in 2026? Breakdowns for asphalt, concrete, and synthetic surfaces plus fencing and lighting.
Jul 30, 2026