Screw On Stone Veneer: The Complete Mortarless Installation Guide
Discover everything about screw on stone veneer systems. Compare top mortarless brands, costs, and step-by-step installation techniques for DIYers.

The Mechanics of Mortarless Stone Veneer
Screw on stone veneer represents a fundamental shift in exterior and interior cladding, replacing traditional Portland cement mortar with mechanical fastening systems. These systems utilize either proprietary metal clips or direct-screw nailing flanges to anchor stone or high-density polyurethane (HDPU) panels directly to structural substrates. For contractors and advanced DIYers, this eliminates the need for masonry troweling skills, scratch coats, and weather-dependent curing times.
Quick Technical Specifications
- Weight: 8 to 15 lbs per sq. ft. (Real stone clip systems); 1 to 2 lbs per sq. ft. (HDPU direct-screw panels)
- Substrate Requirements: Minimum 7/16-inch OSB or 1/2-inch plywood over wood framing; 1/2-inch cement board over metal studs
- Fastener Penetration: Minimum 1 inch into structural framing (studs)
- Installation Rate: 15 to 25 sq. ft. per hour (single installer)
- Thermal Resistance: R-value ranges from 0 (real stone) to R-4.5 (insulated HDPU panels)
System Comparison: Clip-Based vs. Direct-Screw Panels
When specifying screw on stone veneer, you must choose between two distinct mechanical architectures: real stone secured by hidden clips, and synthetic panels with integrated nailing flanges.
| Feature | Clip-Based Real Stone (e.g., ClipStone) | Direct-Screw HDPU (e.g., GenStone) | Traditional Mortar Stone |
|---|---|---|---|
| Material Composition | Natural stone or architectural cast concrete | High-Density Polyurethane (HDPU) | Natural or manufactured stone |
| Fastening Method | Stainless steel clips screwed to wall | Screws driven through integrated flange | Type S or N mortar adhesion |
| Material Cost (2026) | $9.00 - $14.50 / sq. ft. | $6.50 - $9.50 / sq. ft. | $7.00 - $12.00 / sq. ft. |
| Labor Cost | $4.00 - $7.00 / sq. ft. (or DIY) | $2.50 - $5.00 / sq. ft. (or DIY) | $12.00 - $18.00 / sq. ft. |
| Weather Constraints | Installable down to 20°F (-6°C) | Installable in any temperature | Requires 40°F+ and no freezing for 48 hrs |
Fastener Selection and Corrosion Resistance
The structural integrity of a screw on stone veneer system relies entirely on the fasteners. Because the screws are hidden behind the stone or within the panel joints, a rusted and failed screw will result in catastrophic cladding detachment without visible warning signs.
Approved Fastener Specifications
- Material: 304 or 316 stainless steel, or ceramic-coated structural screws that pass ASTM B117 salt spray testing for a minimum of 1,000 hours.
- Gauge and Length: Minimum #8 or #10 gauge. Length must be calculated as: Substrate Thickness + Sheathing Thickness + 1.0 inch (minimum stud penetration). For standard 1/2-inch plywood over 2x4 framing, use 2.5-inch to 3-inch screws.
- Head Type: Flat head or wafer head for clip systems to ensure the stone sits flush; bugle head for HDPU nailing flanges to prevent tearing the polyurethane.
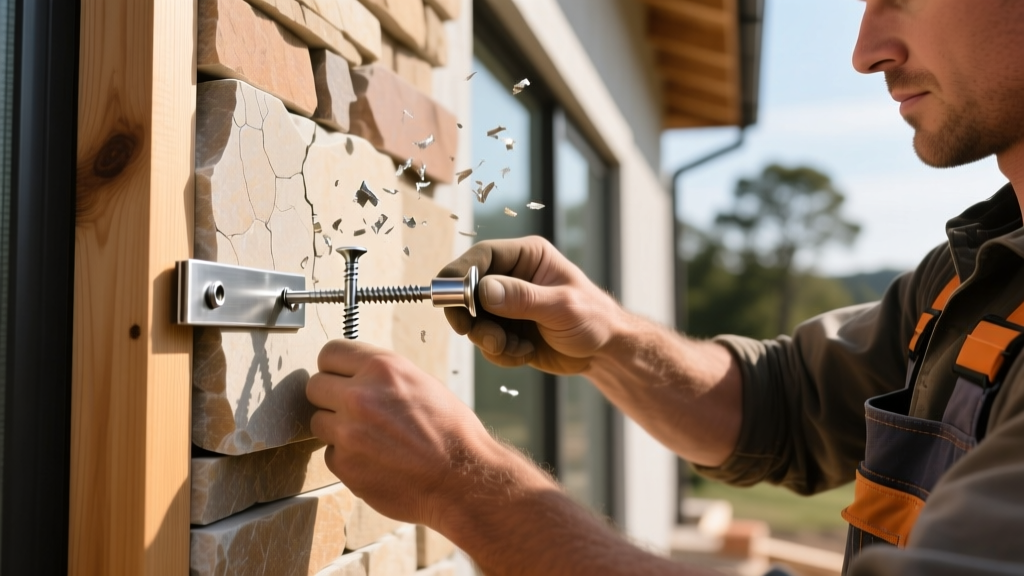
Step-by-Step Installation: The Clip-and-Screw Method
This workflow applies to clip-based real stone systems. Direct-screw HDPU panels follow a similar substrate prep but eliminate the clip-installation step.
- Weather Resistive Barrier (WRB) Integration: Apply a code-approved WRB (e.g., Tyvek HomeWrap or Zip System) over the sheathing. Tape all seams with manufacturer-approved butyl or acrylic flashing tape. The WRB must be continuous and integrated with window and door flashings.
- Install the Weep Screed: At the base of the wall, screw a corrosion-resistant weep screed (minimum 0.019-inch galvanized steel) directly into the bottom plate. The weep screed must extend at least 4 inches above grade and 1/4 inch below the foundation line to allow trapped moisture to escape. Do not skip this step; omitting the weep screed is the leading cause of rot in mortarless veneer systems.
- Layout and Snap Lines: Snap horizontal chalk lines every 12 to 16 inches to align the screw clips. Stagger vertical joints to prevent continuous water channels.
- Secure the Metal Clips: Position the proprietary metal clips on the chalk lines. Drive two approved screws through the pre-punched holes of each clip, ensuring the screw head pulls the clip tight against the WRB without crushing the sheathing.
- Seat the Stone: Slide the top lip of the stone veneer piece into the clip above it, then tilt the bottom down until it locks into the clip below. Use a rubber mallet to gently tap the stone into full engagement. You should hear a distinct click or feel zero lateral play.
- Address Penetrations and Corners: Use manufacturer-specific corner pieces that interlock with the field stone. For window and door casings, cut the stone with a diamond-tipped wet saw and seal the perimeter joint with a high-grade polyurethane sealant (e.g., Sikaflex-1a) to prevent wind-driven rain intrusion.
Common Failure Modes and Mitigation Strategies
While screw on stone veneer eliminates mortar cracking, it introduces unique mechanical and moisture-related vulnerabilities.
Thermal Buckling (HDPU Panels)
Synthetic panels expand and contract significantly with temperature swings. If screws are driven too tightly into the nailing flange, the panel cannot slide laterally, causing it to bow or buckle in high heat. Fix: Leave a 1/16-inch gap between the screw head and the flange to allow for thermal movement.
Stud Misses
Driving screws only into OSB or drywall without hitting the structural framing will not support the 15 lbs/sq. ft. dead load of real stone. Fix: Use a high-quality stud finder and verify framing locations by drilling a test hole before snapping chalk lines for clip placement.
Capillary Water Trapping
If the bottom course of stone rests directly on a flat deck or concrete patio, capillary action will wick water up into the wall cavity. Fix: Maintain a minimum 2-inch clearance between the bottom of the weep screed and any horizontal surface.
Building Codes and Structural Requirements
Mortarless veneer systems must comply with local building codes, which generally defer to the International Residential Code (IRC) Chapter 7 regarding exterior wall coverings. Under IRC Section R703.7, exterior veneer must be supported by non-combustible foundations or properly engineered structural ledgers.
For seismic zones and high-wind regions (exceeding 110 mph ultimate design wind speed), the mechanical clip spacing must be reduced. The National Concrete Masonry Association (NCMA) provides extensive engineering tables for anchor design and tie spacing in masonry veneer applications. Always request the manufacturer's specific Evaluation Report (ESR) from the ICC Evaluation Service to prove code compliance to your local building inspector.
Frequently Asked Questions
Can I install screw on stone veneer over existing brick or concrete?
Yes, but you cannot use standard wood screws. You must use masonry tapcon screws or powder-actuated fasteners to attach the clips directly to the masonry substrate. Alternatively, frame out a 1x3 furring strip grid using masonry screws, then attach the clips to the wood furring strips.
Do I need a rainscreen gap behind mortarless stone?
Clip-based systems inherently create a 1/4-inch to 3/8-inch air gap between the back of the stone and the WRB, which functions as a drained and vented rainscreen. Direct-screw HDPU panels sit flush against the WRB; therefore, if you are in a high-rainfall climate, it is highly recommended to install a 3/8-inch plastic furring mat (like Keene DriWall) behind the panels to promote drying.
How do I cut real stone for clip-based systems without breaking the clip groove?
Use a 10-inch wet tile saw with a continuous rim diamond blade. Do not use an angle grinder with a dry masonry blade, as the aggressive vibration will micro-fracture the proprietary lip on the back of the stone, preventing it from locking securely into the metal clip.
Written by
David NakamuraDavid Nakamura is a licensed architect (AIA) and construction technology writer focused on sustainable building methods, mass timber engineering, and high-performance building envelopes. He holds a Master of Architecture from the University of Washington and is a certified Passive House Consultant (CPHC). David spent eight years at the Seattle firm Mithun, where he led the design of three LEED Platinum projects, before founding his own practice specializing in net-zero residential design. He serves on the editorial advisory board of GreenBuilder Magazine and has authored peer-reviewed papers on cross-laminated timber (CLT) connections for the Journal of Structural Engineering. In his spare time, David teaches woodworking at Pratt Fine Arts Center and kayaks the Puget Sound.
More from David Nakamura
View all
Construction Cost
Labor Cost to Build a Deck Per Sq Ft: 2026 Installation Guide
Discover the exact labor cost to build a deck per sq ft in 2026. This installation guide breaks down contractor rates, complexity factors, and hidden fees.
Aug 4, 2026

Construction Cost
How Much Does It Cost to Build a 3 Bedroom House? Financing Guide
Learn exactly how much it costs to build a 3 bedroom house and explore 2026 financing options, construction loan types, and budget frameworks for your build.
Aug 4, 2026

Construction Cost
Cost to Build a Tennis Court: 2026 Guide
How much does it cost to build a tennis court in 2026? Breakdowns for asphalt, concrete, and synthetic surfaces plus fencing and lighting.
Jul 30, 2026