Technical Specifications for a Stone Veneer Kitchen Island Installation
Master the technical specifications for a stone veneer kitchen island. Learn substrate prep, weight loads, mortar types, and clearance requirements.

Structural Load and Framing Deflection Limits
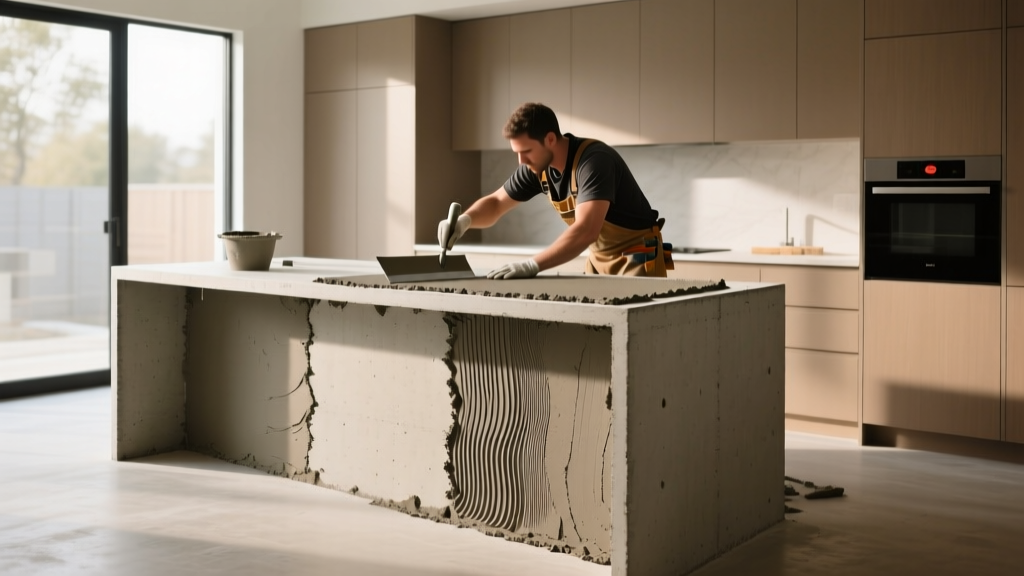
Cladding a kitchen island with stone requires rigorous structural validation before any substrate is applied. Natural stone veneer typically weighs between 10 and 15 pounds per square foot (psf), while manufactured stone veneer (MSV) ranges from 7 to 12 psf. When calculating the total dead load for a stone veneer kitchen island, you must aggregate the weight of the veneer, the metal lath, the mortar bed (approximately 4 psf for a 1/2-inch scratch coat and setting bed), and the countertop material.
According to guidelines published by the Tile Council of North America (TCNA) and the National Veneer Masonry Association (NVMA), the underlying wood or steel framing must meet strict deflection limits to prevent cracking. For natural stone applications, the framing deflection limit is L/600 under total anticipated load. For manufactured stone veneer, the limit is L/360. Standard 2x4 framing at 16 inches on center (O.C.) is rarely sufficient for a large, load-bearing island clad in natural stone. Engineers typically specify 2x6 framing at 12 inches O.C. or reinforced steel studs (minimum 20-gauge) to achieve the necessary rigidity and support the concentrated loads of heavy stone profiles.
Substrate Preparation and Moisture Matrix
The substrate dictates the longevity of the installation. Kitchens are high-moisture, high-spill environments, making moisture management behind the veneer non-negotiable. Direct application of mortar to drywall, greenboard, or painted plywood will result in catastrophic delamination.
| Substrate Material | Minimum Thickness | Fastener Schedule | Moisture Barrier Requirement |
|---|---|---|---|
| Cement Backer Board | 1/2 inch (e.g., James Hardie HardieBacker) | 1-1/4' corrosion-resistant screws, 6' O.C. field, 4' O.C. edges | Required behind board (ASTM D226 Type 1 felt or Grade D paper) |
| Exterior Plywood / OSB | 3/4 inch (Exposure 1 rated) | N/A (Lath fastens directly) | Two layers of Grade D water-resistant barrier |
| Galvanized Metal Lath | 2.5 lbs/sq yd, self-furring | 1-1/2' galvanized staples or screws with washers, 6' O.C. | Must overlap moisture barrier by 2 inches at horizontal seams |
When using cement backer board, all seams must be taped and filled with alkali-resistant fiberglass mesh tape and a polymer-modified thin-set mortar. Do not use standard drywall joint compound. The board must be installed with a 1/8-inch gap at all joints and changes of plane to allow for thermal expansion.
Mortar Chemistry and ANSI Standards
The choice of mortar for a stone veneer kitchen island depends heavily on whether you are installing natural or manufactured stone, as well as the specific profile of the veneer.
- Type S Masonry Cement: The traditional standard for natural stone. Type S provides high compressive strength (minimum 1,800 psi) and excellent bond. It must be mixed to a workable consistency that holds its shape when troweled (a 'fat' mix).
- Polymer-Modified Mortar (ANSI A118.4 / A118.15): Required for manufactured stone veneer and large-format natural stones. The polymers increase flexural strength and bond adhesion, which is critical for kitchen islands that may experience minor vibrations from adjacent appliances like dishwashers or trash compactors.
- Scratch Coat Specification: A 1/2-inch scratch coat must be applied over the metal lath and deeply scored in a horizontal pattern. This coat requires a minimum 24 to 48 hours of curing time before the setting bed is applied. Skipping the scratch coat or failing to score it reduces the mechanical key by up to 60%, leading to vertical shear failures.
Critical Clearances: Overhangs and Toe Kicks
Water management at the countertop-to-veneer joint is the most common failure point in island installations. The countertop must overhang the stone veneer face by a minimum of 1/2 inch to 3/4 inch. This prevents spills from wicking directly into the porous mortar joints. Furthermore, a drip edge (kerf cut into the bottom of the countertop overhang) is highly recommended to break surface tension and force liquids to drip onto the floor rather than tracking back onto the stone.
At the base, the island must feature a recessed toe kick. The minimum specification is a 3-inch depth and 4-inch height from the finished floor. This prevents mop water and floor cleaning chemicals from degrading the bottom course of the veneer and prevents foot traffic from scuffing the stone.
Edge Transitions and Corner Engineering
Kitchen islands typically feature four external corners, which require precise detailing to maintain structural integrity and aesthetic continuity.
Manufactured vs. Natural Corners
Manufactured stone veneer systems offer pre-cast corner pieces (quoins) that wrap around the 90-degree angle. These must be installed first, alternating long and short legs, before filling in the field. For natural stone, corners must be mitered using a wet saw equipped with a continuous-rim diamond blade designed specifically for masonry. The mitered joint should be buttered with a non-sanded, color-matched grout or a high-quality, paintable elastomeric sealant to accommodate differential movement.
Termination Details
Where the stone veneer terminates against cabinetry or drywall, do not butt the stone directly against the adjacent material. Install a corrosion-resistant L-bead or casing bead to create a clean, straight edge. Leave a 1/8-inch expansion gap between the bead and the adjacent surface, filling it with a flexible, color-matched polyurethane sealant rather than rigid grout.
Troubleshooting Common Failure Modes
Understanding the pathology of stone veneer failures allows installers to preemptively engineer solutions into the kitchen island design.
- Efflorescence: The white, powdery salt deposit on the stone surface. This occurs when water-soluble salts within the Portland cement mortar are drawn to the surface by moisture evaporation. Prevention: Use low-efflorescence mortars, ensure the island substrate is completely dry before installation, and apply a breathable, penetrating silane/siloxane sealer to the finished stone. Never use a non-breathable topical sealer, which traps moisture inside the wall cavity.
- Shadowing and Staining: Certain natural stones (particularly light-colored limestones and marbles) are porous enough that the gray Portland cement mortar can bleed through, creating dark 'shadows' behind the stone. Prevention: Always use a white Portland cement-based mortar or a specialized light-stone setting adhesive when installing translucent or light-colored natural stone.
- Delamination at the Countertop Seam: If the countertop is installed before the veneer, and the veneer is mortared directly against the bottom of the countertop substrate, the downward deflection of the countertop under load can crack the mortar bond. Prevention: Always install the stone veneer first, leaving a 1/4-inch gap at the top. Install the countertop over the veneer, allowing the countertop to 'float' independently of the masonry cladding.
FAQ: Technical Clearances and Codes
Do I need a vapor barrier behind a kitchen island stone veneer?
Yes. Even though it is an interior application, kitchens generate significant ambient humidity, and islands often house plumbing lines (like prep sinks or dishwashers) that pose a leak risk. A Grade D water-resistant barrier protects the structural framing from trapped moisture.
Can I install stone veneer directly over an existing drywall island?
No. Standard gypsum drywall lacks the structural shear strength to support the weight of stone and mortar, and the paper facing will delaminate when exposed to the moisture in wet mortar. You must strip the drywall to the studs and install an approved cementitious substrate or metal lath system.
Written by
David NakamuraDavid Nakamura is a licensed architect (AIA) and construction technology writer focused on sustainable building methods, mass timber engineering, and high-performance building envelopes. He holds a Master of Architecture from the University of Washington and is a certified Passive House Consultant (CPHC). David spent eight years at the Seattle firm Mithun, where he led the design of three LEED Platinum projects, before founding his own practice specializing in net-zero residential design. He serves on the editorial advisory board of GreenBuilder Magazine and has authored peer-reviewed papers on cross-laminated timber (CLT) connections for the Journal of Structural Engineering. In his spare time, David teaches woodworking at Pratt Fine Arts Center and kayaks the Puget Sound.
More from David Nakamura
View all
Construction Cost
Labor Cost to Build a Deck Per Sq Ft: 2026 Installation Guide
Discover the exact labor cost to build a deck per sq ft in 2026. This installation guide breaks down contractor rates, complexity factors, and hidden fees.
Aug 4, 2026

Construction Cost
How Much Does It Cost to Build a 3 Bedroom House? Financing Guide
Learn exactly how much it costs to build a 3 bedroom house and explore 2026 financing options, construction loan types, and budget frameworks for your build.
Aug 4, 2026

Construction Cost
Cost to Build a Tennis Court: 2026 Guide
How much does it cost to build a tennis court in 2026? Breakdowns for asphalt, concrete, and synthetic surfaces plus fencing and lighting.
Jul 30, 2026