Sourcing from Stone Veneer Suppliers Near Me: A Pro Installation How-To
Learn how to vet stone veneer suppliers near me, evaluate regional stone inventory, and execute a flawless adhered masonry installation step-by-step.

The Local Sourcing Advantage: Why Proximity Dictates Installation Strategy
Searching for stone veneer suppliers near me is often driven by the desire to reduce heavy freight costs and avoid transit damage. However, sourcing locally introduces a critical variable that most DIYers overlook: regional material characteristics. Local suppliers typically stock stone harvested from nearby quarries or manufactured in regional plants. This means the limestone, fieldstone, or cast concrete veneer you purchase will have specific porosity, density, and thermal expansion traits native to your geographic area. Understanding how to adapt your installation technique to the exact inventory your local supplier carries is the difference between a facade that lasts a century and one that spalls after a single freeze-thaw cycle.
Vetting Local Inventory: The ASTM Checklist
When you walk into a local masonry yard, do not just look at the color and texture. Ask the supplier for the technical data sheets (TDS) for their veneer products. According to the National Concrete Masonry Association (NCMA), adhered manufactured stone must meet ASTM C1670, while natural stone veneers should comply with standards like ASTM C616 (Sandstone) or ASTM C1527 (Travertine). If a local supplier cannot provide documentation showing their stone has passed ASTM C666 (Standard Test Method for Resistance of Concrete to Rapid Freezing and Thawing), do not install it on an exterior elevation in a cold climate.
Material-Specific Installation: Adapting to Your Supplier's Stock
Not all stone is installed the same way. The absorption rate of the stone you buy locally dictates your mortar choice, pre-wetting requirements, and sealing strategy. Use the matrix below to adjust your installation plan based on the specific material your local supplier provides.
| Material Type (Common at Local Yards) | Absorption Rate | Required Mortar Type | Pre-Wetting Needed? | Sealer Recommendation |
|---|---|---|---|---|
| Cast / Manufactured Stone | Low to Medium (3-8%) | Polymer-Modified (ANSI A118.4) | No (surface mist only) | Silane/Siloxane penetrating |
| Regional Limestone | High (10-20%) | Type N or Type S Masonry | Yes (soak and damp-dry) | Breathable Siloxane only |
| River Rock / Fieldstone | Very Low (<2%) | Type S with bonding agent | No | Usually unsealed |
| Cleft Slate Veneer | Low (1-4%) | Polymer-Modified Thinset | No | Enhancing penetrating sealer |
Step-by-Step Installation How-To for Locally Sourced Veneer
Once you have secured your materials from local stone veneer suppliers near me and identified the specific stone type, follow this rigorous installation protocol. This methodology aligns with best practices outlined by the Fine Homebuilding masonry experts and ensures long-term adhesion and moisture management.
Phase 1: Substrate and Weather Barrier Preparation
Adhered masonry veneer is a heavy, rigid cladding that requires a rock-solid substrate. For wood-framed exterior walls, install two layers of Grade D building paper or one layer of housewrap covered by one layer of Grade D paper. The dual-layer approach creates a microscopic slip plane that allows moisture to drain down and out without wicking into the OSB or plywood sheathing. Overlap horizontal seams by 2 inches and vertical seams by 6 inches. Secure the weather-resistive barrier (WRB) using cap nails or staples, ensuring the fasteners penetrate directly into the wall studs, not just the sheathing.
Phase 2: Metal Lath and the Scratch Coat
Fasten 2.5 lb self-furring galvanized metal lath (ASTM C847) over the WRB. The self-furring dimples are critical; they hold the lath exactly 1/4 inch away from the weather barrier, allowing the mortar to wrap behind the wire mesh for a mechanical lock. Overlap lath sheets by 1 inch on the sides and 2 inches on the ends. Wrap the lath around corners by at least 16 inches—never place a seam directly on a corner.
Mix a scratch coat using Type S masonry mortar to a consistency similar to thick peanut butter. Apply a 3/8-inch to 1/2-inch layer over the lath using a flat trowel, pressing it firmly through the mesh. Before it sets, use a notched trowel or a stiff brush to score horizontal grooves into the surface. This scratch coat must cure for a minimum of 24 to 48 hours before any stone is applied.
Phase 3: Mortar Mixing and Stone Placement
When setting the stone, use a high-quality Type S mortar or a specialized veneer mortar like Quikrete Veneer Stone Mortar, which contains polymers for increased bond strength. If you are installing high-absorption natural limestone sourced from your local yard, you must pre-wet the stones. Submerge them in a bucket of clean water for 3 to 5 minutes, then let them dry until they are damp to the touch (surface-dry). This prevents the dry stone from sucking the moisture out of your mortar too quickly, which causes a weak, powdery bond.
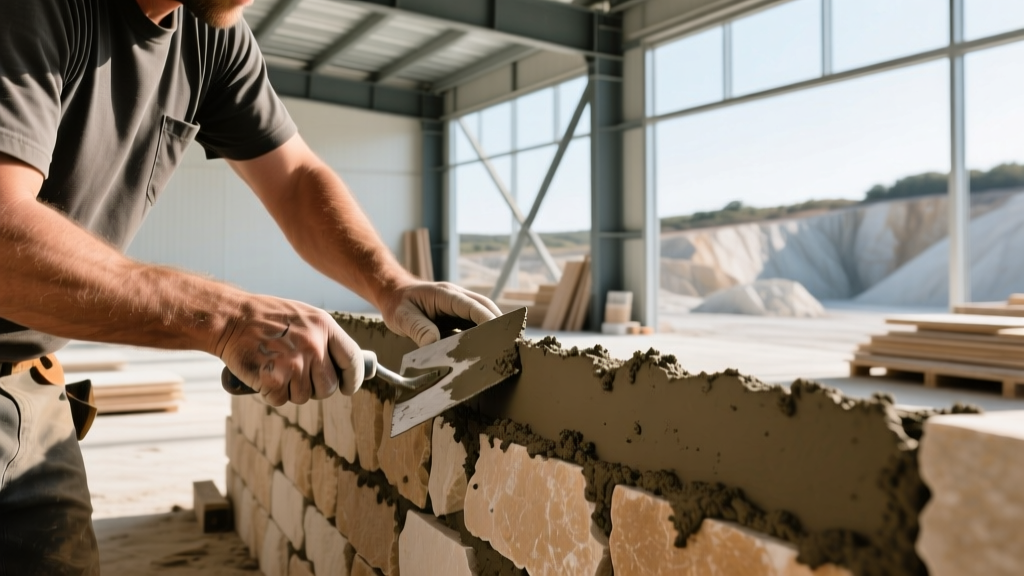
Apply a 1/2-inch to 1-inch layer of mortar to the back of each stone (buttering) and press it firmly into the scratch coat. Maintain a consistent 1/2-inch to 1-inch joint width for fieldstone, or push ledger-style stones tightly together for a dry-stack look. Use a jointing tool to compact the mortar joints once the mortar becomes thumbprint-hard. Never strike the joints when the mortar is wet, as this brings excess water and fine cement particles to the surface, leading to shrinkage cracks.
Troubleshooting Common Supplier-Sourced Veneer Issues
Even with perfect technique, regional materials can present unique challenges. Here is how to diagnose and fix the most common issues when working with locally sourced stone:
- Mortar Staining on Porous Stone: If mortar smears onto highly porous local sandstone or limestone during installation, do not wipe it with a wet sponge. This drives cement pigments deep into the stone pores. Instead, let the mortar droppings dry completely, then pop them off with a stiff, dry natural-bristle brush. For stubborn stains, use a specialized masonry cleaner formulated for natural stone, never raw muriatic acid.
- Lath Rust Bleed: If you see orange or brown stains bleeding through the mortar joints a few weeks after installation, the supplier may have provided non-galvanized or poorly coated lath. The only permanent fix is to remove the affected stones, cut out the rusted lath, replace it with hot-dipped galvanized or PVC-coated lath, and reinstall.
- Hollow Sounding Veneer: Tap the installed stones with the handle of your trowel. A sharp, high-pitched click indicates a solid bond. A dull, hollow thud means the mortar failed to adhere to the scratch coat or the back of the stone. This is usually caused by failing to pre-wet high-absorption stone or applying mortar in direct, hot sunlight. Hollow stones must be pried off and reinstalled immediately.
- Inconsistent Joint Widths: When dealing with irregular fieldstone from local suppliers, maintaining uniform joints is difficult. Keep a bucket of wooden shims or specialized plastic spacers on hand to prop up heavy stones while the mortar cures, preventing them from sliding down and crushing the joints below.
Sourcing from local suppliers provides immense advantages in material inspection and freight reduction, provided you respect the geological and manufactured traits of the stone. By matching your mortar chemistry, moisture management, and sealing strategy to the exact inventory you purchase, your veneer installation will remain structurally sound and visually striking for decades.
Written by
James ThorntonJames Thornton is a construction industry veteran with 25 years of hands-on experience in wood framing, lumber grading, and residential building codes. He started as a framing carpenter in rural Oregon, earned his ICC Residential Building Inspector certification, and eventually became a senior plan reviewer for the City of Portland Bureau of Development Services. James holds a B.S. in Wood Science & Technology from Oregon State University and is a certified lumber grader through the West Coast Lumber Inspection Bureau (WCLIB). He has inspected over 3,000 residential construction sites and authored the city's internal guide on advanced framing techniques (2x6 at 24" O.C.). James lives in Bend, OR, where he builds custom timber-frame cabins and competes in lumberjack sports.
More from James Thornton
View all
Insulation
Best Home Insulation Materials: Complete 2026 Guide
Compare top home insulation materials for 2026. Find R-values, installed costs per square foot, and best uses for fiberglass, spray foam, and mineral wool.
Aug 4, 2026

Sustainable Building
Certify Your Green Building Material for LEED and WELL
Step-by-step guide to certifying a green building material for LEED v5 and WELL v2. Master EPDs, HPDs, and VOC limits for 2026 project specifications.
Aug 4, 2026

Stone & Masonry
Veneer Stacked Stone Panels: Interior Design & Style Showcase
Discover how veneer stacked stone panels transform interiors. Explore modern design profiles, material pairings, and technical installation specs.
Aug 4, 2026