Manufactured Stone Veneer Panels: The Complete Material Guide
Explore manufactured stone veneer panels for your next project. This complete guide covers costs, top brands, installation steps, and pros and cons.

What Are Manufactured Stone Veneer Panels?
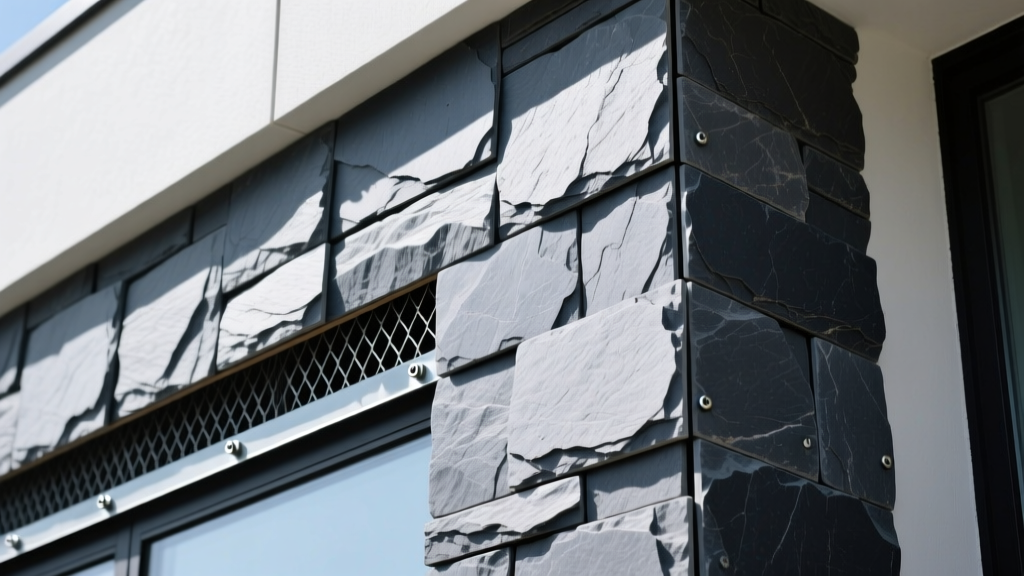
Manufactured stone veneer (MSV) panels are engineered cladding systems designed to replicate the aesthetic of natural stone at a fraction of the weight and cost. Unlike traditional loose-piece veneer, which requires masons to individually select and fit irregular stones, panelized systems feature interlocking modules—typically measuring 24 by 48 inches—that snap or mortar together to create a continuous, seamless facade. These panels are cast from molds taken from real quarried stone, ensuring authentic textures and color variations.
The core composition of high-quality MSV panels includes Portland cement, lightweight aggregates (such as pumice or expanded shale), and iron oxide pigments. This specific matrix yields a product that weighs between 10 and 12 pounds per square foot, compared to the 25 to 40 pounds per square foot typical of natural stone. This drastic weight reduction eliminates the need for structural wall reinforcements, foundation footings, or heavy-duty masonry ties, making MSV panels viable for both interior accent walls and exterior cladding over standard wood or steel framing.
Panelized Systems vs. Loose-Piece Veneer: The Decision Matrix
Choosing between panelized manufactured stone and traditional loose-piece veneer dictates your labor budget, installation timeline, and final aesthetic. Use the matrix below to determine the optimal material for your specific application.
| Feature | Manufactured Stone Panels | Loose-Piece MSV |
|---|---|---|
| Installation Speed | Fast (Covers 8 sq ft per panel) | Slow (Requires individual stone placement) |
| Labor Skill Required | Moderate (Carpenters or advanced DIYers) | High (Requires experienced masons) |
| Aesthetic Seamlessness | High (Engineered interlocking edges) | Very High (Randomized natural patterns) |
| Material Cost (per sq ft) | $7.00 – $14.00 | $6.00 – $12.00 |
| Labor Cost (per sq ft) | $8.00 – $12.00 | $14.00 – $22.00 |
| Best Application | Large exterior facades, commercial builds | Custom fireplaces, small accent walls |
Top Brands and 2026 Product Lines
The MSV market is dominated by a few key manufacturers that consistently meet or exceed ASTM C1670 standards for adhered manufactured stone masonry veneer. When specifying panels, look for these industry-leading product lines:
- Cultured Stone (Westlake Royal): The Country Ledgestone panel line offers a rugged, dry-stacked look with highly engineered interlocking joints that hide horizontal seams. Their panels feature integrated color layers that extend through the entire thickness of the cast.
- Eldorado Stone: Known for their RoughCut and Panelized Profiles, Eldorado utilizes a proprietary pumice aggregate blend that reduces weight while increasing thermal insulation properties. Their panels are specifically designed with staggered edge profiles to prevent repetitive patterning.
- Coronado Stone: The Fast-N-Easy series focuses heavily on installation speed, featuring larger 48-inch modules with a tongue-and-groove edge system that requires minimal mortar tooling at the joints.
Comprehensive Cost Breakdown
Budgeting for MSV panels requires looking beyond the sticker price of the stone itself. The following table outlines the fully burdened costs for a standard 500-square-foot exterior residential project in 2026.
| Cost Category | Price Range (per sq ft) | Notes & Specifications |
|---|---|---|
| MSV Panels | $7.00 – $14.00 | Varies by profile complexity and color blend. |
| Weather Barrier & Lath | $1.50 – $2.50 | Includes Grade D paper, 2.5 lb galvanized lath, and fasteners. |
| Mortar & Accessories | $1.00 – $2.00 | Type S mortar, weep screed, and corner pieces. |
| Professional Labor | $8.00 – $15.00 | Highly dependent on regional labor rates and wall height. |
| Total Installed Cost | $17.50 – $33.50 | Average national installed cost sits around $24.00/sq ft. |
Step-by-Step Installation Framework
Proper installation is critical to prevent water intrusion and structural degradation. Always adhere to the manufacturer's specific guidelines, such as those detailed in the Cultured Stone Installation Guidelines, but follow this universal baseline framework for exterior applications.
Phase 1: Substrate and Weatherization
- Apply the Weather-Resistive Barrier (WRB): Install two layers of Grade D building paper or a code-approved housewrap over the structural sheathing. The dual-layer system ensures that any moisture penetrating the stone drains down the face of the outer layer without touching the sheathing.
- Install Weep Screed: Attach a corrosion-resistant weep screed at the base of the wall. Maintain a minimum clearance of 4 inches above earth grade and 2 inches above hardscapes (concrete patios, driveways) to prevent capillary water action and soil splash-back.
- Fasten Metal Lath: Staple or nail 2.5 lb self-furring galvanized diamond mesh lath over the WRB. Fasteners must penetrate the structural studs by at least 1 inch, spaced no more than 6 inches apart vertically and 16 inches horizontally.
Phase 2: Mortar and Panel Application
- Apply the Scratch Coat: Trowel a 1/2-inch layer of Type S mortar over the lath. While the mortar is still wet, horizontally scratch the surface with a rake to create a mechanical key. Allow this coat to cure for 24 to 48 hours, keeping it moist in hot climates to prevent rapid drying and cracking.
- Layout and Dry-Fit: Unbox multiple panels and mix them to ensure color variation. Dry-fit the panels on the ground to plan your staggered vertical joints, ensuring no repetitive patterns emerge.
- Butter and Set: Apply a 1/2-inch to 1-inch layer of fresh Type S mortar to the back of the panel (buttering). Press the panel firmly into the scratch coat, wiggling slightly to squeeze out excess mortar at the edges.
- Tool the Joints: Use a trowel or jointing tool to strike the interlocking seams, blending the mortar with the panel edges. Avoid using a wet brush to tool joints, as this brings laitance to the surface and causes discoloration.
Pro-Tip for Interior Installs: For interior applications over painted drywall, you must scarify the paint surface or install cement backer board. Never apply MSV panels directly over unscarified gloss or semi-gloss paint, as the mortar will not achieve adequate mechanical adhesion, leading to catastrophic delamination.
Common Failure Modes and Prevention Strategies
Critical Troubleshooting Guide
1. Efflorescence (White Powdery Staining)
Cause: Soluble salts within the cement matrix are drawn to the surface by migrating moisture.
Prevention: Ensure proper flashing above the veneer field to stop bulk water entry. If efflorescence occurs, dry-brush the surface and wash with a diluted masonry cleaner. Do not use high-pressure washers, which force water deeper into the pores.
2. Freeze-Thaw Spalling
Cause: Water becomes trapped inside the panel's pores, freezes, and expands, causing the face of the stone to pop off.
Prevention: Verify that the chosen panels meet ASTM C1670 water absorption limits (typically under 10%). Apply a breathable, penetrating silane/siloxane sealer after installation. Never use film-forming acrylic sealers, which trap internal moisture and accelerate spalling.
3. Mortar Joint Cracking
Cause: Applying mortar too thick, using the wrong mortar type, or allowing the scratch coat to dry too quickly.
Prevention: Strictly use Type S or Type N mortar. Never add calcium chloride or antifreeze compounds to the mix in cold weather, as these compromise the structural integrity of the cementitious bond.
Maintenance and Longevity
When installed correctly according to Eldorado Stone Technical Data and industry standards, manufactured stone veneer panels carry a lifespan comparable to the structure itself, often backed by 50-year limited manufacturer warranties. Routine maintenance is minimal. Inspect the weep screed annually to ensure it is not blocked by landscaping mulch or soil. Check all penetrations (windows, doors, HVAC lines) to verify that the caulking between the MSV panels and the flashing remains pliable and intact. If the facade is exposed to heavy organic debris, an annual soft-wash with a garden hose and a mild, non-acidic detergent will prevent moss and algae colonization without damaging the iron oxide pigments.
Written by
James ThorntonJames Thornton is a construction industry veteran with 25 years of hands-on experience in wood framing, lumber grading, and residential building codes. He started as a framing carpenter in rural Oregon, earned his ICC Residential Building Inspector certification, and eventually became a senior plan reviewer for the City of Portland Bureau of Development Services. James holds a B.S. in Wood Science & Technology from Oregon State University and is a certified lumber grader through the West Coast Lumber Inspection Bureau (WCLIB). He has inspected over 3,000 residential construction sites and authored the city's internal guide on advanced framing techniques (2x6 at 24" O.C.). James lives in Bend, OR, where he builds custom timber-frame cabins and competes in lumberjack sports.
More from James Thornton
View all
Insulation
Best Home Insulation Materials: Complete 2026 Guide
Compare top home insulation materials for 2026. Find R-values, installed costs per square foot, and best uses for fiberglass, spray foam, and mineral wool.
Aug 4, 2026

Sustainable Building
Certify Your Green Building Material for LEED and WELL
Step-by-step guide to certifying a green building material for LEED v5 and WELL v2. Master EPDs, HPDs, and VOC limits for 2026 project specifications.
Aug 4, 2026

Stone & Masonry
Veneer Stacked Stone Panels: Interior Design & Style Showcase
Discover how veneer stacked stone panels transform interiors. Explore modern design profiles, material pairings, and technical installation specs.
Aug 4, 2026