Stone Veneer Phoenix Installation: Beating the Desert Heat
Master stone veneer Phoenix installation with our climate-specific guide. Learn hot-weather mortar mixing, substrate prep, and monsoon curing tips.

The Phoenix Climate Challenge for Masonry
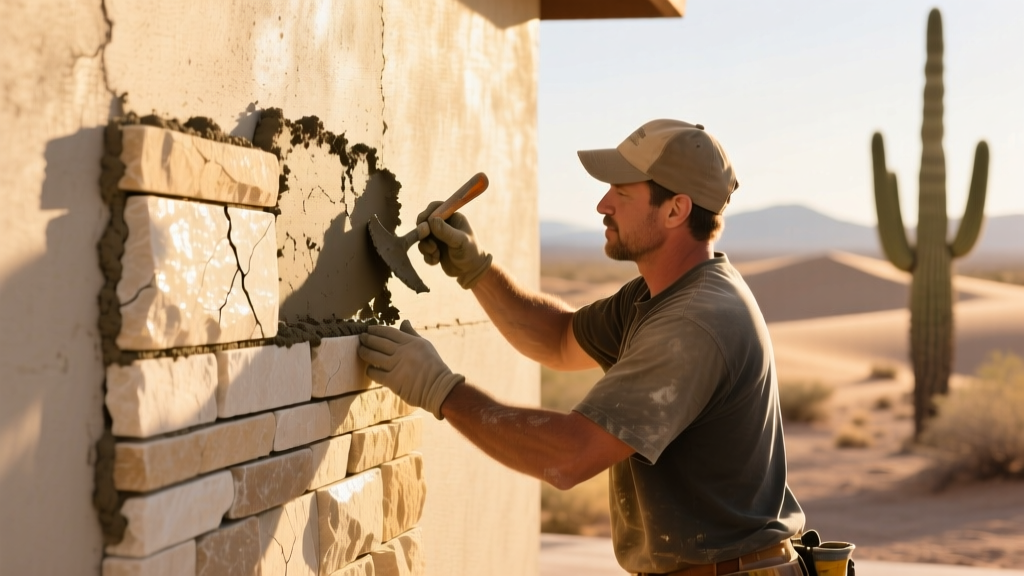
Installing stone veneer in the Sonoran Desert requires a fundamental departure from standard masonry practices. When ambient temperatures exceed 110°F and relative humidity drops below 15%, standard Portland cement-lime mortars lose their workability in minutes. The rapid evaporation of mixing water prevents proper hydration, leading to plastic shrinkage cracking, efflorescence, and catastrophic bond failure. According to the National Concrete Masonry Association (NCMA), hot weather masonry protocols must be triggered when temperatures hit 90°F, but Phoenix summers routinely push these limits far beyond standard thresholds.
Material Selection for the Sonoran Desert
Not all stone veneers perform equally under intense ultraviolet radiation and extreme thermal cycling. While natural slate is popular in cooler climates, its high absorption rate makes it susceptible to spalling during the rare but destructive freezing rain events that hit the Valley in January. Manufactured Stone Veneer (MSV) and dense natural limestones are the superior choices for Maricopa County.
| Veneer Type | UV Resistance | Thermal Expansion | Phoenix Suitability |
|---|---|---|---|
| Manufactured Stone (MSV) | Excellent (Iron oxide pigments) | Moderate | High (Lightweight, reduces structural load) |
| Natural Limestone | Excellent | Low | High (Dense, resists monsoon dust abrasion) |
| Natural Slate | Good | High | Low (Prone to delamination in freeze-thaw) |
| Sandstone | Fair | Moderate | Medium (Requires heavy sealing against UV) |
Step-by-Step Installation: Adapting to 110°F+ Days
Step 1: Substrate Prep & Moisture Barriers
Most residential exteriors in Gilbert and Scottsdale utilize wood-frame construction with a stucco finish. You cannot apply mortar directly to painted or sealed stucco. The existing stucco must be scarified or covered with a secondary weather-resistive barrier (WRB). Apply two layers of Grade D asphalt-impregnated building paper (meeting ASTM D226 standards) over the substrate. Overlap horizontal joints by 2 inches and vertical joints by 6 inches. Next, fasten 18-gauge self-furring galvanized diamond mesh lath using 1.5-inch roofing nails spaced every 6 inches. The self-furring dimples are non-negotiable; they ensure the mortar encapsulates the wire mesh completely, preventing rust jacking that can blow the veneer off the wall.
Step 2: Mortar Mixing & Retarders
For Phoenix installations, you must use a Type S masonry mortar (meeting ASTM C270 specifications), which offers the high tensile bond strength required for vertical veneer applications. In temperatures above 95°F, integrate a liquid or powdered mortar retarder, such as Fritz-Pak Mortar Retarder, into the mix. Add one pouch per 80-lb bag of dry mix. This extends the board life from 45 minutes to over 2 hours without compromising the ultimate compressive strength. Mix the mortar to a stiff, peanut-butter consistency; a soupy mix will slump off the wall in high heat.
Step 3: The 'Dunk and Scrub' Method
Manufactured and natural stones are highly porous. In dry desert air, a stone will wick moisture out of the mortar bed before the cement can hydrate. Before applying any stone, submerge it in a bucket of clean water for 5 to 10 seconds, then use a stiff bristle brush to scrub the back of the stone. This removes kiln dust and factory release agents while saturating the pore structure. Apply a 0.5-inch layer of mortar directly to the back of the stone (back-buttering) and a 0.5-inch layer to the lath. Press the stone into place with a slight twisting motion until the mortar squeezes out evenly on all sides.
Step 4: Curing & Mist Schedules
Standard masonry cures by retaining moisture. In Phoenix, you must actively introduce moisture post-installation. Beginning 24 hours after the mortar has achieved initial thumbprint hardness, mist the entire veneer wall with a fine fog spray of water twice daily (early morning and late evening) for 3 to 5 days. Do not use a high-pressure nozzle, which will erode the fresh joints.
Monsoon Wind & Dust Mitigation
Between July and September, Phoenix experiences violent monsoon storms characterized by haboobs—massive walls of airborne dust and micro-debris. If a haboob strikes while your mortar joints are still in the plastic state (the first 4 hours after tooling), fine silt will embed itself into the mortar, creating a weak slip plane and permanent discoloration.
- Windbreaks: Erect 6-mil polyethylene sheeting on the windward side of your scaffolding to block airborne particulates.
- Joint Tooling: Tool the mortar joints slightly earlier than usual (when the mortar is thumbprint hard but still slightly damp) to close the surface pores before dust can settle.
- Cleanup Protocol: Never use muriatic acid to clean desert dust off fresh veneer; the high alkalinity of local water combined with acid will cause severe efflorescence. Use a specialized, non-acidic masonry cleaner like Prosoco Sure Klean Weather Seal Natural Stone Cleaner.
Cost Breakdown: Phoenix Metro Area (2026)
Material and labor costs in the Phoenix metropolitan area have stabilized following the supply chain adjustments of the early 2020s, but extreme heat premiums apply during summer months. Contractors often charge a 10% to 15% 'summer hazard premium' for jobs scheduled between June and August to cover accelerated labor shifts (starting at 4:00 AM) and increased material waste.
| Cost Component | Low End (Per Sq. Ft.) | High End (Per Sq. Ft.) | Notes |
|---|---|---|---|
| Material (MSV / Limestone) | $7.50 | $14.00 | Includes stone, corner pieces, and 5% waste factor |
| Mortar, Lath & WRB | $2.50 | $4.00 | Type S mortar, 18-ga lath, Grade D paper |
| Labor (Winter/Spring) | $14.00 | $19.00 | Standard masonry rates in Maricopa County |
| Labor (Summer Premium) | $16.50 | $22.00 | Includes early morning shift differentials |
| Total Installed Cost | $24.00 | $39.00 | Varies by HOA scaffolding requirements & access |
Frequently Asked Questions
Do I need a specific contractor license for stone veneer in Arizona?
Yes. The Arizona Registrar of Contractors (ROC) requires any professional applying masonry or stone veneer to hold an active R-32 (Masonry) or K-11 (Specialty Masonry) license. Unlicensed handyman work on structural or weather-resistive exterior envelopes is illegal and will void most homeowner insurance policies if water intrusion occurs.
How do Scottsdale and Paradise Valley HOAs affect veneer installations?
Master-planned communities and high-end HOAs in North Scottsdale frequently mandate natural stone over manufactured veneer to maintain architectural uniformity. Furthermore, many HOAs require the mortar color to be custom-tinted to match the existing desert soil tones (typically a 'Sonoran Tan' or 'Mesa Buff' pigment) to ensure the joints blend seamlessly with the natural landscape.
Can I install stone veneer over an existing cinder block retaining wall?
You can, but cinder blocks (CMU) in Phoenix are highly alkaline and porous. You must apply a liquid acrylic bonding agent and a scratch coat of Type S mortar before installing the lath and veneer. Failure to neutralize and seal the CMU will result in the alkaline salts leaching through the mortar joints, creating severe white efflorescence staining on the stone face within six months.
Written by
Priya KapoorPriya Kapoor is a real estate market analyst and construction economics researcher with expertise in housing affordability, development feasibility, and infrastructure investment. She holds a Master of Regional Planning from Cornell University and previously worked as a senior analyst at CBRE's Investment Properties group, where she modeled returns for $4B in mixed-use development pipelines. Priya now runs an independent research practice advising developers, municipalities, and REITs on construction cost forecasting and market timing. She publishes the quarterly "BuildMat Market Pulse" report tracking material price indices across 12 commodity categories. Based in Austin, TX, Priya serves on the board of Habitat for Humanity Austin and is a marathon runner.
More from Priya Kapoor
View all
Construction Cost
Cost to Build a 1600 Sq Ft Home in 2026: Full Breakdown
Accurate 2026 cost to build a 1600 sq ft home—material, labor, and regional pricing breakdowns included. Plan your budget with real-time estimates.
Aug 11, 2026

Wood & Lumber
Name the Types of Wood for Pressure Treatment and Preservation
Learn how to name the types of wood best suited for pressure treatment. Compare species treatability, chemical retention levels, and 2026 preservation costs.
Aug 4, 2026

Stone & Masonry
Stone Veneer Suppliers Lindenhurst: 2026 Cost Analysis
Analyze 2026 stone veneer costs in Lindenhurst, NY. Compare local supplier pricing, delivery fees, and Suffolk County installation labor rates.
Aug 4, 2026