How to Install Mortarless Stone Veneer Exterior Walls
Learn how to install mortarless stone veneer exterior panels with our step-by-step guide covering substrate prep, fastening, and weatherproofing.

The Mechanics of Mortarless Stone Systems
Traditional manufactured stone veneer requires metal lath, a scratch coat of mortar, and meticulous masonry skills. Mortarless stone veneer exterior systems—such as those engineered by Boral Versetta Stone or similar interlocking concrete-polymer composites—eliminate the masonry bottleneck. These panels feature an integrated 2-inch nailing flange and a built-in 1-inch drainage plane, allowing them to be fastened directly to structural sheathing. This guide details the exact substrate requirements, fastener schedules, and weatherproofing protocols required to install interlocking stone panels that meet International Residential Code (IRC) standards for wind uplift and moisture management.
Essential Tools & Material Checklist
- Panels: Mortarless interlocking stone veneer (calculate square footage + 10% waste factor)
- Fasteners: 2.5-inch exterior-grade corrosion-resistant screws (e.g., Simpson Strong-Tie or Grip-Rite)
- Weather Barrier: Code-approved WRB (House wrap or fluid-applied membrane)
- Flashing: 26-gauge galvanized steel Z-flashing or PVC weep-flashing
- Cutting: 10-inch miter saw with continuous rim diamond blade; 4.5-inch angle grinder for field cuts
- Layout: 4-foot level, chalk line, tape measure, tin snips, impact driver with Torx/square bit
Phase 1: Substrate and Weather Barrier Preparation
The structural integrity of a mortarless system relies entirely on the substrate. Because the panels lock together and transfer wind loads directly to the framing, the wall must be rigid and properly spaced.
Sheathing and Framing Requirements
Verify that your exterior wall sheathing is a minimum of 7/16-inch thick OSB or 1/2-inch plywood. Wall studs must be spaced at a maximum of 16 inches on center (O.C.). If your framing is 24 inches O.C., you must install horizontal furring strips or reinforce the sheathing to prevent deflection, which can snap the interlocking tongues of the stone panels under wind pressure.
Applying the Weather-Resistive Barrier (WRB)
While the panels themselves have a built-in drainage gap, a secondary WRB is non-negotiable for code compliance. According to Fine Homebuilding's waterproofing guidelines, you must install a continuous water-resistive barrier over the sheathing. Lap horizontal seams by a minimum of 2 inches and vertical seams by 6 inches. Seal all penetrations (windows, vents, electrical boxes) with compatible flashing tape or fluid-applied sealant to create a continuous drainage plane behind the stone's integrated air gap.
Phase 2: Flashing and Starter Track Installation
Moisture intrusion at the foundation line is the most common failure point in exterior veneer installations. Proper flashing ensures that any water penetrating the panel joints is directed outward.
- Install Base Flashing: Attach a continuous piece of Z-flashing or PVC weep-flashing along the bottom edge of the wall where the veneer will begin. The lower leg of the flashing must extend over the foundation or ledger board by at least 2 inches.
- Establish a Level Baseline: Mortarless panels are unforgiving if the first course is unlevel. Snap a chalk line exactly 1 inch above the bottom edge of your flashing. This gap allows for thermal expansion and prevents the stone from wicking ground moisture.
- Attach the Starter Strip: Most mortarless systems require a specific metal or polymer starter strip. Align the top edge of the starter strip with your chalk line and fasten it to the studs using 2.5-inch screws every 16 inches O.C.
Phase 3: Panel Fastening and Interlocking Matrix
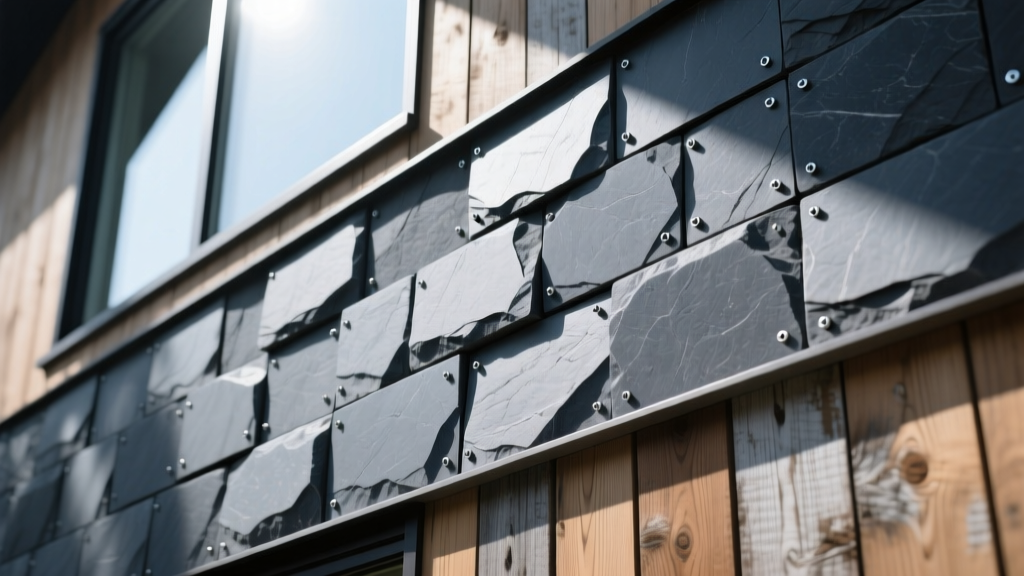
The core advantage of mortarless stone veneer exterior systems is the hidden fastener flange. Each panel features a top nailing flange with pre-punched slots that allow for vertical expansion and contraction.
Fastener Specifications by Substrate
Using the correct fastener length and type is vital for achieving the manufacturer's rated wind-uplift resistance (often tested to withstand 110+ mph winds, as certified by Westlake Royal Building Products for their Versetta systems).
| Substrate Type | Fastener Specification | Length | Minimum Penetration |
|---|---|---|---|
| Wood Studs (16" O.C.) | Corrosion-resistant exterior screw | 2.5 inches | 1 inch into solid stud |
| Light-Gauge Steel Studs | Self-drilling TEK screw with washer | 2.0 inches | 3 threads past steel flange |
| Concrete / CMU Block | Tapcon masonry screw | 2.75 inches | 1 inch into solid masonry |
Begin installing panels from the bottom left corner. Slide the bottom lip of the first panel into the starter strip, ensure it is level, and drive screws through the top flange into the studs. Place the next panel adjacent to it, engaging the vertical interlocking tongue-and-groove joint. For the second course, stagger the vertical seams by at least 12 inches to mimic a natural masonry running bond pattern.
Phase 4: Cutting, Corners, and Expansion Gaps
Manufactured stone is dense and abrasive. Standard carbide-tipped wood blades will dull instantly and chip the aggregate face.
Precision Cutting Techniques
- Wet Saw Method: For clean, chip-free cuts around windows and doors, use a 10-inch wet tile saw equipped with a continuous rim diamond blade. Feed the panel slowly to prevent the blade from binding in the dense concrete matrix.
- Angle Grinder Method: For quick field cuts or notching around electrical fixtures, use a 4.5-inch angle grinder with a turbo mesh diamond blade. Always cut from the back (nailing flange side) to minimize visible chipping on the exposed stone face.
Managing Expansion Gaps
The Masonry Veneer Manufacturers Association (MVMA) emphasizes that all veneer systems require expansion joints. Leave a strict 1/4-inch gap at all inside and outside corners, as well as where the stone meets rooflines, decks, or window casings. These gaps should later be filled with a high-quality, paintable exterior polyurethane sealant that matches the mortar color of your panels.
Warning: Corner Piece Sequencing
Do not attempt to miter-cut the stone panels for outside corners. Mortarless systems require proprietary L-shaped corner pieces. Install the corner pieces first, then butt the field panels into the return leg of the corner unit. This ensures the structural interlock is maintained and hides the raw cut edges of the field panels.
Cost Analysis and ROI
Understanding the financial breakdown helps justify the material choice over traditional options. Mortarless stone veneer exterior panels typically cost between $13.00 and $18.00 per square foot for materials, including starter strips, corner pieces, and fasteners.
While the material cost is roughly 20% higher than traditional lath-and-mortar manufactured stone, the labor savings are substantial. A professional masonry crew charges $12 to $18 per square foot for labor, and the process requires multiple days for curing. Mortarless panels can be installed by a competent DIYer or a standard carpentry crew at a fraction of the time—typically covering 40 to 60 square feet per hour. This reduces total installed costs by up to 35% while delivering an identical aesthetic and superior drainage characteristics.
Troubleshooting Common Installation Errors
- Symptom: Panels are bowing or bulging in the center.
Cause: Fasteners were driven too tightly, or the substrate is uneven.
Fix: Back out the screws slightly to allow the panel to sit flush. Shim behind the WRB if the sheathing has severe deflections. - Symptom: Vertical seams are drifting out of plumb.
Cause: Failing to check level every 3 courses.
Fix: Use a 4-foot level on every third course. If drift occurs, use a tapered shim behind the nailing flange to gradually correct the pitch over the next 4 feet of wall. - Symptom: Water staining on interior drywall below the veneer.
Cause: Missing or improperly lapped Z-flashing at the base course.
Fix: Remove the bottom course of panels, install continuous weep-flashing over the foundation sill plate, and ensure the WRB laps over the top leg of the flashing.
Written by
James ThorntonJames Thornton is a construction industry veteran with 25 years of hands-on experience in wood framing, lumber grading, and residential building codes. He started as a framing carpenter in rural Oregon, earned his ICC Residential Building Inspector certification, and eventually became a senior plan reviewer for the City of Portland Bureau of Development Services. James holds a B.S. in Wood Science & Technology from Oregon State University and is a certified lumber grader through the West Coast Lumber Inspection Bureau (WCLIB). He has inspected over 3,000 residential construction sites and authored the city's internal guide on advanced framing techniques (2x6 at 24" O.C.). James lives in Bend, OR, where he builds custom timber-frame cabins and competes in lumberjack sports.
More from James Thornton
View all
Insulation
Best Home Insulation Materials: Complete 2026 Guide
Compare top home insulation materials for 2026. Find R-values, installed costs per square foot, and best uses for fiberglass, spray foam, and mineral wool.
Aug 4, 2026

Sustainable Building
Certify Your Green Building Material for LEED and WELL
Step-by-step guide to certifying a green building material for LEED v5 and WELL v2. Master EPDs, HPDs, and VOC limits for 2026 project specifications.
Aug 4, 2026

Stone & Masonry
Veneer Stacked Stone Panels: Interior Design & Style Showcase
Discover how veneer stacked stone panels transform interiors. Explore modern design profiles, material pairings, and technical installation specs.
Aug 4, 2026