The Complete Guide to Natural Stone Veneer for Fireplace Installations
Explore natural stone veneer for fireplace projects. Compare profiles, costs, heat clearances, and installation methods for a stunning hearth upgrade.

Full-Bed Stone vs. Natural Stone Veneer: Structural Realities
When upgrading a hearth, homeowners often debate between full-bed natural stone and natural stone veneer. Full-bed stone typically weighs between 25 and 40 pounds per square foot and requires a dedicated concrete footing to support the massive dead load. In contrast, natural stone veneer is sliced or cast to a thickness of 1 to 2.5 inches, reducing the weight to 7 to 15 pounds per square foot. This weight reduction allows the veneer to be supported entirely by standard wood or steel wall framing, provided the substrate is properly reinforced with cement backer board and metal lath. For retrofitting existing fireplaces where pouring a new footing is structurally or financially unfeasible, veneer is the only viable natural stone option.
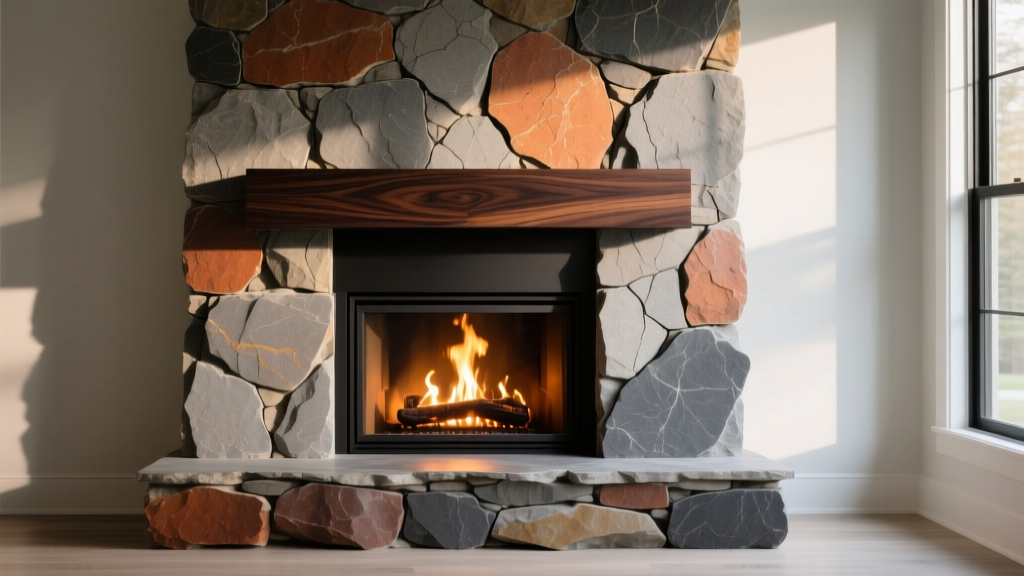
Top Stone Profiles for Fireplace Surrounds
The visual impact of your fireplace is dictated by the stone profile. Natural stone veneer is quarried and shaped into distinct patterns, each interacting with firelight differently. Below is a technical comparison of the most common profiles used in hearth applications.
| Profile Type | Aesthetic | Joint Width | Best Application | Avg. Cost (Material Only) |
|---|---|---|---|---|
| Ledgestone | Linear, modern-rustic | Tight (1/4" or dry-stacked) | Contemporary homes, tall chimney chases | $12 - $18 / sq ft |
| Fieldstone | Rounded, organic, traditional | Wide (1/2" to 1") | Cabin-style homes, traditional masonry hearths | $9 - $14 / sq ft |
| Ashlar | Squared, geometric, classic | Medium (3/8" to 1/2") | Transitional designs, formal living rooms | $11 - $16 / sq ft |
| Mosaic | Irregular, puzzle-like | Variable (1/4" to 3/4") | Eclectic spaces, outdoor fireplaces | $10 - $15 / sq ft |
Heat Tolerance, Clearances, and Building Codes
Natural stone is inherently non-combustible and will easily pass Masonry Society standards for fire resistance (ASTM E136). However, the stone itself is only one component of the fireplace assembly. The critical safety factor lies in the clearance to combustible materials behind and adjacent to the veneer.
According to the National Fire Protection Association (NFPA 211), all combustible materials—including wood mantels, drywall, and wood framing—must maintain a minimum clearance of 12 inches from the firebox opening. While the stone veneer is non-combustible, the mortar and substrate can transfer heat. Always use 1/2-inch cement backer board (such as Durock or HardieBacker) as the substrate within 18 inches of the firebox, never standard gypsum drywall.
Selecting the Right Mortar for Thermal Expansion
Fireplace surrounds experience significant thermal cycling. As the firebox heats up, the surrounding masonry expands; as it cools, it contracts. Using the wrong mortar will result in hairline cracking or complete delamination within the first heating season.
- Type S Mortar: This is the mandatory standard for the scratch coat and the setting bed. Type S contains a higher proportion of Portland cement and lime, yielding a compressive strength of at least 1,800 psi and superior bond strength compared to Type N. The lime content provides the necessary flexibility to absorb minor thermal expansion without cracking.
- Refractory Mortar: Required only if you are applying stone veneer inside the actual firebox or on the immediate 2-inch lip of the firebox opening. Refractory mortar is rated to withstand temperatures exceeding 2,000°F without calcifying or crumbling.
- Polymeric Jointing Sand: For dry-stacked ledgestone profiles where traditional grouting is impossible, a high-heat polymeric sand swept into the tight joints will lock the stones together while allowing for micro-movements during thermal cycling.
Cost Breakdown: Material vs. Labor
Budgeting for a natural stone veneer fireplace requires accounting for the hidden accessory costs that are often omitted from initial material quotes. The following breakdown reflects average pricing for a standard 50-square-foot floor-to-ceiling fireplace surround.
- Natural Stone Veneer: $450 - $900 ($9 - $18 per sq ft)
- Cement Backer Board & Fasteners: $60 - $90
- 18-Gauge Galvanized Metal Lath: $40 - $75
- Type S Mortar (Scratch & Setting): $80 - $120
- Professional Masonry Labor: $750 - $1,500 ($15 - $30 per sq ft)
- Total Estimated Project Cost: $1,380 - $2,685
For a deeper understanding of how fireplace upgrades impact overall home energy dynamics and heating efficiency, refer to the U.S. Department of Energy's guidelines on wood and pellet heating, which detail how masonry mass can improve radiant heat retention.
Step-by-Step Installation Framework
Proper installation is non-negotiable for high-heat zones. Follow this sequence to ensure structural integrity and code compliance.
1. Substrate Preparation
Strip the existing wall down to the studs. Install a vapor barrier (15 lb asphalt felt or Grade D paper) overlapping by 2 inches at the seams. Screw 1/2-inch cement backer board directly to the studs using corrosion-resistant cement board screws spaced 6 inches apart on the edges and 8 inches in the field.
2. Lath Application
Staple 18-gauge self-furring galvanized metal lath over the cement board. The self-furring dimples must face outward to hold the lath 1/4-inch away from the board, allowing the scratch coat mortar to wrap behind the wire. Overlap horizontal seams by 1 inch and vertical seams by 2 inches.
3. The Scratch Coat
Mix Type S mortar to a thick, peanut-butter consistency. Trowel a 1/2-inch layer of mortar completely encapsulating the metal lath. While the mortar is still wet, use a notched trowel to rake horizontal grooves into the surface. This mechanical key is what prevents the heavy stone from sliding down the wall during the final application. Allow the scratch coat to cure for a minimum of 48 hours.
4. Stone Setting and Grouting
Apply a 1/2-inch layer of fresh Type S mortar to the back of each stone (back-buttering) and press it firmly into a fresh layer of mortar on the wall. Maintain consistent joint widths using spacers. Once the mortar has set enough to resist thumb pressure (usually 45 to 60 minutes), tool the joints with a convex jointer to compress the mortar against the stone edges, creating a weather-tight seal.
Troubleshooting Common Veneer Failures
Even with premium materials, environmental factors and installation shortcuts can lead to specific failure modes. Recognizing these early prevents costly teardowns.
Delamination and Stone Slippage
The Symptom: Stones detach from the wall, often pulling the metal lath with them, or slide downward leaving a gap at the top of the surround.
The Cause: Skipping the scratch coat, applying mortar to a dusty substrate, or failing to back-butter the stones. In high-heat zones, it can also be caused by using Type N mortar, which lacks the bond strength to withstand thermal expansion.
The Fix: Remove the loose stones. Clean the substrate with a wire brush, reapply the scratch coat, and reset the stones using a polymer-modified Type S mortar for enhanced adhesion.
Efflorescence (White Powder Deposits)
The Symptom: A chalky, white crystalline deposit forms on the surface of the stone or within the mortar joints, particularly near the top of the chimney chase.
The Cause: Water-soluble salts naturally present in the natural stone or Portland cement are dissolved by moisture moving through the masonry. As the water evaporates at the surface, the salts are left behind.
The Fix: Do not seal the stone immediately after installation; the masonry needs 28 to 60 days to fully cure and release trapped moisture. Once cured, clean the efflorescence with a stiff nylon brush and a specialized masonry cleaner (never use muriatic acid on natural limestone or sandstone, as it will etch the surface). Finally, apply a breathable, penetrating silane/siloxane sealer that repels liquid water while allowing water vapor to escape.
Written by
David NakamuraDavid Nakamura is a licensed architect (AIA) and construction technology writer focused on sustainable building methods, mass timber engineering, and high-performance building envelopes. He holds a Master of Architecture from the University of Washington and is a certified Passive House Consultant (CPHC). David spent eight years at the Seattle firm Mithun, where he led the design of three LEED Platinum projects, before founding his own practice specializing in net-zero residential design. He serves on the editorial advisory board of GreenBuilder Magazine and has authored peer-reviewed papers on cross-laminated timber (CLT) connections for the Journal of Structural Engineering. In his spare time, David teaches woodworking at Pratt Fine Arts Center and kayaks the Puget Sound.
More from David Nakamura
View all
Construction Cost
Labor Cost to Build a Deck Per Sq Ft: 2026 Installation Guide
Discover the exact labor cost to build a deck per sq ft in 2026. This installation guide breaks down contractor rates, complexity factors, and hidden fees.
Aug 4, 2026

Construction Cost
How Much Does It Cost to Build a 3 Bedroom House? Financing Guide
Learn exactly how much it costs to build a 3 bedroom house and explore 2026 financing options, construction loan types, and budget frameworks for your build.
Aug 4, 2026

Construction Cost
Cost to Build a Tennis Court: 2026 Guide
How much does it cost to build a tennis court in 2026? Breakdowns for asphalt, concrete, and synthetic surfaces plus fencing and lighting.
Jul 30, 2026