Installing Outdoor Kitchen Stone Veneer: Step-by-Step
Master outdoor kitchen stone veneer installation with this pro guide. Learn substrate prep, mortar selection, and weatherproofing techniques.

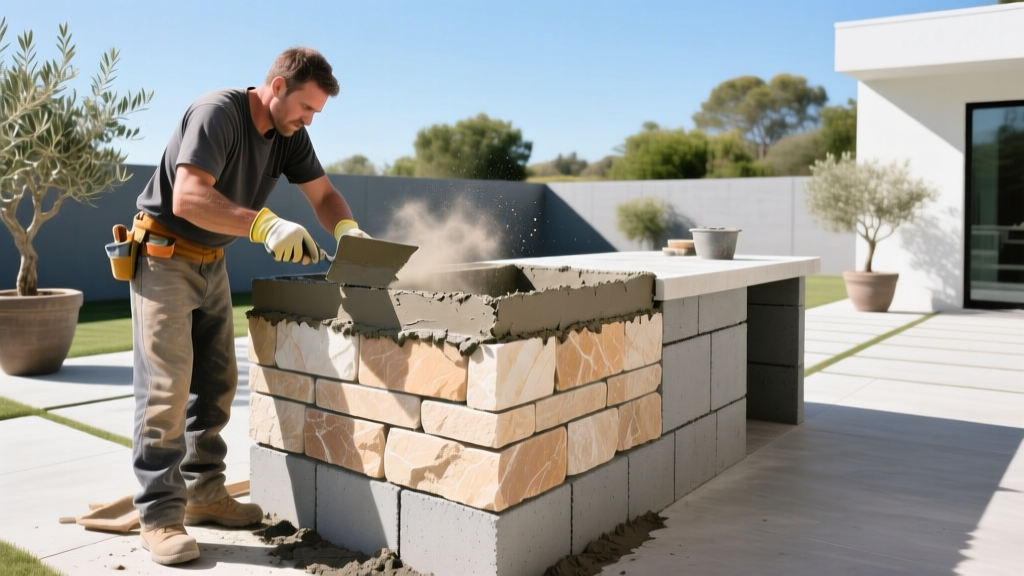
Building an exterior culinary space exposes your masonry to extreme thermal cycling, driving rain, and structural loads that interior fireplaces never face. Installing outdoor kitchen stone veneer requires strict adherence to moisture management and substrate rigidity protocols. A failure in the scratch coat or an incorrect sealer choice will result in delamination, efflorescence, or freeze-thaw spalling within the first winter. This guide details the exact materials, measurements, and sequencing required for a permanent exterior veneer installation.
Substrate Requirements: Why Wood Framing Fails Outdoors
While interior stone veneer is routinely applied over wood stud framing with cement backer board, outdoor kitchens demand a more robust substrate. Wood framing is susceptible to moisture-induced deflection and rot. According to guidelines published by the National Concrete Masonry Association (NCMA), exterior masonry veneers should be anchored to rigid, non-combustible, and moisture-tolerant substrates to prevent differential movement.
The CMU Standard
Construct your outdoor kitchen island base using 8-inch Concrete Masonry Units (CMU) blocks. For load-bearing sections supporting granite countertops or heavy grills, fill the CMU cells with vertical rebar (typically #4 or #5) and grout. This creates a monolithic, immovable base that will not warp, swell, or degrade when exposed to weather, providing the ultimate anchor for your stone veneer.
Mortar and Lath Selection for Exterior Environments
The bond between the stone and the substrate relies entirely on the metal lath and the mortar matrix. Exterior applications require materials that can withstand hydrostatic pressure and thermal expansion.
| Component | Interior Standard | Exterior Requirement (Outdoor Kitchen) | Specification / Standard |
|---|---|---|---|
| Metal Lath | Galvanized or painted | 2.5 lb/yd² Galvanized Diamond Mesh | ASTM C847 |
| Scratch Coat Mortar | Type N Mortar | Type S Mortar (Higher compressive strength) | ASTM C270 |
| Veneer Adhesive | Type N or Thinset | Polymer-Modified Mortar (ANSI A118.15) | ANSI A118.4 / A118.15 |
| Fasteners | Drywall screws / nails | Concrete masonry anchors or wedge anchors | Corrosion-resistant |
Always use self-furring lath. The dimples in self-furring mesh hold the lath 1/4 inch away from the CMU block, allowing the scratch coat mortar to flow behind the metal and create a mechanical lock. Overlap horizontal lath seams by a minimum of 1 inch and vertical seams by 2 inches. Fasten the lath to the CMU using corrosion-resistant masonry anchors spaced no more than 6 inches apart vertically and 16 inches horizontally.
Step-by-Step Installation Flow
Follow this exact sequence to ensure structural integrity and aesthetic consistency. The The Masonry Society emphasizes that proper curing times between stages are non-negotiable for exterior masonry.
Step 1: Apply and Score the Scratch Coat
Mix a Type S mortar (1 part Portland cement, 1/2 part hydrated lime, and 4.5 parts masonry sand). Apply a 1/2-inch thick layer over the galvanized lath using a steel trowel, pressing firmly to force the mortar through the mesh. Before the mortar sets (usually within 30-45 minutes), use a coarse masonry rake or a stiff-bristled brush to score horizontal lines into the surface. This cross-hatching provides the mechanical key for the final veneer layer. Allow the scratch coat to cure for a minimum of 24 to 48 hours, misting it lightly with water if temperatures exceed 80°F to prevent rapid drying.
Step 2: Dry Layout and Stone Preparation
Lay out your stone veneer panels or individual pieces on the ground around the island base. Mix stones from at least three different pallets to ensure a natural variation in color and texture. If using natural stone, wash the back of each piece with a stiff brush and water to remove quarry dust, which acts as a bond-breaker and will cause the stone to pop off the wall.
Step 3: Buttering and Setting the Veneer
Using a polymer-modified mortar or a high-quality masonry adhesive specifically rated for exterior veneer, apply a 1/2-inch layer to the back of the stone (buttering). Press the stone firmly into the scratch coat, wiggling it slightly to squeeze out excess mortar and eliminate air pockets.
- For Stacked Stone (Dry-Stack): Keep joints tight. Wipe away any mortar that squeezes out onto the face immediately with a damp sponge.
- For Fieldstone or Ledge Stone (Grouted): Maintain a consistent 1/2-inch to 1-inch joint width. Tool the joints with a concave jointer once the mortar becomes thumbprint-hard.
Step 4: Corner and Cap Integration
Always install corner pieces first. Alternate the long and short legs of the corners as you move up the wall to create a natural, interlocking masonry look. For the top of the kitchen island, ensure your countertop overhangs the stone veneer by at least 1.5 inches. Install a metal drip edge or a sloped stone cap beneath the countertop overhang to direct water away from the veneer face, preventing unsightly streaking and water infiltration behind the stone.
Weatherproofing: The Critical Sealer Phase
Exterior stone is porous. Without proper sealing, it will absorb rainwater, leading to efflorescence (white salt deposits) and freeze-thaw spalling. However, applying the wrong sealer is just as destructive as applying none at all.
Instead, use a breathable, penetrating silane/siloxane sealer, such as those manufactured by PROSOCO. These sealers penetrate up to 1/4 inch into the stone and mortar, lining the pores with a hydrophobic resin that repels liquid water while allowing water vapor to escape. Apply the sealer using a low-pressure pump sprayer when the wall temperature is between 50°F and 90°F, ensuring the masonry has cured for at least 28 days post-installation.
Cost and Time Breakdown (2026 Estimates)
Budgeting for an outdoor kitchen stone veneer project requires accounting for both the structural prep and the aesthetic finish. The following table outlines average costs per square foot of vertical veneer area.
| Project Phase | Material Cost (per sq ft) | Labor Cost (per sq ft) | Estimated Time (per 50 sq ft) |
|---|---|---|---|
| CMU Base & Rebar Prep | $12.00 - $18.00 | $15.00 - $25.00 | 4 - 6 Hours |
| Lath & Scratch Coat | $2.50 - $4.00 | $8.00 - $12.00 | 2 - 3 Hours (+ 24h cure) |
| Stone Veneer & Mortar | $9.00 - $24.00 | $18.00 - $35.00 | 8 - 12 Hours |
| Penetrating Sealer | $0.75 - $1.50 | $2.00 - $4.00 | 1 Hour (+ 28 day wait) |
| Total Estimated | $24.25 - $47.50 | $43.00 - $76.00 | 2 to 3 Days |
Common Failure Modes and Troubleshooting
Even with premium materials, improper technique will lead to visible defects. Use this diagnostic guide to identify and prevent common exterior veneer failures.
1. Severe Efflorescence (White Powdery Staining)
- Cause: Using unbuffered acid washes to clean the stone, or applying gray Portland cement mortar behind highly porous, light-colored natural stone without a vapor barrier.
- Fix: For light-colored limestone or travertine, always specify white Portland cement in your mortar mix. Never use muriatic acid to clean exterior masonry; use specialized, non-acidic masonry cleaners and a stiff nylon brush.
2. Veneer Delamination (Stones Falling Off)
- Cause: Failure to score the scratch coat, applying veneer to a dusty/dry scratch coat without dampening it first, or using interior-grade mastic instead of exterior polymer-modified mortar.
- Fix: If delamination occurs, the affected stones must be completely removed. Chip away the old mortar, re-scratch the area, and reset the stones using a high-bond, exterior-rated thinset. Ensure the substrate is damp (not wet) before applying new mortar to prevent the dry wall from sucking the moisture out of the adhesive too quickly.
3. Mortar Smearing on Stone Faces
- Cause: Attempting to grout joints on a windy, hot day, causing the mortar to dry before it can be tooled, or using a grout bag improperly on textured stone.
- Fix: Work in small 10-square-foot sections. If mortar smears onto the stone face, do not wipe it while wet, as this will grind the cement into the stone's pores. Allow the smear to dry until it is crumbly, then knock it off with a dry, stiff-bristled masonry brush.
Written by
James ThorntonJames Thornton is a construction industry veteran with 25 years of hands-on experience in wood framing, lumber grading, and residential building codes. He started as a framing carpenter in rural Oregon, earned his ICC Residential Building Inspector certification, and eventually became a senior plan reviewer for the City of Portland Bureau of Development Services. James holds a B.S. in Wood Science & Technology from Oregon State University and is a certified lumber grader through the West Coast Lumber Inspection Bureau (WCLIB). He has inspected over 3,000 residential construction sites and authored the city's internal guide on advanced framing techniques (2x6 at 24" O.C.). James lives in Bend, OR, where he builds custom timber-frame cabins and competes in lumberjack sports.
More from James Thornton
View all
Insulation
Best Home Insulation Materials: Complete 2026 Guide
Compare top home insulation materials for 2026. Find R-values, installed costs per square foot, and best uses for fiberglass, spray foam, and mineral wool.
Aug 4, 2026

Sustainable Building
Certify Your Green Building Material for LEED and WELL
Step-by-step guide to certifying a green building material for LEED v5 and WELL v2. Master EPDs, HPDs, and VOC limits for 2026 project specifications.
Aug 4, 2026

Stone & Masonry
Veneer Stacked Stone Panels: Interior Design & Style Showcase
Discover how veneer stacked stone panels transform interiors. Explore modern design profiles, material pairings, and technical installation specs.
Aug 4, 2026