Sakrete Stone Veneer Mortar: Maintenance, Cleaning, and Repair
Learn how to inspect, clean, and repair Sakrete stone veneer mortar joints. Expert tips on tuckpointing, efflorescence removal, and long-term care.

Understanding Sakrete Stone Veneer Mortar Degradation
Sakrete Stone Veneer Mortar is a polymer-modified, Type S equivalent mix engineered for high bond strength and flexibility on vertical surfaces. While the latex and acrylic polymers provide superior adhesion to manufactured and natural stone, the Portland cement matrix remains susceptible to environmental stressors. Over time, freeze-thaw cycles, hydrostatic pressure, and structural settling can compromise the mortar joints. Proper maintenance is not about daily upkeep; it is about systematic inspection, chemical-safe cleaning, and precise tuckpointing when the polymer matrix begins to fail.
According to the National Park Service guidelines on repointing mortar joints, addressing minor joint deterioration immediately prevents moisture from migrating behind the veneer, which can cause catastrophic lath and framing damage. Below is a diagnostic framework to identify specific failure modes in polymer-modified veneer mortars.
Mortar Failure Diagnostic Matrix
| Symptom | Root Cause | Repair Protocol |
|---|---|---|
| Spider-web hairline cracking | Rapid moisture loss during initial curing; plastic shrinkage. | Apply penetrating silane/siloxane sealer; monitor for widening. |
| Deep, stepped cracking along joints | Differential structural settling or foundation movement. | Consult structural engineer; rake and repoint only after movement stabilizes. |
| Mortar crumbling or powdering | Freeze-thaw spalling due to excess water in original mix or lack of air entrainment. | Complete joint raking and tuckpointing with fresh Sakrete SVM. |
| White, powdery residue (Efflorescence) | Water-soluble salts migrating to the surface and crystallizing. | Dry brushing followed by specialized masonry cleaner application. |
| Mortar pulling away from stone edge | Poor initial joint packing or stone absorption of mix water before hydration. | Caulk with color-matched polyurethane or repoint if gap exceeds 1/4 inch. |
Safe Cleaning Protocols for Polymer-Modified Mortar
Cleaning stone veneer requires extreme caution when the joints are bonded with polymer-modified products like Sakrete Stone Veneer Mortar. Traditional masonry cleaning often relies on muriatic (hydrochloric) acid to remove mortar smears and stains. However, high-concentration acid solutions can degrade the acrylic and latex polymers in the mortar joint, leading to premature embrittlement and loss of bond strength.
- Light Dirt and Dust: Use a soft-bristle brush and a mild, non-ionic detergent mixed with water. Rinse with a low-pressure garden hose.
- Mortar Smears (Haze): If removing fresh mortar haze within 14 days of installation, use a specialized, polymer-safe masonry cleaner (such as Sure Klean Vana Trol or Prosoco Sure Klean Light Duty Concrete Cleaner) diluted strictly to manufacturer specifications.
- Biological Growth (Algae/Mildew): Apply a diluted sodium hypochlorite (bleach) solution or a commercial quaternary ammonium biocide. Allow 15 minutes of dwell time and rinse thoroughly to prevent salt buildup.
Never use a pressure washer exceeding 1,500 PSI on stone veneer mortar joints. High-pressure streams can easily erode the cement paste, exposing the aggregate and destroying the polymer matrix. Maintain a minimum 12-inch distance from the wall and use a 40-degree fan tip.
Step-by-Step Tuckpointing and Joint Repair
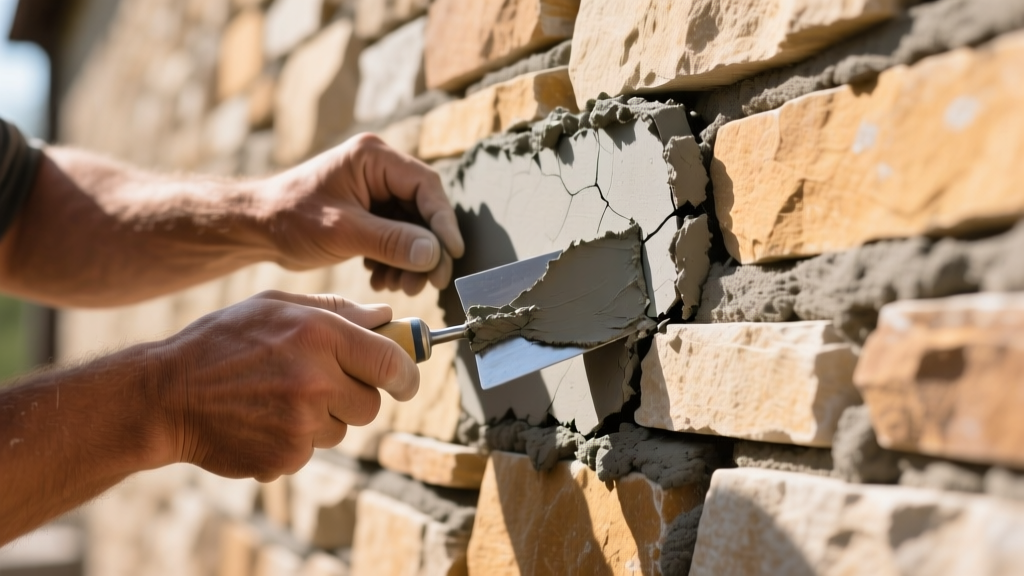
When the Sakrete Stone Veneer Mortar technical data sheet parameters for structural integrity are no longer met, tuckpointing is required. Because this product is polymer-modified, it bonds exceptionally well to existing cured mortar, provided the substrate is prepared correctly.
Phase 1: Joint Raking and Preparation
- Rake the Joint: Use a manual joint raker or a specialized diamond-blade masonry saw to remove deteriorated mortar to a depth of at least 1/2 inch, or twice the width of the joint. Do not cut into the stone or the underlying metal lath.
- Remove Debris: Brush out all loose dust and aggregate with a stiff nylon brush. Use compressed air or a leaf blower to ensure the cavity is completely clear.
- Pre-Wet the Substrate: This is the most critical step. Polymer-modified mortars require moisture to cure properly, but the existing dry masonry will steal water from the new mix. Thoroughly dampen the joints with a spray bottle or misting hose. The joint must be in a Saturated Surface-Dry (SSD) condition—damp to the touch, but with no standing water pooling in the cavity.
Phase 2: Mixing and Application
- Proportioning: Mix the 80-lb bag of Sakrete Stone Veneer Mortar with approximately 1.25 gallons of clean, potable water. Always add water to the dry mix, not vice versa.
- Slaking: Mix for 3 to 5 minutes until a lump-free, peanut-butter consistency is achieved. Let the mixture slake (rest) for 5 minutes. This allows the polymers to fully activate and the cement particles to absorb moisture. Remix briefly without adding water before application.
- Packing the Joint: Load a hawk with mortar. Using a 3/8-inch or 1/2-inch pointing trowel, firmly press the mortar into the raked joint. Start with vertical (head) joints, then move to horizontal (bed) joints. Compact the mortar in layers if the depth exceeds 3/4 inch to prevent sagging.
- Tooling: Once the mortar has lost its sheen and is thumbprint-hard (typically 20 to 45 minutes depending on ambient temperature), tool the joint with a concave jointer or V-tool to compress the surface and create a weather-tight seal.
Managing Efflorescence on Veneer Mortar
Efflorescence is not a structural defect; it is an aesthetic condition caused by the migration of water-soluble salts to the surface of the mortar. However, persistent efflorescence indicates chronic moisture intrusion that must be addressed at the source.
When treating efflorescence on Sakrete SVM joints, avoid immediate chemical intervention. The first line of defense is mechanical removal. Use a stiff, dry nylon brush to scrub the white crystalline deposits off the joints. If water is introduced during cleaning, it may simply dissolve the salts and drive them back into the porous mortar matrix, restarting the cycle.
If dry brushing fails, apply a diluted solution of white vinegar and water (1:3 ratio) or a commercial efflorescence remover specifically formulated for polymer-modified masonry. Apply the solution, agitate gently, and rinse immediately with low-pressure water. Always test any chemical cleaner on an inconspicuous 2x2 foot section of the veneer to ensure it does not alter the mortar pigment.
Sealing: Breathability vs. Water Resistance
A common maintenance error is applying a film-forming acrylic or polyurethane sealer over stone veneer and mortar joints. While this creates a waterproof barrier on the surface, it traps moisture vapor inside the wall assembly. When the trapped vapor attempts to escape, it blisters and peels the sealer, taking the mortar surface with it.
For long-term protection of Sakrete Stone Veneer Mortar, utilize a penetrating silane/siloxane water repellent. These sealers do not clog the microscopic pores of the mortar. Instead, they line the capillaries, creating a hydrophobic barrier that repels liquid water while allowing water vapor to freely transmit out of the wall. Apply the sealer using a low-pressure pump sprayer, ensuring the joints are completely dry and free of efflorescence prior to application. Reapply every 5 to 7 years, or when water no longer beads on the mortar surface.
For comprehensive industry standards on masonry joint maintenance and moisture management, refer to the Brick Industry Association Technical Notes, which provide foundational principles applicable to all cementitious veneer mortars.
Written by
David NakamuraDavid Nakamura is a licensed architect (AIA) and construction technology writer focused on sustainable building methods, mass timber engineering, and high-performance building envelopes. He holds a Master of Architecture from the University of Washington and is a certified Passive House Consultant (CPHC). David spent eight years at the Seattle firm Mithun, where he led the design of three LEED Platinum projects, before founding his own practice specializing in net-zero residential design. He serves on the editorial advisory board of GreenBuilder Magazine and has authored peer-reviewed papers on cross-laminated timber (CLT) connections for the Journal of Structural Engineering. In his spare time, David teaches woodworking at Pratt Fine Arts Center and kayaks the Puget Sound.
More from David Nakamura
View all
Construction Cost
Labor Cost to Build a Deck Per Sq Ft: 2026 Installation Guide
Discover the exact labor cost to build a deck per sq ft in 2026. This installation guide breaks down contractor rates, complexity factors, and hidden fees.
Aug 4, 2026

Construction Cost
How Much Does It Cost to Build a 3 Bedroom House? Financing Guide
Learn exactly how much it costs to build a 3 bedroom house and explore 2026 financing options, construction loan types, and budget frameworks for your build.
Aug 4, 2026

Construction Cost
Cost to Build a Tennis Court: 2026 Guide
How much does it cost to build a tennis court in 2026? Breakdowns for asphalt, concrete, and synthetic surfaces plus fencing and lighting.
Jul 30, 2026