Stone Veneer Mortar Maintenance: Repairing Cracks and Joints
Learn how to inspect, clean, and repair stone veneer mortar joints. Expert tips on fixing cracks, efflorescence, and repointing for lasting durability.

Diagnosing Stone Veneer Mortar Failure
In any stone veneer assembly, the mortar is intentionally designed to be the weakest link. This sacrificial characteristic ensures that when thermal expansion, moisture intrusion, or minor structural settlement occurs, the mortar joints crack rather than the expensive natural or manufactured stone. Recognizing the specific failure mode of your stone veneer mortar is the critical first step in determining the correct maintenance protocol.
| Symptom | Primary Cause | Required Action |
|---|---|---|
| Hairline cracking (under 1/16") | Thermal cycling or minor substrate deflection | Monitor; apply elastomeric masonry sealant if water intrusion occurs |
| Crumbling or powdering joints | Freeze-thaw damage, improper initial mix, or lack of air entrainment | Full rake-out and repoint with air-entrained Type N mortar |
| White, powdery surface residue | Efflorescence (water-soluble salts migrating to the surface) | Dry brushing followed by specialized alkaline cleaner |
| Mortar pulling away from stone edge | Improper wetting of stone during installation or shrinkage | Caulk with color-matched polyurethane or repoint if gap exceeds 1/4" |
The Efflorescence Problem: Cleaning Without Destruction
Efflorescence is the most common aesthetic complaint with stone veneer mortar. It occurs when moisture dissolves soluble salts within the Portland cement matrix and carries them to the surface, where the water evaporates and leaves a crystalline deposit. While unsightly, it is rarely a structural threat. However, the cleaning method you choose can permanently destroy the mortar joint.
Contractors frequently use diluted muriatic (hydrochloric) acid to clean masonry. On stone veneer mortar, this is catastrophic. Acid attacks the calcium carbonate and calcium silicate hydrates in the cement, effectively dissolving the binder that holds the sand together. This leaves the joint porous, weak, and highly susceptible to rapid freeze-thaw deterioration. Always use a non-acidic, specialized efflorescence cleaner.
For light efflorescence, a stiff natural-bristle brush (never wire, which leaves rust-staining iron particles) and clean water are sufficient. For heavy deposits, use a neutral-pH or mildly alkaline cleaner specifically formulated for masonry, such as PROSOCO Sure Klean Vana-Trol. Apply the cleaner, allow a 5-minute dwell time without letting it dry, agitate with a brush, and rinse thoroughly with low-pressure water. According to the National Park Service guidelines on masonry preservation, gentle mechanical removal should always precede chemical treatments to minimize moisture introduction into the wall cavity.
Step-by-Step Repointing (Tuckpointing) Guide
When stone veneer mortar is crumbling, deeply cracked, or missing, it must be replaced through a process called repointing or tuckpointing. This requires precision to avoid staining the stone face and to ensure a weather-tight seal.
1. Rake Out the Deteriorated Mortar
Using a manual joint raker or a specialized carbide-tipped mortar removal blade on an oscillating multi-tool, remove the failed mortar to a depth equal to twice the width of the joint, or a minimum of 3/4 inch. If the mortar is solid beyond that depth, stop raking. Removing too much can compromise the veneer's attachment to the scratch coat.
2. Clean and Prepare the Cavity
Remove all dust and debris using compressed air or a stiff brush. The cavity must be completely free of loose particles for the new mortar to achieve a mechanical bond.
3. Achieve the SSD Condition (Crucial Step)
Dry masonry will instantly suck the moisture out of fresh mortar, causing it to cure too quickly, shrink, and crack. Mist the joints with clean water until the surrounding stone and old mortar are damp but not glistening with standing water. Masons call this the Saturated Surface Dry (SSD) condition. This is the single most common failure point in DIY repointing.
4. Mix and Pack the Mortar
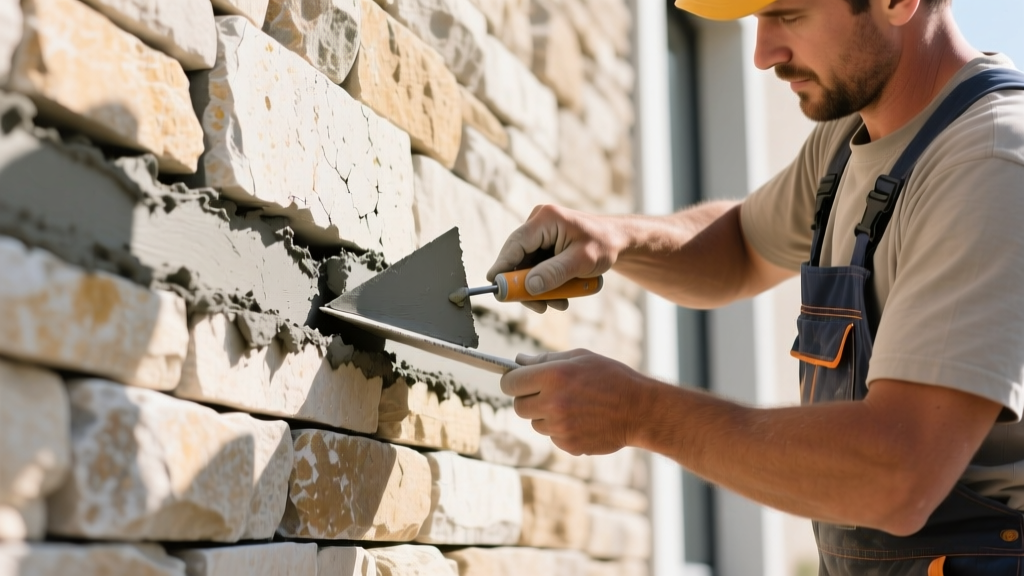
Mix your chosen stone veneer mortar to a consistency resembling stiff peanut butter. Using a hawk and a narrow pointing trowel (or a grout bag for deep, narrow joints), firmly pack the mortar into the cavity in 1/4-inch layers. Compacting the mortar eliminates air pockets that could later trap water.
5. Tool the Joint
Wait until the mortar is "thumbprint hard"—meaning you can press your thumb into it and leave a clear impression without mortar sticking to your skin. Use a convex jointing tool to compress and smooth the joint. This compression forces the mortar tightly against the stone edges and creates a dense, weather-resistant surface skin.
Mortar Selection: Type N vs. Veneer-Specific Blends
Selecting the correct mortar is vital for long-term durability. The Brick Industry Association (BIA) Technical Notes on Mortar dictate that the mortar must be softer and more permeable than the masonry unit it surrounds. For most natural and manufactured stone veneers, Type N mortar is the industry standard.
- Type N Mortar: Offers a compressive strength of roughly 750 psi. It provides excellent flexibility and weather resistance, making it ideal for exterior veneer exposed to thermal movement.
- Type S Mortar: With a compressive strength of 1,800 psi, Type S is too rigid for most stone veneer applications. It can cause the stone itself to crack during substrate deflection and should only be used if specified by a structural engineer for high-wind or seismic zones.
- Polymer-Modified Veneer Mortars: Products like QUIKRETE Veneer Stone Mortar or ProSpec Veneer Stone Mortar contain latex polymers that increase bond strength and water retention. These are highly recommended for repointing existing veneer, as they adhere exceptionally well to old, cured mortar edges.
If mixing from scratch, the standard Type N ratio by volume is 1 part Portland cement, 1 part hydrated lime, and 6 parts masonry sand. The lime is non-negotiable; it provides the workability, water retention, and autogenous healing properties (where minor micro-cracks self-seal when exposed to moisture) required for veneer joints.
Sealing and Moisture Management
Once the repointed stone veneer mortar has fully cured (typically 28 days for complete hydration), applying a water repellent can significantly extend the lifespan of the joints. However, the wrong sealer will trap moisture inside the wall assembly, leading to catastrophic spalling during freeze-thaw cycles.
Never use film-forming acrylic or urethane sealers on stone veneer. These create a plastic-like barrier that prevents the wall from "breathing" and drying outward. Instead, specify a silane/siloxane penetrating sealer. These chemicals react with the silica in the cement and stone to form a hydrophobic resin deep within the pores, repelling liquid water while allowing water vapor to escape. Products like Prosoco Siloxane PD or Eagle Siloxane Sealer provide 5 to 10 years of protection without altering the natural matte appearance of the stone and mortar.
2026 Cost Breakdown: DIY vs. Professional Repointing
The cost to maintain and repair stone veneer mortar varies significantly based on the extent of the damage, the height of the wall, and regional labor rates. Below is a current breakdown for a standard 200-square-foot exterior accent wall requiring moderate joint repair.
| Cost Category | DIY Approach | Professional Masonry Contractor |
|---|---|---|
| Material Costs (Mortar, Cleaners, Sealers) | $120 - $180 | $150 - $250 (Passed to consumer) |
| Tool Rental/Purchase (Rakers, Trowels, Scaffolding) | $80 - $150 | Included in labor overhead |
| Labor Costs | $0 (Value your time at 10-15 hours) | $1,200 - $2,400 ($6-$12 per sq. ft.) |
| Sealer Application | $90 - $130 (Materials only) | $300 - $500 (Labor + Materials) |
| Total Estimated Project Cost | $290 - $460 | $1,650 - $3,150 |
Professional repointing is priced either by the square foot of wall area or by the linear foot of joint. For intricate stacked stone profiles with high joint density, contractors will lean toward the higher end of the spectrum due to the painstaking labor required to rake and pack narrow, irregular joints without smearing the stone faces. If your veneer is located above 8 feet, expect a 20% to 30% surcharge for scaffolding erection and fall-arrest safety compliance.
Frequently Asked Troubleshooting Questions
Can I use standard sanded tile grout to repair stone veneer mortar?
No. Tile grout is formulated for rigid, interior substrates and lacks the flexibility, freeze-thaw durability, and vapor permeability required for exterior masonry. It will crack and pop out of the joints within a single winter season.
How do I match the color of the original mortar?
Mortar color is determined by the sand pigment, the cement color (gray vs. white), and any integral oxides added to the mix. To match existing mortar, purchase a masonry mortar color-matching kit from a supplier like Solomon Colors. Mix small test batches, let them cure completely (mortar lightens significantly as it dries), and compare them to the existing wall before committing to the full batch.
Why is my new mortar cracking down the center of the joint?
Center-line shrinkage cracking occurs when the mortar loses moisture too rapidly during the curing process, or if the joint was over-watered during tooling. Ensure you are dampening the substrate prior to application, protecting the wall from direct sun and wind during the first 48 hours, and avoiding the temptation to add excess water to the mix for easier workability.
Written by
David NakamuraDavid Nakamura is a licensed architect (AIA) and construction technology writer focused on sustainable building methods, mass timber engineering, and high-performance building envelopes. He holds a Master of Architecture from the University of Washington and is a certified Passive House Consultant (CPHC). David spent eight years at the Seattle firm Mithun, where he led the design of three LEED Platinum projects, before founding his own practice specializing in net-zero residential design. He serves on the editorial advisory board of GreenBuilder Magazine and has authored peer-reviewed papers on cross-laminated timber (CLT) connections for the Journal of Structural Engineering. In his spare time, David teaches woodworking at Pratt Fine Arts Center and kayaks the Puget Sound.
More from David Nakamura
View all
Construction Cost
Labor Cost to Build a Deck Per Sq Ft: 2026 Installation Guide
Discover the exact labor cost to build a deck per sq ft in 2026. This installation guide breaks down contractor rates, complexity factors, and hidden fees.
Aug 4, 2026

Construction Cost
How Much Does It Cost to Build a 3 Bedroom House? Financing Guide
Learn exactly how much it costs to build a 3 bedroom house and explore 2026 financing options, construction loan types, and budget frameworks for your build.
Aug 4, 2026

Construction Cost
Cost to Build a Tennis Court: 2026 Guide
How much does it cost to build a tennis court in 2026? Breakdowns for asphalt, concrete, and synthetic surfaces plus fencing and lighting.
Jul 30, 2026