Riverside Stone and Veneer: Technical Specs & Installation Guide
Master riverside stone and veneer installation with technical specs, ASTM standards, mortar mix designs, and structural adhesion strategies.

Material Physics and Profile Classifications
Riverside stone and veneer profiles replicate the smooth, water-tumbled aesthetics of natural river rock. From an engineering perspective, this category is bifurcated into two distinct material classes: natural round stone and manufactured architectural veneer. The primary technical challenge with natural riverside stone is its convex geometry. Unlike flat-backed ledge stone, natural river rock presents a curved, non-porous surface that severely limits the mechanical interlock and chemical bond area with the mortar bed. Manufactured riverside veneer solves this by casting a rounded, textured face against a flat, saw-cut, or scored backing, optimizing the bond surface area while maintaining the visual profile.
When specifying materials for 2026 construction projects, contractors must reference the appropriate ASTM standards to ensure structural integrity and weather resistance. According to testing frameworks maintained by ASTM International, manufactured stone veneer (MSV) must comply with ASTM C1670, which dictates maximum water absorption, freeze-thaw durability, and flexural strength. Natural stone veneers are governed by ASTM C616 (Sandstone), C568 (Limestone), or C629 (Slate), depending on the geological origin of the riverside profile.
| Property | Natural Round River Stone | Manufactured Riverside Veneer |
|---|---|---|
| Average Thickness | 1.5" - 3.0" (Irregular) | 0.75" - 1.25" (Uniform back) |
| Weight per Sq. Ft. | 18 - 28 lbs | 9 - 13 lbs |
| Water Absorption | < 1.5% (Typical Quartzite) | < 22% (Per ASTM C1670) |
| Bond Surface Area | 15% - 30% (Tangent point) | 95% - 100% (Flat back) |
| 2026 Material Cost | $15.00 - $24.00 / sq. ft. | $8.50 - $13.00 / sq. ft. |
Substrate Engineering and Lath Specifications
The longevity of any stone veneer installation relies entirely on the substrate preparation. For exterior applications, the wall assembly must integrate a weather-resistive barrier (WRB) and a corrosion-resistant metal lath. The Masonry Society and modern building codes mandate the use of self-furring galvanized wire lath weighing a minimum of 2.5 lbs per square yard (ASTM C1063). The self-furring dimples are critical; they hold the wire mesh exactly 1/4 inch away from the WRB, allowing the scratch coat mortar to fully encapsulate the wire rather than just resting against the building paper.
Fastening and Overlap Schedules
- Horizontal Overlap: Minimum 1 inch between lath sheets.
- Vertical Overlap: Minimum 2 inches, with upper sheets shingling over lower sheets to direct moisture outward.
- Fastener Type: Hot-dipped galvanized nails or corrosion-resistant screws with 1-inch diameter heads.
- Fastener Spacing: 6 inches on center (o.c.) vertically and horizontally along studs.
- Penetration Depth: Fasteners must penetrate wood studs by a minimum of 1 inch or cold-formed steel framing by 3/8 inch.
Mortar Rheology: Why Type S is Non-Negotiable
A frequent failure point in riverside stone installations is the use of Type N mortar. While Type N (750 psi compressive strength) is adequate for standard bricklaying, the sheer dead load and irregular geometry of riverside profiles demand the higher tensile bond strength of Type S mortar (1,800 psi minimum compressive strength). Data published by the Portland Cement Association confirms that the higher Portland cement content in Type S mixtures provides the necessary adhesive shear strength to support heavier, irregular stone profiles on vertical planes.
Field-Mixed Type S Mortar Ratio
For optimal workability and bond strength, use the following volumetric ratio:
- 1 Part Portland Cement (Type I/II or III)
- 0.5 Part Hydrated Lime (Type S)
- 4.5 Parts Clean, Well-Graded Masonry Sand (ASTM C144)
Pro-Tip: For natural round river stone, integrate a liquid acrylic polymer fortifier into the mixing water. This increases the mortar's flexibility and tensile adhesion, compensating for the reduced surface contact area of convex stones.
Installation Mechanics: Overcoming the Convex Challenge
Installing natural riverside stone requires a deviation from standard veneer techniques due to the 'point-loading' effect. If a round stone is simply pressed into a flat mortar bed, it contacts the scratch coat at a single tangent point. Under thermal expansion or structural settling, this point load creates a shear pivot, leading to delamination. To mitigate this, masons must employ a heavy back-buttering and 'cupping' technique.
Step-by-Step Adhesion Protocol
- Scratch Coat Application: Apply a 3/8-inch thick Type S scratch coat over the encapsulated lath. Scarify the surface horizontally with a coarse rake to create deep mechanical grooves. Cure for a minimum of 48 hours under damp conditions (mist daily) to prevent rapid moisture loss and shrinkage cracking.
- Stone Preparation: Wash natural riverside stones with a stiff bristle brush and clean water to remove loose silt and biofilms that act as bond-breakers. Manufactured veneer requires no washing but should be kept dry.
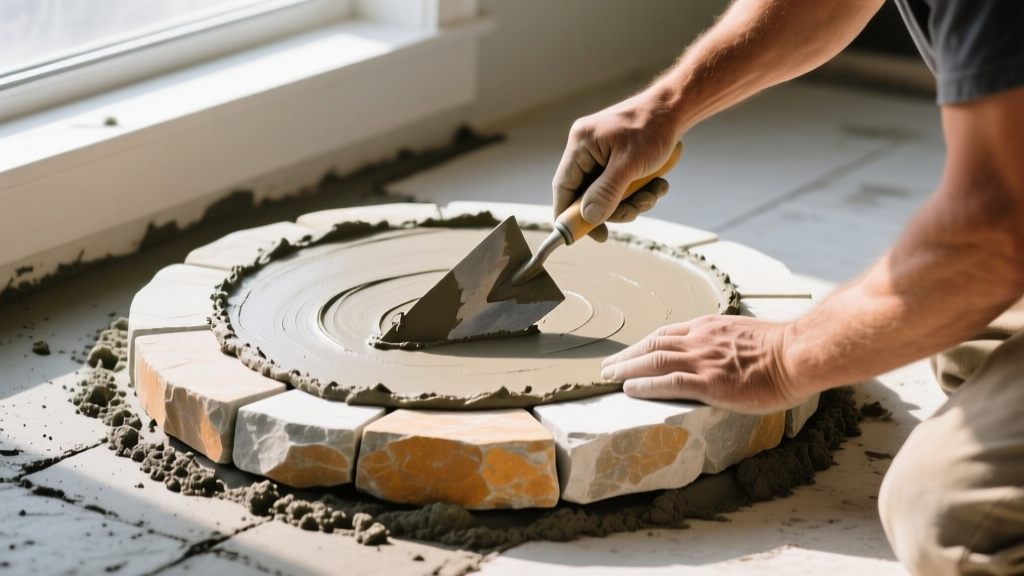
- The Mortar Cup (Natural Stone Only): Apply a 1/2-inch layer of mortar to the back of the round stone. Use the trowel to build up the edges of the mortar, creating a concave 'cup' that matches the convex curve of the stone. This artificially increases the bonding surface area from 20% to nearly 80%.
- Setting and Tooling: Press the stone firmly into the fresh setting bed on the wall. Twist slightly to collapse the air pockets. Maintain a 1/2-inch to 1-inch joint width. Do not strike joints flush; use a convex jointer tool to compact the mortar, which increases joint density and weather resistance.
Failure Mode Analysis and Mitigation Strategies
Even with perfect mortar chemistry, environmental factors can compromise a riverside veneer installation. Understanding these failure modes allows contractors to implement preventive detailing during the design phase.
Critical Alert: Efflorescence and Moisture Entrapment
Riverside stone profiles, particularly manufactured versions with high aggregate porosity, are highly susceptible to efflorescence (white, powdery salt deposits). This occurs when moisture migrates through the wall assembly, dissolving soluble salts in the Portland cement, and deposits them on the stone face upon evaporation. Mitigation: Install a corrosion-resistant weep screed (ASTM C1063) at the base of all exterior walls. The screed must be positioned a minimum of 4 inches above grade or 2 inches above paved surfaces to allow trapped moisture to drain freely from the wall cavity, bypassing the stone face entirely.
Thermal Shock and Spalling
In climates with severe freeze-thaw cycles, water absorbed into the mortar joints can freeze and expand, causing the face of the stone to spall (flake off). Because riverside stones often feature smooth, dense faces, the moisture tends to migrate laterally into the mortar joints rather than evaporating through the stone. To prevent spalling, specify a mortar mix that is slightly softer and more permeable than the stone itself. This ensures that if micro-cracking occurs due to thermal shock, the mortar sacrifices itself rather than the stone face. For projects in USDA Hardiness Zones 4 and below, always apply a breathable, silane-siloxane penetrating sealer to the finished installation 28 days after completion to reduce capillary water absorption without trapping internal vapor.
Written by
David NakamuraDavid Nakamura is a licensed architect (AIA) and construction technology writer focused on sustainable building methods, mass timber engineering, and high-performance building envelopes. He holds a Master of Architecture from the University of Washington and is a certified Passive House Consultant (CPHC). David spent eight years at the Seattle firm Mithun, where he led the design of three LEED Platinum projects, before founding his own practice specializing in net-zero residential design. He serves on the editorial advisory board of GreenBuilder Magazine and has authored peer-reviewed papers on cross-laminated timber (CLT) connections for the Journal of Structural Engineering. In his spare time, David teaches woodworking at Pratt Fine Arts Center and kayaks the Puget Sound.
More from David Nakamura
View all
Construction Cost
Labor Cost to Build a Deck Per Sq Ft: 2026 Installation Guide
Discover the exact labor cost to build a deck per sq ft in 2026. This installation guide breaks down contractor rates, complexity factors, and hidden fees.
Aug 4, 2026

Construction Cost
How Much Does It Cost to Build a 3 Bedroom House? Financing Guide
Learn exactly how much it costs to build a 3 bedroom house and explore 2026 financing options, construction loan types, and budget frameworks for your build.
Aug 4, 2026

Construction Cost
Cost to Build a Tennis Court: 2026 Guide
How much does it cost to build a tennis court in 2026? Breakdowns for asphalt, concrete, and synthetic surfaces plus fencing and lighting.
Jul 30, 2026