Scratch Coat for Stone Veneer: Mix Ratios and Application Guide
Master the scratch coat for stone veneer with exact mix ratios, curing times, and application techniques to prevent delamination and ensure a lasting install.

The Structural Purpose of the Scratch Coat
The scratch coat is the foundational mortar layer applied over metal lath or directly onto approved masonry substrates before installing natural or manufactured stone veneer. Its primary function is to create a continuous, rigid, and textured base that bridges the structural framing and the final veneer assembly. Without a properly mixed and applied scratch coat, the setting bed used to adhere the stone lacks a reliable mechanical key, leading to catastrophic delamination, moisture intrusion, and veneer collapse.
According to the Eldorado Stone Installation Guide and industry standards set by the Manufactured Stone Veneer Manufacturers Association (MVMA), the scratch coat must encapsulate the metal lath entirely and provide a uniformly scored surface. This layer handles the shear loads of the heavy stone cladding and accommodates minor structural movements without transferring stress to the veneer face.
Substrate Variations: Wood Frame vs. Masonry
The requirement for a scratch coat—and the preparation leading up to it—changes drastically based on the underlying substrate.
Wood and Steel Framing
For framed structures, a scratch coat is strictly mandatory. The assembly requires a weather-resistant barrier (WRB) such as Grade D building paper or housewrap, followed by self-furring galvanized wire lath. The scratch coat must be forced through the lath to lock it in place. Skipping the scratch coat and applying stone directly to the lath with the setting bed is a critical code violation that guarantees premature failure.
Concrete Masonry Units (CMU) and Poured Concrete
Unpainted, unsealed CMU or poured concrete walls do not require metal lath, provided the surface is clean and structurally sound. However, a scratch coat is still highly recommended to level the wall and provide a consistent suction rate for the setting bed. If the concrete is smooth or form-oiled, it must be mechanically abraded or treated with a bonding agent before the scratch coat is applied.
Material Selection: Type S vs. Polymer-Modified Mortars
The mortar used for the scratch coat must meet ASTM C270 specifications for Type S mortar, which delivers a minimum compressive strength of 1,800 psi. This strength is necessary to support the dead load of stone veneer, which can weigh up to 15 pounds per square foot.
Pre-Bagged vs. Site-Mixed: A Cost and Consistency Matrix
| Mixing Method | Composition / Product Example | 2026 Avg. Cost (per 80-lb bag) | Consistency & Quality | Best Application |
|---|---|---|---|---|
| Pre-Bagged Type S | Quikrete Veneer Stone Mortar or Sakrete Stone Veneer Mortar | $9.00 - $14.00 | Excellent; factory-proportioned sand and cement ratios eliminate human error. | Residential projects, small commercial facades, DIY installations. |
| Polymer-Modified Pre-Bagged | PROSOCO or Custom Building Products Veneer Mortar with latex additives | $18.00 - $26.00 | Superior; enhanced flexural strength, water retention, and freeze-thaw resistance. | Seismic zones, extreme freeze-thaw climates, high-moisture exteriors. |
| Site-Mixed Type S | 1 part Portland cement, 1/2 part hydrated lime, 2.25 to 3 parts masonry sand | $4.00 - $7.00 (bulk materials) | Variable; highly dependent on mason skill, sand moisture content, and measuring accuracy. | Large-scale commercial builds where bulk silos and mechanical mixers are used. |
Step-by-Step Application and Scoring Techniques
Proper application dictates the longevity of the veneer. The Quikrete Stone Veneer Installation Guide outlines the following protocol for achieving the correct thickness and mechanical key.
- Substrate Wetting: Lightly mist the lath or masonry substrate with water. The surface should be damp (SSD - saturated surface dry) but not pooling water. This prevents the dry substrate from sucking moisture out of the mortar too quickly, which causes flash-setting and weak bonding.
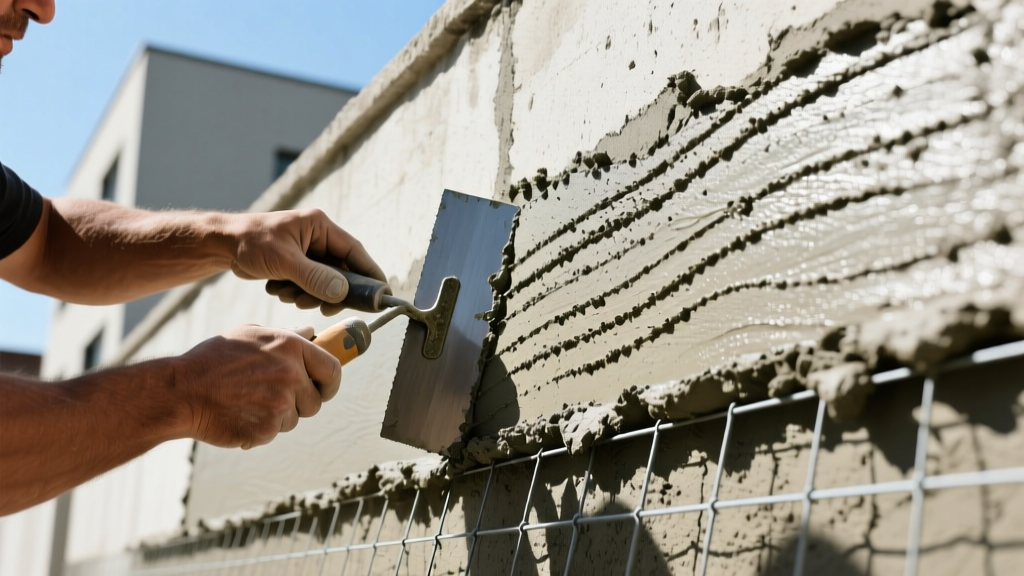
- The Push-Through Technique: Using a flat trowel, forcefully press the mortar into and through the wire lath. You must see the mortar oozing through the back of the lath. This encapsulation is what creates the physical lock.
- Building the Thickness: Apply the mortar to a uniform nominal thickness of 3/8 inch to 1/2 inch. Use a straight edge or screed board to strike off excess mortar and ensure a plumb, flat surface.
- Horizontal Scoring: While the mortar is still thumbprint-hard (usually 30 to 60 minutes after application, depending on ambient temperature), score the surface using a scarifier, a notched trowel, or a stiff-bristled rake.
Curing Timelines and Environmental Constraints
A common and costly mistake is confusing drying with curing. Portland cement mortar cures through a chemical hydration process, not through evaporation. If the scratch coat dries out too quickly, hydration halts, resulting in a chalky, weak layer that will pulverize under the weight of the stone.
Environmental Limits
According to ASTM C1063 and general masonry best practices, do not apply a scratch coat if ambient temperatures are below 40°F (4°C) or above 90°F (32°C). In hot, dry, or windy conditions, the scratch coat must be lightly misted with water and covered with a breathable curing blanket or polyethylene sheeting for the first 24 hours to retain moisture.
Timeline for Stone Application
- Minimum Wait Time: 24 to 48 hours under ideal conditions (70°F, moderate humidity) before applying the setting bed and stone veneer.
- Optimal Wait Time: 7 to 10 days. This allows the majority of the mortar's natural shrinkage to occur before the rigid stone veneer is locked into place, significantly reducing the risk of map cracking.
Common Failure Modes and Troubleshooting
When a stone veneer installation fails, the root cause almost always traces back to the scratch coat phase. Recognizing these failure modes allows contractors to adjust their techniques in real-time.
Map Cracking (Craze Cracking)
Symptom: A network of fine, shallow cracks resembling a spider web across the scratch coat surface.
Cause: Adding too much water to the mix to make it workable, or allowing the coat to dry too rapidly in direct sunlight without curing measures. Excess water increases the water-to-cement ratio, leading to high volumetric shrinkage.
Fix: Stick strictly to the manufacturer's water ratio (usually around 1.5 to 2 quarts per 80-lb bag). Use a polymer-modified mortar which retains water better, and implement wet-curing protocols.
Delamination from Lath
Symptom: The scratch coat separates from the wire lath, creating a hollow sound when tapped.
Cause: Failure to use the push-through technique, or using non-self-furring lath installed flush against the WRB. If the mortar cannot get behind the lath, there is no mechanical lock.
Fix: Ensure you are using ASTM C1032 compliant 2.5 lb self-furring galvanized lath. The dimples on the lath must face outward to hold the mesh away from the WRB, allowing mortar to flow behind it.
Efflorescence and Moisture Staining
Symptom: White, powdery salt deposits appearing on the stone face or mortar joints weeks after installation.
Cause: Trapped moisture within a thick, improperly cured scratch coat migrating outward, carrying soluble salts to the surface.
Fix: Maintain the strict 3/8 to 1/2 inch thickness limit. Ensure proper weep screeds are installed at the base of the wall assembly to allow trapped water to escape the cavity. For comprehensive masonry moisture management, refer to the Portland Cement Association's guidelines on mortar types and moisture dynamics.
Final Quality Assurance Checklist
Before proceeding to the stone setting bed, verify the following parameters on the cured scratch coat:
- Thickness is uniformly between 3/8" and 1/2" across the entire wall plane.
- Scoring lines are strictly horizontal and approximately 1/8" deep.
- The surface is hard, gritty, and does not dust or chalk when rubbed with a bare hand.
- All edges, corners, and penetrations are fully encapsulated with no exposed wire lath.
- Minimum 24-48 hour curing period has elapsed under acceptable temperature conditions.
By treating the scratch coat as a critical structural component rather than a mere preparatory step, installers ensure the stone veneer assembly performs flawlessly against gravity, weather, and time.
Written by
Priya KapoorPriya Kapoor is a real estate market analyst and construction economics researcher with expertise in housing affordability, development feasibility, and infrastructure investment. She holds a Master of Regional Planning from Cornell University and previously worked as a senior analyst at CBRE's Investment Properties group, where she modeled returns for $4B in mixed-use development pipelines. Priya now runs an independent research practice advising developers, municipalities, and REITs on construction cost forecasting and market timing. She publishes the quarterly "BuildMat Market Pulse" report tracking material price indices across 12 commodity categories. Based in Austin, TX, Priya serves on the board of Habitat for Humanity Austin and is a marathon runner.
More from Priya Kapoor
View all
Construction Cost
Cost to Build a 1600 Sq Ft Home in 2026: Full Breakdown
Accurate 2026 cost to build a 1600 sq ft home—material, labor, and regional pricing breakdowns included. Plan your budget with real-time estimates.
Aug 11, 2026

Wood & Lumber
Name the Types of Wood for Pressure Treatment and Preservation
Learn how to name the types of wood best suited for pressure treatment. Compare species treatability, chemical retention levels, and 2026 preservation costs.
Aug 4, 2026

Stone & Masonry
Stone Veneer Suppliers Lindenhurst: 2026 Cost Analysis
Analyze 2026 stone veneer costs in Lindenhurst, NY. Compare local supplier pricing, delivery fees, and Suffolk County installation labor rates.
Aug 4, 2026