Stone Veneer Bathroom Maintenance: Cleaning and Sealing Guide
Learn expert maintenance, cleaning, and sealing techniques for your stone veneer bathroom to prevent efflorescence, mold, and water damage.

The Moisture Challenge in Wet Environments
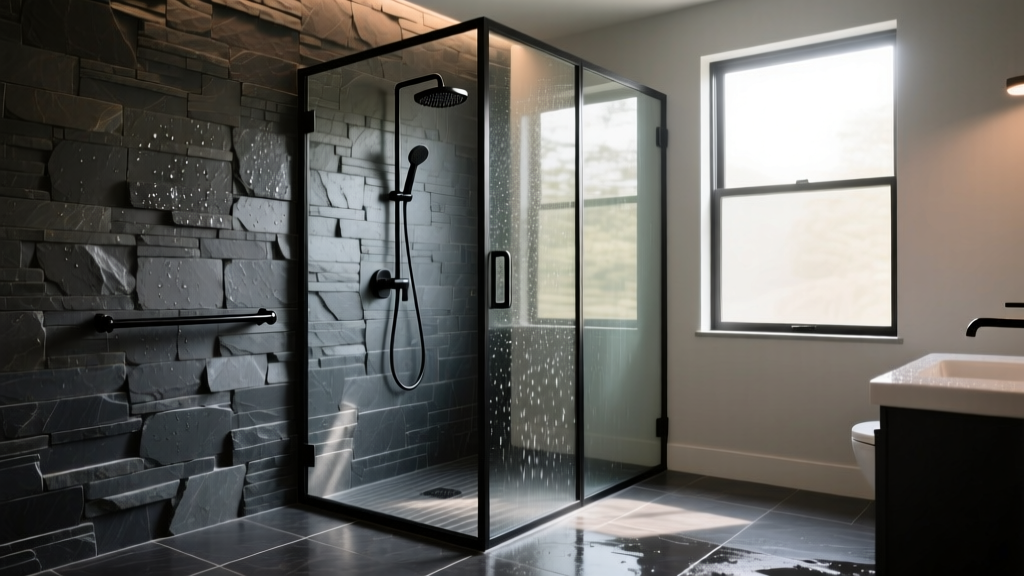
Installing a stone veneer bathroom creates a stunning, spa-like aesthetic, but it introduces significant moisture management challenges. Unlike exterior applications where rain is intermittent and wind promotes rapid drying, bathrooms subject masonry to daily, concentrated humidity, direct water contact, and aggressive chemical cleaners. Natural stone veneers—such as slate, quartzite, and limestone—as well as manufactured stone veneers (MSV), are inherently porous. Without rigorous maintenance protocols, trapped moisture leads to efflorescence, mold proliferation in mortar joints, and eventual spalling of the stone face.
The Environmental Protection Agency (EPA) notes that controlling indoor moisture is the primary defense against mold growth, which thrives on organic matter trapped within the microscopic pores of unsealed stone and cementitious mortar joints. Proper maintenance is not just about aesthetics; it is critical for preserving the structural integrity of the veneer assembly and maintaining indoor air quality.
Daily and Weekly Cleaning Protocols
The most common mistake homeowners make with stone veneer bathrooms is using standard bathroom cleaners. Products formulated to remove hard water stains or soap scum typically rely on acidic compounds (like hydrochloric or phosphoric acid) or harsh alkalis (like bleach). These chemicals will permanently etch calcium-based stones (marble, travertine, limestone) and degrade the Portland cement or lime within the mortar joints.
The pH-Neutral Cleaning Rule
For routine weekly cleaning, use a dedicated pH-neutral stone cleaner (pH 7.0). If you prefer a DIY solution, mix one gallon of warm water with one teaspoon of mild, non-detergent liquid dish soap (like clear Castile soap) and one cup of isopropyl alcohol. The alcohol acts as a rapid-evaporation agent, minimizing the time moisture sits on the veneer surface.
- Application: Spray the solution onto the stone using a pump sprayer. Avoid soaking the veneer; a light mist is sufficient.
- Agitation: Use a soft-bristle nylon brush to gently agitate the mortar joints where soap scum and biofilm accumulate. Never use wire brushes or abrasive scouring pads.
- Rinsing: Wipe the surface with a clean, damp microfiber cloth to remove soap residue.
- Drying: Use a squeegee or dry microfiber towel to remove standing water immediately after showering. This single habit reduces hard water staining by up to 80%.
Deep Cleaning: Hard Water and Soap Scum Removal
When soap scum and mineral deposits build up beyond what a neutral cleaner can handle, you must use specialized, stone-safe poultices or alkaline cleaners specifically formulated for natural stone.
For heavy hard water stains on slate or quartzite veneers, apply a stone-safe hard water remover (such as Aqua Mix Hard Water & Mineral Deposit Remover). Apply the liquid, allow it to dwell for 3 to 5 minutes—never letting it dry on the surface—and agitate with a white nylon scrub pad. For severe calcium buildup, create a poultice using diatomaceous earth mixed with a stone-safe alkaline cleaner. Trowel it over the stain at a thickness of 1/4 inch, cover with plastic wrap, tape the edges, and let it sit for 24 to 48 hours. As the poultice dries, it draws the mineral deposits out of the stone pores.
Sealing Strategies for High-Humidity Zones
Sealing is the most critical maintenance task for a stone veneer bathroom. You must use a penetrating (impregnating) sealer rather than a topical sealer. Topical sealers create a surface film that traps moisture vapor inside the wall assembly, leading to sub-surface spalling and mold growth behind the veneer. Penetrating sealers, typically fluoropolymer or siloxane-based, line the microscopic pores, repelling liquid water while allowing water vapor to escape.
The Water Drop Test
Before applying sealer, perform the water drop test. Place a few drops of water on the stone and the mortar joints in multiple locations. If the water darkens the stone or absorbs within 3 minutes, it is time to reseal. If it beads up and remains on the surface for 10 minutes, the existing seal is intact.
Step-by-Step Resealing Process
- Preparation: Ensure the veneer is completely dry. Wait at least 48 hours after the last shower before sealing. Clean the surface thoroughly and remove all soap residue.
- Product Selection: Use a high-quality impregnating sealer like Miracle Sealants 511 Impregnator or Aqua Mix Sealer's Choice Gold. These offer excellent vapor transmission rates crucial for wet areas.
- Application: Apply the sealer using a low-pressure pump sprayer or a foam brush. Ensure even coverage, paying special attention to the porous mortar joints.
- Dwell Time: Allow the sealer to penetrate for 15 to 20 minutes. Do not let it dry on the surface.
- Wiping: Buff off all excess sealer with clean, dry, lint-free cotton towels. Any sealer left on the surface will dry into a sticky, hazy film that is extremely difficult to remove.
- Curing: Allow 24 to 72 hours of cure time before exposing the wall to shower moisture. Run an exhaust fan during the curing process to vent fumes and aid drying.
Troubleshooting Common Stone Veneer Bathroom Issues
Even with diligent care, the extreme environment of a bathroom can cause specific masonry issues. Use this diagnostic matrix to identify and resolve common problems.
| Symptom | Root Cause | Actionable Fix |
|---|---|---|
| White, powdery crust on mortar joints | Efflorescence: Water moving through the wall carries soluble salts to the surface, which crystallize upon evaporation. | Dry brush the residue. Apply a commercial efflorescence remover formulated for stone. Improve bathroom ventilation to speed up wall drying. |
| Black or green spots in crevices | Mildew/Mold: High humidity and poor air circulation allowing organic growth on soap residue trapped in pores. | Clean with a stone-safe mold remover or a 50/50 mix of water and 3% hydrogen peroxide (rinse thoroughly). Ensure the exhaust fan runs for 30 mins post-shower. |
| Flaking or peeling stone surface | Spalling: Sub-surface freeze/thaw (rare indoors) or crystallization of salts/silicone-based topical sealers trapping moisture. | Remove failing topical sealers with a chemical stripper. Replace severely spalled stones. Switch to a breathable penetrating sealer. |
| Rusty orange stains on slate or quartzite | Iron Oxidation: Naturally occurring iron deposits within the stone reacting with moisture and oxygen. | Apply a specialized iron stain remover (containing sodium hydrosulfite). Poultice the area if the stain is deep. Reseal immediately after. |
Mortar Joint and Grout Maintenance
While the stone veneer gets the visual focus, the mortar joints are the most vulnerable component in a bathroom setting. Standard Type N mortar, commonly used for dry-stack or interior manufactured stone veneer, is highly porous and acts like a sponge for shower moisture.
If your stone veneer bathroom utilizes grouted joints, inspect the mortar annually for micro-cracks. Water penetrating these cracks will reach the underlying cement board or waterproofing membrane. For new installations or major repairs in wet zones, specify a polymer-modified mortar or an epoxy-based grout (such as SpectraLOCK) for the joints. Epoxy grout is virtually impervious to water, resists staining from hair dyes and cosmetics, and eliminates the need to seal the joints separately.
For existing mortar joints that are degrading, rake out the failing material to a depth of 1/2 inch using a carbide-tipped grout saw. Repoint the joints with a high-quality, polymer-fortified thin-set or specialized veneer mortar, tooling the joint to a slight concave profile. This concave shape compresses the surface of the mortar, increasing its density and shedding water away from the joint more effectively than a flat or raked profile.
Maintaining a stone veneer bathroom requires a shift in mindset from standard tile care. By respecting the pH sensitivity of the materials, utilizing breathable penetrating sealers, and aggressively managing ambient humidity through proper ventilation, your stone installation will remain structurally sound and visually striking for decades.
Written by
Marcus ChenMarcus Chen is a licensed structural engineer (PE) and building materials analyst with over 12 years of experience across residential, commercial, and industrial construction. He holds a Master of Science in Civil Engineering from UC Berkeley and spent six years at Thornton Tomasetti before transitioning to independent consulting and technical writing. Marcus specializes in material selection for seismic-prone regions, concrete reinforcement strategies, and lifecycle cost analysis. His work has been cited by the American Concrete Institute (ACI) and the Structural Engineers Association of California (SEAOC). When he is not on a job site or at his desk, you will find him hiking the Sierra Nevada or restoring a 1920s craftsman bungalow in Oakland, CA.
More from Marcus Chen
View all
Construction Cost
How Much Did the Eiffel Tower Cost to Build?
How much did the Eiffel Tower cost to build in 1889? We adjust for inflation and compare its budget to modern skyscraper construction.
Aug 4, 2026

Fire Resistance
What Is a Fire Resistant Material? Testing & Certification Guide
Discover what is a fire resistant material through ASTM and UL testing. Learn how fire ratings, certifications, and assemblies work in construction.
Aug 4, 2026

Construction Cost
How Much Did the Burj Khalifa Cost to Build?
How much did the Burj Khalifa cost to build? We break down the $1.5B project and extract 5 money-saving strategies for your next build.
Jul 30, 2026