Stone Veneer Chimney Guide: Materials, Costs, and Installation
Discover the best stone veneer chimney materials, compare natural vs. manufactured options, and get current pricing and expert installation insights.

The Structural Advantage of Stone Veneer on Chimneys
Cladding a chimney in full-bed natural stone requires an engineered concrete footing capable of supporting 40 to 60 pounds per square foot. Stone veneer eliminates this structural burden. Manufactured stone veneer (MSV) weighs between 10 and 12 pounds per square foot, while sawn natural stone veneer ranges from 13 to 15 pounds per square foot. This weight reduction allows the veneer to be supported directly by standard wood or steel framing with proper shear reinforcement, drastically reducing foundation costs and expanding design possibilities for both new builds and retrofits.
Natural vs. Manufactured Stone Veneer: Core Comparison
Selecting between manufactured and natural stone dictates your budget, installation timeline, and long-term maintenance. Below is a technical comparison of both material classes for vertical chimney applications.
| Feature | Manufactured Stone Veneer (MSV) | Natural Stone Veneer (Sawn) |
|---|---|---|
| Weight | 10 - 12 lbs / sq. ft. | 13 - 15 lbs / sq. ft. |
| Material Cost | $6.00 - $12.00 / sq. ft. | $12.00 - $28.00 / sq. ft. |
| Thickness | 0.75 to 1.5 inches | 1.0 to 1.5 inches |
| Color Consistency | High (batch-controlled iron oxide pigments) | Low (natural geological variation) |
| Corner Pieces | Factory-molded 90-degree returns | Custom mitered or quoined by mason |
| Water Absorption | High (requires breathable sealer) | Variable (slate is low, sandstone is high) |
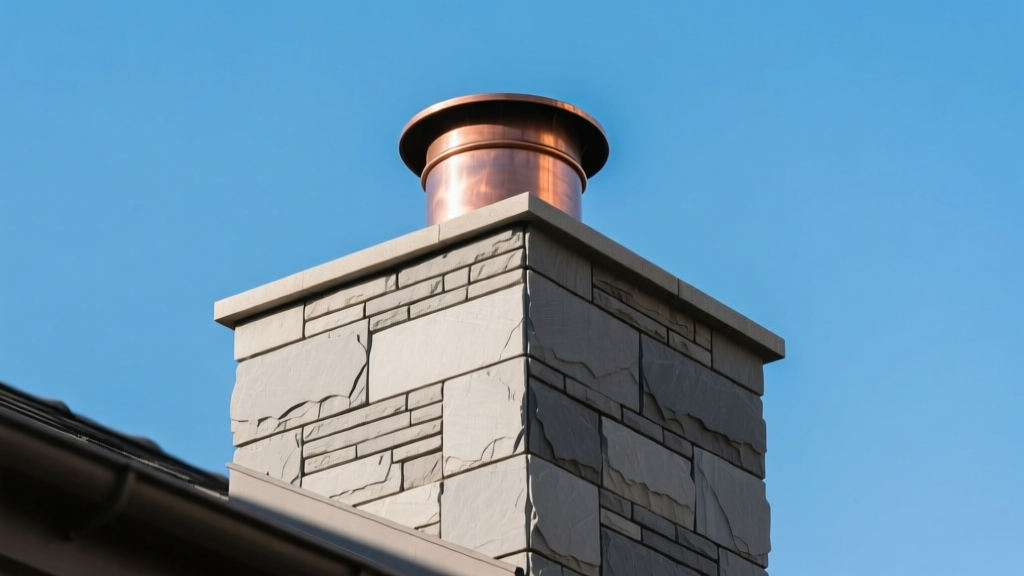
Top Material Profiles for Chimney Applications
The visual profile of the stone must complement the architectural style of the home while managing water runoff effectively.
Ledgestone and Ashlar
Characterized by long, horizontal rectangular cuts, ledgestone provides a clean, contemporary look. For chimneys, the tight horizontal joints shed water efficiently. Ashlar offers a similar geometric precision but with varying heights, creating a more dynamic, less repetitive pattern.
Fieldstone and River Rock
Rounded, irregular shapes that mimic naturally tumbled stone. This profile requires wider, heavily grouted joints (often called a 'mud-joint' or 'overgrout' technique). While highly traditional, the deep crevices between rounded stones can trap snow and ice in northern climates, increasing the risk of freeze-thaw spalling if not properly sealed.
Stacked Stone
Installed with zero mortar joint visibility (dry-stacked look). While visually striking, true mortarless stacked stone is not recommended for exterior chimneys in wet or freezing climates. The lack of mortar joints creates direct pathways for wind-driven rain to penetrate the substrate. If a dry-stack look is mandatory, use a concealed mortar bed behind the stones and install a high-grade fluid-applied weather-resistive barrier (WRB).
Substrate Preparation and Mortar Selection
A chimney chase framed in wood requires rigorous preparation to prevent moisture intrusion and structural failure. Follow the guidelines established by the Masonry Veneer Manufacturers Association (MVMA) for guaranteed adhesion and weatherproofing.
- Weather-Resistive Barrier (WRB): Apply two layers of Grade D building paper or a high-performance fluid-applied membrane over the OSB or plywood sheathing. The dual-layer system creates a drainage plane.
- Metal Lath: Attach self-furring, galvanized metal lath (minimum 2.5 lbs per square yard) using corrosion-resistant staples or nails spaced no more than 6 inches apart on center. Ensure the lath overlaps by at least 1 inch at all seams.
- Scratch Coat: Apply a 3/8 to 1/2-inch scratch coat of mortar. Use a notched trowel to create horizontal grooves, which provide a mechanical key for the setting bed. Allow the scratch coat to cure for 24 to 48 hours.
- Mortar Selection: Use Type S mortar for MSV due to its high compressive strength and excellent adhesion. For softer natural stones like limestone or sandstone, use Type N mortar; its lower compressive strength allows for slight flexing and prevents the rigid mortar from cracking the softer stone during thermal expansion.
2026 Cost Breakdown: Stone Veneer Chimney Pricing
The following estimates are based on a standard residential chimney measuring 3x4 feet at the base and extending 20 feet above the roofline, yielding approximately 280 square feet of exposed veneer area.
| Cost Category | Manufactured Stone (MSV) | Natural Stone Veneer |
|---|---|---|
| Material (Stone & Corners) | $2,200 - $3,300 | $4,500 - $7,800 |
| Substrate (Lath, WRB, Mortar) | $450 - $600 | $450 - $600 |
| Masonry Labor | $2,800 - $4,200 | $4,500 - $7,000 |
| Scaffolding & Equipment | $600 - $900 | $600 - $900 |
| Total Estimated Project Cost | $6,050 - $9,000 | $10,050 - $16,300 |
Common Installation Failure Modes and How to Avoid Them
Chimneys endure extreme thermal cycling and direct weather exposure. Avoid these common field mistakes to ensure the longevity of the installation.
1. Acid Washing Manufactured Stone
MSV derives its color from iron oxide pigments mixed into the concrete. Cleaning excess mortar smears with muriatic acid will chemically strip the iron oxide, leaving permanent, bleached streaks on the chimney face. The Fix: Clean MSV using only a stiff natural-bristle brush and plain water while the mortar is still semi-fresh. For cured smears, use a specialized, non-acidic masonry cleaner approved by the manufacturer.
2. Raked Mortar Joints in Freezing Climates
Raking the mortar joint (pressing it inward to create a shadow line) looks aesthetically pleasing but creates a horizontal shelf that catches water and snow. On a chimney subjected to freeze-thaw cycles, this trapped water will expand and pop the stone off the substrate. The Fix: Always use flush, convex, or overgrout (weathered) joints on exterior chimneys in northern climates to actively shed water away from the stone edge.
3. Efflorescence Blooming
White, powdery salt deposits (efflorescence) occur when water moves through the mortar, dissolves alkaline salts, and deposits them on the surface as it evaporates. While mostly cosmetic, it indicates moisture movement. The Fix: Ensure the chimney cap has adequate overhang (minimum 2 inches) and a functional drip edge to prevent water from washing down the veneer face. Use low-alkali Portland cement in your mortar mix to minimize salt availability.
Essential Maintenance and Sealing Protocols
Stone veneer chimneys are not 'install and forget' systems. Because MSV and porous natural stones act like hard sponges, they require chemical protection.
Never apply an acrylic or polyurethane film-forming sealer to a chimney. These sealers trap moisture inside the masonry cavity. When the chimney heats up from a fire or solar gain, the trapped moisture turns to vapor, creating hydrostatic pressure that spalls the stone face. Instead, apply a silane/siloxane penetrating water repellent. These sealers line the microscopic pores of the stone and mortar, repelling liquid water while remaining 100% vapor-permeable, allowing the chimney to breathe and dry out naturally. Reapply the siloxane sealer every 5 to 7 years, depending on UV exposure and driving rain frequency.
For further technical specifications on mortar mixes and lath requirements, consult the Fine Homebuilding masonry guides and always adhere to local building codes regarding chimney clearances and fire-stopping.
Written by
David NakamuraDavid Nakamura is a licensed architect (AIA) and construction technology writer focused on sustainable building methods, mass timber engineering, and high-performance building envelopes. He holds a Master of Architecture from the University of Washington and is a certified Passive House Consultant (CPHC). David spent eight years at the Seattle firm Mithun, where he led the design of three LEED Platinum projects, before founding his own practice specializing in net-zero residential design. He serves on the editorial advisory board of GreenBuilder Magazine and has authored peer-reviewed papers on cross-laminated timber (CLT) connections for the Journal of Structural Engineering. In his spare time, David teaches woodworking at Pratt Fine Arts Center and kayaks the Puget Sound.
More from David Nakamura
View all
Construction Cost
Labor Cost to Build a Deck Per Sq Ft: 2026 Installation Guide
Discover the exact labor cost to build a deck per sq ft in 2026. This installation guide breaks down contractor rates, complexity factors, and hidden fees.
Aug 4, 2026

Construction Cost
How Much Does It Cost to Build a 3 Bedroom House? Financing Guide
Learn exactly how much it costs to build a 3 bedroom house and explore 2026 financing options, construction loan types, and budget frameworks for your build.
Aug 4, 2026

Construction Cost
Cost to Build a Tennis Court: 2026 Guide
How much does it cost to build a tennis court in 2026? Breakdowns for asphalt, concrete, and synthetic surfaces plus fencing and lighting.
Jul 30, 2026