How to Apply a Stone Veneer Scratch Coat: Pro Installation Guide
Learn how to mix, apply, and cure a stone veneer scratch coat. Includes ASTM mortar specs, lath requirements, and pro scoring techniques.

The Structural Purpose of the Scratch Coat
The scratch coat is the critical structural bridge between the weather-resistive barrier (WRB) and the adhered stone veneer. It is not merely a base layer; it provides the mechanical key required to support the substantial dead load of natural or manufactured stone. A properly executed stone veneer scratch coat encapsulates the wire lath, creating a unified, monolithic panel that resists shear forces, manages incidental moisture, and prevents the delamination of the veneer assembly. Skipping this step or applying it over bare sheathing violates building codes and guarantees catastrophic failure.
Material Specifications & Mortar Mix Ratios
According to the Portland Cement Association, the scratch coat must utilize a mortar mix that balances compressive strength with flexibility. For adhered masonry veneer, Type S and Type N mortars are the industry standards, governed by ASTM C270.
| Mortar Type | Proportions (Cement:Lime:Sand) | Min. Compressive Strength | Primary Application |
|---|---|---|---|
| Type S | 1 : 1/2 : 4.5 | 1,800 psi | Exterior walls, high-wind zones, interior feature walls |
| Type N | 1 : 1 : 6 | 750 psi | Interior non-load-bearing walls, climate-controlled spaces |
Pro Insight: Always use washed, well-graded masonry sand (ASTM C144). Avoid using concrete sand or unwashed river sand, as the silt content will weaken the bond and increase shrinkage cracking. If using pre-blended bagged mortar, verify the bag explicitly states compliance with ASTM C270 for Type S or Type N.
Substrate Prep: WRB and Wire Lath Standards
Before mixing mortar, the substrate must be prepared to meet the stringent requirements of ASTM C1063 (Standard Specification for Installation of Lathing and Furring to Receive Interior and Exterior Portland Cement-Based Plaster). The National Concrete Masonry Association (NCMA) mandates the following assembly:
- Weather-Resistive Barrier (WRB): Apply two layers of Grade D building paper (ASTM D226) or one layer of code-approved housewrap covered by one layer of Grade D paper. The dual-layer system creates a slip sheet that allows the scratch coat to move independently of the sheathing during thermal expansion.
- Wire Lath: Use minimum 2.5 lb/yd² galvanized welded wire lath (ASTM A641). The lath must be self-furring, meaning it features dimples that hold the wire 1/4 inch away from the WRB, allowing mortar to flow behind the wire for complete encapsulation.
- Fastening: Secure lath with corrosion-resistant staples or nails every 6 inches on center vertically and 16 inches on center horizontally, penetrating the structural framing by at least 1 inch.
- Overlaps: Maintain a minimum 1-inch overlap on horizontal seams and a 2-inch overlap on vertical seams.
Step-by-Step Application & Scoring Protocol
Proper technique ensures the mortar achieves maximum bond strength. Follow this exact sequence:
- Mix and Slake: Combine dry ingredients and water in a mechanical mixer until achieving a consistency similar to thick peanut butter. Allow the mixture to 'slake' (rest) for 5 to 10 minutes. This allows the lime to fully hydrate. Remix briefly without adding water before use.
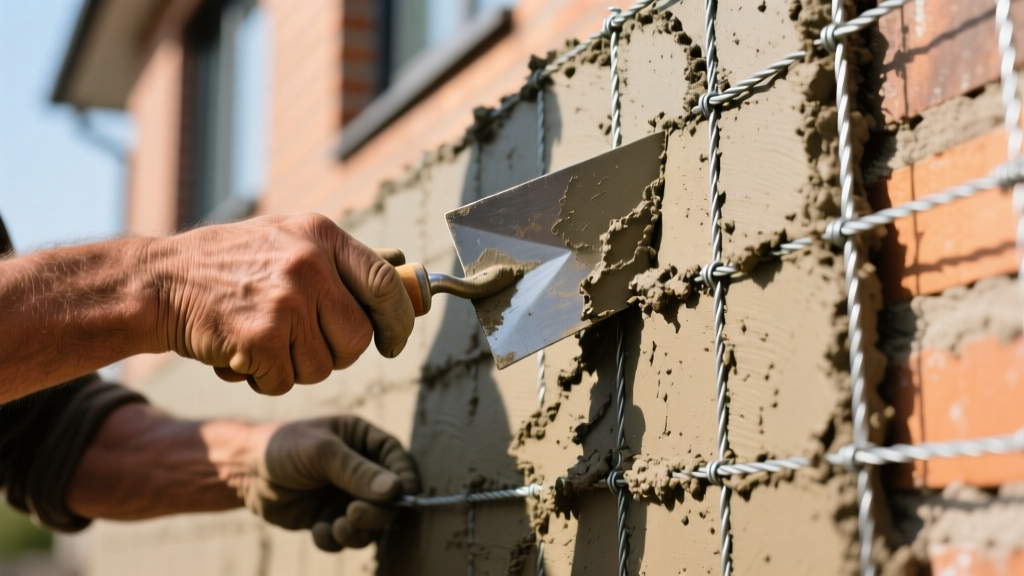
- Force the Embedment: Using a flat trowel, forcefully press the mortar through the wire lath and into the 1/4-inch gap behind it. Do not simply trowel it over the top; the mechanical lock depends on the mortar gripping the back of the wire.
- Build the Thickness: Apply the mortar to a uniform thickness of 3/8 inch to 1/2 inch. Use a straight edge or screed to strike off excess material and ensure a plumb, flat surface. The wire lath should be completely buried within the center of the mortar bed.
- Score the Surface: Once the mortar has stiffened enough to hold its shape but is still plastic (usually 20-40 minutes after application), score the surface. Use a scratch rake or a coarse-toothed comb to create horizontal lines 1/8 inch deep, spaced 1/2 inch apart.
CRITICAL WARNING: Never Score Vertical Lines
Scoring vertical lines creates continuous channels that direct wind-driven rain and incidental moisture straight down the wall cavity. Always score horizontally to create a mechanical shelf for the setting bed while shedding water laterally.
Curing Parameters & Environmental Constraints
The curing process is a chemical hydration reaction, not a drying process. Rushing this phase leads to a weak, powdery substrate that will fail under the weight of the stone.
- Temperature Limits: Do not apply the scratch coat if ambient temperatures are below 40°F (4°C) or expected to drop below freezing within 48 hours. Avoid application when temperatures exceed 90°F (32°C) without mitigation.
- Moisture Curing: In hot, dry, or windy conditions, mist the scratch coat with a fine spray of water 2 to 3 times a day for the first 48 hours to prevent rapid moisture loss and plastic shrinkage cracking.
- Cure Time: Allow a minimum of 24 to 48 hours of cure time before applying the setting bed and installing the stone veneer. In high-humidity or cold environments, extend this to 72 hours.
Troubleshooting Common Scratch Coat Failures
Identifying and correcting defects before applying the stone veneer prevents costly tear-offs. Consult the guidelines maintained by the Masonry Society when evaluating substrate integrity.
- Map Cracking (Spiderweb Cracks)
- Cause: Excess water in the mix, applying the coat too thick in a single pass, or rapid drying. Fix: If cracks are hairline and the surface is solid, fill with a slurry bond coat. If cracks are wide or the surface sounds hollow when tapped, remove and replace the affected section.
- Delamination (Hollow Sounds)
- Cause: Failure to use self-furring lath, lath installed over a single layer of WRB without a slip plane, or mortar not forced behind the wire. Fix: Complete removal of the delaminated section. Verify lath dimples are facing outward and fasteners hit structural framing.
- Efflorescence (White Powdery Residue)
- Cause: Unwashed sand with high clay/silt content, or excessive lime in the mix allowing water-soluble salts to migrate to the surface. Fix: Brush off residue with a stiff bristle brush. Ensure the final veneer installation includes proper weep holes and flashing to manage hydrostatic pressure.
Final Inspection Before Veneer Installation
Before proceeding to the setting bed, perform a final quality check. The scratch coat must be uniform in thickness, free of loose debris, and exhibit a consistent, rough texture. Run your hand over the surface; it should feel like coarse sandpaper. If the surface is overly smooth or dusty, scrub it with a stiff wire brush and apply a thin slurry bond coat (a mixture of pure Portland cement and water painted on like paint) immediately before troweling the setting bed. A meticulously executed stone veneer scratch coat ensures the longevity, safety, and aesthetic perfection of the final masonry installation.
Written by
Marcus ChenMarcus Chen is a licensed structural engineer (PE) and building materials analyst with over 12 years of experience across residential, commercial, and industrial construction. He holds a Master of Science in Civil Engineering from UC Berkeley and spent six years at Thornton Tomasetti before transitioning to independent consulting and technical writing. Marcus specializes in material selection for seismic-prone regions, concrete reinforcement strategies, and lifecycle cost analysis. His work has been cited by the American Concrete Institute (ACI) and the Structural Engineers Association of California (SEAOC). When he is not on a job site or at his desk, you will find him hiking the Sierra Nevada or restoring a 1920s craftsman bungalow in Oakland, CA.
More from Marcus Chen
View all
Construction Cost
How Much Did the Eiffel Tower Cost to Build?
How much did the Eiffel Tower cost to build in 1889? We adjust for inflation and compare its budget to modern skyscraper construction.
Aug 4, 2026

Fire Resistance
What Is a Fire Resistant Material? Testing & Certification Guide
Discover what is a fire resistant material through ASTM and UL testing. Learn how fire ratings, certifications, and assemblies work in construction.
Aug 4, 2026

Construction Cost
How Much Did the Burj Khalifa Cost to Build?
How much did the Burj Khalifa cost to build? We break down the $1.5B project and extract 5 money-saving strategies for your next build.
Jul 30, 2026