How to Install Veneer Stone on Fireplace: Cost Analysis & DIY Steps
Learn how to install veneer stone on a fireplace with our detailed cost analysis. Get 2026 pricing for materials, labor, and DIY vs. pro installation.

Core Cost Metrics for Fireplace Stone Veneer
Upgrading a fireplace surround with stone veneer yields one of the highest returns on investment in interior remodeling, frequently recouping 80% to 90% of the project cost at resale. However, understanding how to install veneer stone on a fireplace requires navigating a complex matrix of material weights, mortar chemistry, and hidden preparatory costs. For a standard 40-square-foot fireplace surround (including the hearth extension and chimney chase up to the ceiling), total project costs in 2026 typically range from $1,200 for a budget-conscious DIY installation using manufactured stone, to $4,500+ for professional installation of premium natural fieldstone.
2026 Fireplace Veneer Cost Snapshot (40 Sq. Ft. Surround)
- Manufactured Stone (DIY): $450 – $750 (Materials only)
- Manufactured Stone (Pro): $1,400 – $2,200 (Materials + Labor)
- Natural Stone (Pro): $2,400 – $4,500 (Materials + Labor)
- Average Labor Rate: $12 – $18 per square foot
Material Selection: Manufactured vs. Natural Stone Pricing
The primary cost driver in any veneer project is the stone itself. Manufactured stone veneer (MSV) is cast from Portland cement, lightweight aggregates, and iron oxide pigments. It is engineered to mimic natural stone while weighing roughly 50% less, which eliminates the need for structural footing reinforcements on most interior fireplace chases. Natural stone, quarried and sliced into veneer thicknesses, commands a premium due to extraction costs, freight weight, and unique geological variations.
| Material Type | Cost per Sq. Ft. | Weight (lbs/sq ft) | Heat Tolerance & Best Use |
|---|---|---|---|
| Manufactured Ledge Stone | $9.00 – $13.50 | 6 – 8 lbs | High / Standard interior surrounds |
| Natural Limestone Veneer | $16.00 – $24.00 | 12 – 15 lbs | Very High / Premium rustic or traditional |
| Natural Fieldstone / River Rock | $18.00 – $32.00 | 15 – 20 lbs | Very High / Cabin or craftsman styles |
| Natural Slate Veneer | $22.00 – $38.00 | 10 – 14 lbs | Extreme / Modern, high-heat fireboxes |
Hidden Material Costs: Mortar, Lath, and Prep
When calculating how to install veneer stone on a fireplace, amateurs frequently budget only for the stone. The preparatory and setting materials account for 20% to 30% of the total material cost. According to Bob Vila's comprehensive masonry cost guides, skipping these components is the leading cause of veneer delamination.
- Weather-Resistive Barrier (WRB): If your fireplace chase extends through the roof to an exterior chimney, you must apply two layers of Grade D building paper or a fluid-applied membrane over the sheathing before lath. Cost: $15 - $25 per roll.
- Metal Lath: Use 2.5 lb or 3.4 lb self-furring galvanized metal lath. The self-furring dimples keep the lath suspended in the middle of the scratch coat, providing mechanical locking strength. Cost: $12 - $18 per 2x8 ft sheet.
- Scratch Coat Mortar: Type S masonry cement mixed with sand, or a pre-blended polymer-modified veneer mortar. Cost: $35 - $50 per 80 lb bag (covers approx. 30 sq ft at 1/2" thickness).
- Setting Mortar: ANSI A118.4 polymer-modified mortar is mandatory for interior fireplace surrounds to withstand the thermal expansion and contraction cycles without cracking. Cost: $40 - $65 per 50 lb bag.
- Penetrating Sealer: A silane/siloxane breathable sealer prevents efflorescence and soot staining near the firebox. Cost: $45 - $85 per gallon.
Installation Sequence and Labor Time Estimates
Professional masons charge by the square foot, but understanding the time investment is critical for DIYers evaluating their own labor costs. A 40-square-foot fireplace typically requires 18 to 24 hours of active labor spread across three days to accommodate curing times.
- Substrate Preparation (2 Hours): Strip existing drywall or tile down to the wood studs or concrete masonry unit (CMU) block. If applying over painted brick, sandblast or aggressively wire-brush the surface to remove all laitance and paint, ensuring a porous surface for mortar adhesion.
- Lath Attachment (3 Hours): Staple or nail the 2.5 lb galvanized lath directly into the studs using 1-inch roofing nails or staples, spaced 6 inches on center. Overlap horizontal seams by 1 inch and vertical seams by 2 inches. Wrap the lath around outside corners by at least 4 inches to prevent corner cracking.
- The Scratch Coat (2 Hours + 24 Hours Cure): Trowel a 1/2-inch layer of Type S mortar over the lath. Before it sets, use a notched trowel or a stiff-bristled brush to rake horizontal grooves into the surface. This "scratch" provides the mechanical tooth for the setting bed. Allow a minimum of 24 hours to cure.
- Dry Layout and Stone Preparation (3 Hours): Lay the stones on the floor to blend colors and sizes. Trim manufactured stones using a masonry blade on an angle grinder. Pro Tip: Always cut the back edge of the stone at a slight bevel so the face remains tight while the back allows for a thicker mortar bed.
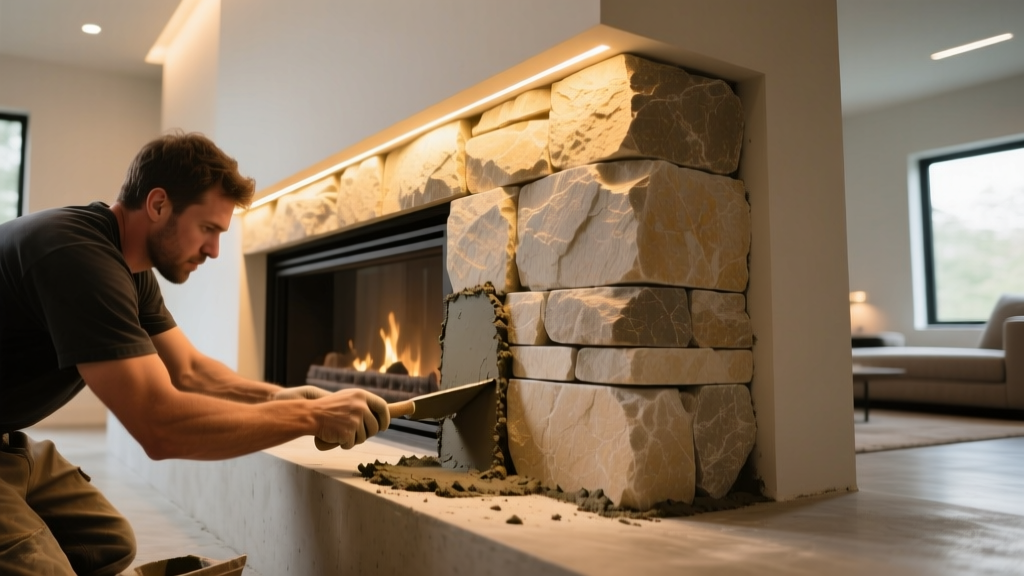
- Setting the Stone (6 Hours): Apply a 1/2-inch layer of polymer-modified mortar to the scratch coat using a 1/2" x 1/2" square-notch trowel. Back-butter every single stone with a 1/8-inch layer of mortar. Press the stone firmly into the bed, wiggling it slightly to squeeze out excess mortar, ensuring 100% coverage on the back of the stone.
- Pointing and Tooling (4 Hours): Once the mortar becomes thumbprint-hard (usually 45-90 minutes), use a pointing trowel and a stiff whisk broom to tool the joints. Do not use a wet sponge to clean the stones, as this smears cementitious residue into the pores of the stone, causing permanent hazing.
DIY vs. Professional Mason: Financial ROI Matrix
Deciding whether to hire a certified mason or tackle the installation yourself hinges on your risk tolerance regarding structural failure and finish quality. The National Association of Certified Home Inspectors (NACHI) frequently documents severe moisture intrusion and delamination in DIY-installed veneers where flashing and mortar chemistry were ignored.
DIY Installation Profile
- Total Cost: $500 - $900
- Timeframe: 3 to 5 weekends
- Warranty: None (Voided manufacturer warranty)
- Best For: Interior, non-combustible CMU or brick surrounds where moisture management is not a factor.
- Primary Risk: Poor joint tooling leading to water wicking; thermal cracking from using unmodified mortar.
Professional Mason Profile
- Total Cost: $1,800 - $4,500
- Timeframe: 2 to 3 consecutive days
- Warranty: 1 to 5 years on labor; 50-year manufacturer material warranty.
- Best For: Exterior chimney chases, complex corner returns, and heavy natural stone exceeding 15 lbs/sq ft.
- Primary Advantage: Proper integration of weep screeds, flashing, and expansion joints to meet IRC building codes.
Critical Failure Modes and Code Compliance
Fireplaces present unique thermal and structural challenges that standard interior accent walls do not. Ignoring these variables leads to expensive teardowns.
Warning: Firebox Clearances. According to the International Residential Code (IRC) and NFPA 211 standards, any combustible material (including wood framing and certain polymer adhesives) must maintain a minimum 12-inch clearance from the interior firebox opening. While stone veneer and Type S mortar are non-combustible, the substrate behind it is not. Never use standard construction adhesive or mastic to install veneer stone within 12 inches of the firebox; rely entirely on mechanical lath and cementitious mortar.
The Efflorescence Trap
Efflorescence—the white, powdery salt deposit that blooms on stone surfaces—is the most common aesthetic failure in fireplace veneers. It occurs when water-soluble salts within the Portland cement mortar are drawn to the surface by migrating moisture. On interior fireplaces, this is usually caused by using too much water in the mortar mix or cleaning the stones with a wet sponge before the mortar has fully carbonated. To prevent this, mix mortar to a stiff, peanut-butter-like consistency, and clean excess mortar off the stone faces using a dry, stiff-bristled nylon brush only after it has crusted over.
Thermal Spalling and Delamination
When a fireplace is in use, the firebox and immediate surround experience rapid temperature spikes. If standard Type N mortar or thin-set tile adhesive is used, the differing rates of thermal expansion between the mortar bed and the stone will cause shear stress. This results in "spalling" (the face of the stone popping off) or total delamination from the scratch coat. Always specify a polymer-modified mortar rated for high-thermal fluctuation environments, and ensure the scratch coat is fully hydrated and cured before introducing high heat to the system. Wait a minimum of 14 days after installation before lighting the first fire, starting with a small, low-heat kindling fire to slowly acclimate the masonry to thermal stress.
Written by
Priya KapoorPriya Kapoor is a real estate market analyst and construction economics researcher with expertise in housing affordability, development feasibility, and infrastructure investment. She holds a Master of Regional Planning from Cornell University and previously worked as a senior analyst at CBRE's Investment Properties group, where she modeled returns for $4B in mixed-use development pipelines. Priya now runs an independent research practice advising developers, municipalities, and REITs on construction cost forecasting and market timing. She publishes the quarterly "BuildMat Market Pulse" report tracking material price indices across 12 commodity categories. Based in Austin, TX, Priya serves on the board of Habitat for Humanity Austin and is a marathon runner.
More from Priya Kapoor
View all
Construction Cost
Cost to Build a 1600 Sq Ft Home in 2026: Full Breakdown
Accurate 2026 cost to build a 1600 sq ft home—material, labor, and regional pricing breakdowns included. Plan your budget with real-time estimates.
Aug 11, 2026

Wood & Lumber
Name the Types of Wood for Pressure Treatment and Preservation
Learn how to name the types of wood best suited for pressure treatment. Compare species treatability, chemical retention levels, and 2026 preservation costs.
Aug 4, 2026

Stone & Masonry
Stone Veneer Suppliers Lindenhurst: 2026 Cost Analysis
Analyze 2026 stone veneer costs in Lindenhurst, NY. Compare local supplier pricing, delivery fees, and Suffolk County installation labor rates.
Aug 4, 2026