How to Install Stone Veneer Panels for Fireplace Surrounds
Learn how to install stone veneer panels for fireplace surrounds. This step-by-step guide covers prep, adhesive selection, and pro cutting techniques.

Substrate Preparation and Firebox Clearances
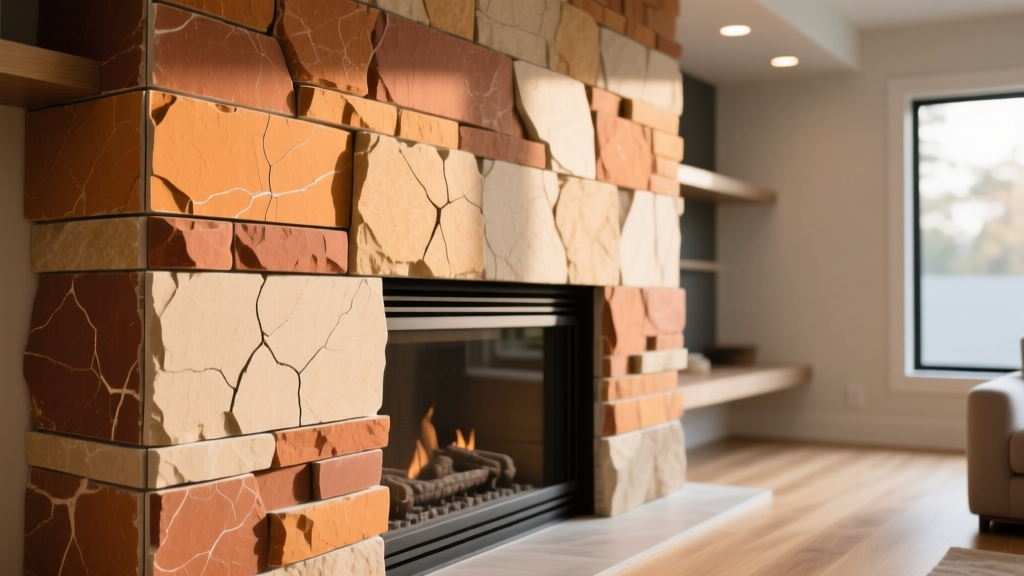
Installing stone veneer panels for fireplace surrounds requires precise substrate preparation, correct adhesive selection, and strict adherence to firebox clearance codes. Unlike standard wall applications, fireplace surrounds subject the masonry to continuous thermal cycling. This expansion and contraction can cause delamination if the substrate or bond coat is improperly specified.
The most critical error in fireplace veneer installation is applying panels directly over drywall or greenboard. The weight of stone veneer panels (typically 8 to 12 lbs per square foot) combined with heat exposure will compromise paper-faced gypsum. You must install a cementitious backer board, such as James Hardie HardieBacker or USG Durock, directly to the wall studs using corrosion-resistant screws spaced 6 inches apart on the edges and 8 inches in the field.
Adhesive Selection Matrix for Thermal Environments
Standard organic mastic (Type I or II) is strictly prohibited for fireplace surrounds. Organic mastics remain thermoplastic, meaning they soften and lose shear strength when exposed to the radiant heat of a fire. You must use a cementitious or advanced polymer bond coat. Below is a comparison of approved adhesives for stone veneer panels in high-heat applications.
| Adhesive Type | Best Application | Thermal Resistance | Estimated Cost (per sq ft) |
|---|---|---|---|
| Polymer-Modified Thinset (e.g., Custom FlexBond) | Manufactured stone panels, interior surrounds | Excellent (withstands up to 300°F) | $0.45 - $0.65 |
| Type S Masonry Mortar | Natural stone, heavy stacked panels, scratch coats | Superior (inorganic, fireproof) | $0.20 - $0.35 |
| Polyurethane Construction Adhesive (e.g., Loctite PL Premium) | Mortarless interlocking panels, quick-set DIY | Moderate (check manufacturer heat limits) | $0.80 - $1.20 |
Step-by-Step Installation Protocol
Follow this sequence to ensure a structurally sound and visually cohesive fireplace surround. This guide assumes the use of interlocking manufactured stone veneer panels, which are the most common choice for modern fireplace retrofits.
Step 1: Dry Layout and Panel Cutting
Never begin adhering panels without a dry layout. Unbox multiple cartons of stone veneer and blend them to ensure color variation is distributed evenly across the fireplace surround.
- Cutting Tools: Use a 10-inch wet tile saw equipped with a continuous-rim diamond blade for clean, chip-free cuts on manufactured stone. For natural stone panels, an angle grinder with a masonry diamond blade is required for thicker profiles.
- Hearth Integration: If your panels will meet a stone hearth, cut the bottom row of panels to follow the exact contour of the hearth stone, maintaining a uniform 1/4-inch expansion gap that will later be filled with color-matched silicone or mortar.
Step 2: Mixing and Applying the Bond Coat
If using polymer-modified thinset or Type S mortar, mix the adhesive to a consistency resembling thick peanut butter. Let the mixture slake (rest) for 10 minutes, then remix without adding water. This activates the polymers and ensures maximum bond strength.
Pro Tip: Always use a 1/2-inch by 1/2-inch square-notched trowel. Apply the adhesive to the cement board using the flat side of the trowel first to key it into the substrate, then comb it with the notched side in a single, horizontal direction to prevent air entrapment.
Step 3: Back-Buttering and Setting
For any stone veneer panel exceeding 12 inches in length, back-buttering is mandatory. Use a margin trowel to apply a thin, 1/16-inch layer of adhesive to the entire back surface of the panel. This ensures 95% to 100% coverage, which is critical for preventing hollow spots that can lead to cracking during thermal expansion.
- Press the panel firmly into the combed adhesive, twisting it slightly to collapse the ridges.
- Use a torpedo level to ensure the first course is perfectly plumb and level. The first row dictates the alignment of the entire surround.
- Stagger vertical joints by at least 4 inches between adjacent courses. Avoid creating 'H' patterns or continuous vertical lines.
- Maintain consistent pressure and use spacers if your specific panel system requires a grouted joint profile.
Step 4: Navigating the Mantel and Corners
When approaching the mantel shelf, measure the gap precisely. If the gap is less than 2 inches, cut a panel to fit rather than trying to force a full panel, which can bow and eventually pop off. For outside corners, always use manufacturer-specific corner pieces rather than miter-cutting flat panels. Corner pieces wrap the edge, providing a realistic mass and hiding the substrate edge.
Troubleshooting Common Failure Modes
Even with perfect installation, fireplace surrounds are subject to unique environmental stresses. Understanding these failure modes allows you to prevent them during the installation phase.
Delamination from Thermal Shock
The Problem: Panels detach from the substrate after a few high-heat fires.
The Cause: Using organic mastic, failing to back-butter large panels, or installing over an unprimed, dusty cement board.
The Fix: Ensure 100% adhesive coverage. If installing over a highly porous cement board, wipe the substrate with a damp sponge before applying thinset to prevent the board from sucking the moisture out of the adhesive too quickly, which starves the bond.
Efflorescence (White Powdery Staining)
The Problem: A white, crystalline deposit forms on the surface of the stone panels.
The Cause: Water-soluble salts within the mortar or substrate are drawn to the surface by moisture evaporation. This is common if the fireplace is located in a high-humidity room or if the mortar was mixed with too much water.
The Fix: Clean the surface with a specialized masonry efflorescence cleaner (a mild phosphoric acid solution). Never use muriatic acid on manufactured stone, as it will etch the cementitious surface and permanently alter the color. For detailed cleaning protocols, refer to the Eldorado Stone Installation Guide.
Grouting and Final Cleanup
If your stone veneer panels require a mortared joint (rather than a tight-stack, mortarless profile), wait 24 to 48 hours after setting the panels before grouting. This allows the bond coat to cure and prevents the panels from shifting when pressure is applied to the joints.
Use a Type N masonry mortar or a specialized sanded grout for the joints. Load the mortar into a canvas grout bag and pipe it into the joints, ensuring they are completely filled. Once the mortar becomes thumbprint-hard (usually 30 to 45 minutes), use a jointing tool to compress and smooth the mortar. Finally, use a soft-bristle masonry brush to sweep away excess mortar from the face of the stone. Do not use a wire brush, as it will leave metallic streaks that rust over time when exposed to the ambient humidity of a living space.
By adhering to these substrate, adhesive, and clearance specifications, your stone veneer fireplace surround will remain structurally intact and aesthetically flawless through years of thermal cycling and daily use.
Written by
David NakamuraDavid Nakamura is a licensed architect (AIA) and construction technology writer focused on sustainable building methods, mass timber engineering, and high-performance building envelopes. He holds a Master of Architecture from the University of Washington and is a certified Passive House Consultant (CPHC). David spent eight years at the Seattle firm Mithun, where he led the design of three LEED Platinum projects, before founding his own practice specializing in net-zero residential design. He serves on the editorial advisory board of GreenBuilder Magazine and has authored peer-reviewed papers on cross-laminated timber (CLT) connections for the Journal of Structural Engineering. In his spare time, David teaches woodworking at Pratt Fine Arts Center and kayaks the Puget Sound.
More from David Nakamura
View all
Construction Cost
Labor Cost to Build a Deck Per Sq Ft: 2026 Installation Guide
Discover the exact labor cost to build a deck per sq ft in 2026. This installation guide breaks down contractor rates, complexity factors, and hidden fees.
Aug 4, 2026

Construction Cost
How Much Does It Cost to Build a 3 Bedroom House? Financing Guide
Learn exactly how much it costs to build a 3 bedroom house and explore 2026 financing options, construction loan types, and budget frameworks for your build.
Aug 4, 2026

Construction Cost
Cost to Build a Tennis Court: 2026 Guide
How much does it cost to build a tennis court in 2026? Breakdowns for asphalt, concrete, and synthetic surfaces plus fencing and lighting.
Jul 30, 2026